Siddh's Blueprint2026-09-06T14:16:47.371Zhttps://mistrysiddh.com/Siddh MistryHexoI Built My Own Self-Hosted AI Assistant (No OpenAI Subscription Needed)https://mistrysiddh.com/2026/09/06/Self-Hosted-AI-Assistant-OpenClaw-Hermes/2026-09-06T14:15:00.000Z2026-09-06T14:16:47.371Z
Why I Stopped Renting My AI and Started Hosting It
Every “AI assistant” you use today — ChatGPT, Gemini, whatever bot is trending this month — lives on someone else’s server, under someone else’s terms of service, with your conversations sitting on someone else’s disk. For a lot of casual use, that’s fine. But if you actually want an assistant that remembers things across sessions, can act on your behalf (send messages, run automations, manage your projects), and doesn’t quietly change behavior after a policy update — you want it running on hardware you control.
That’s exactly why I set up OpenClaw running on Hermes on my own Linux box. No monthly “Pro” tier, no rate limits I don’t control, no black box. Just a system I configured, that I can inspect, extend, and fully own.
This post walks through what that setup actually looks like, why I chose this stack, and what you need if you want to build something similar.
What Is Hermes?
Hermes is the runtime — think of it as the engine that lets an AI agent actually do things instead of just replying with text in a chat window. It gives the assistant:
Memory — persistent facts and context that carry across sessions, not wiped every time you close the tab
Skills — reusable, documented procedures for recurring tasks (deploying a server, managing a Discord community, editing a video, whatever you do often)
Integrations — Telegram, Discord, cron jobs, and other delivery channels so the assistant can reach you outside of a chat window
In short: Hermes turns a language model from “a thing you type questions into” into “an agent that lives on your infrastructure and does work.”
What Is OpenClaw?
OpenClaw is the framework/persona layer sitting on top of Hermes — it’s what gives the assistant a consistent identity, personality, and operating rules across every session, instead of starting from a blank slate every time you open a new chat. It’s the difference between talking to a stateless chatbot and working with something that actually remembers who you are and how you like things done.
The Actual Setup
Here’s the practical side — what running this actually takes:
Hardware: You don’t need a beast of a machine. My box runs on a modest 2-CPU, ~8GB RAM VPS. No GPU required, because the model inference itself happens via API calls to a hosted model (Claude, in my case) — the server just runs the agent, not the model weights. That’s an important distinction: self-hosting the agent is lightweight; self-hosting the model is a completely different (and much heavier) project.
Core stack:
Linux server (any modern distro works)
Hermes runtime installed and configured
API key for your model of choice (Anthropic, OpenAI, or a local model if you want to go fully offline)
.env file holding your bot tokens (Telegram, Discord) — never committed to git
Cron jobs for scheduled tasks (briefings, monitoring, reports)
Integrations I run:
Telegram bot — direct messages and notifications land straight in my phone via the Bot API (sendPhoto, sendMessage), no polling needed
Discord — full server management (channels, roles, onboarding, AutoMod) via raw REST calls using a bot token, tied to my YouTube community server
Skills system — instead of re-explaining how I want something done every single time, I write it once as a skill file and the assistant loads it automatically when relevant
What This Actually Buys You
Privacy — conversations, memory, and automations stay on infrastructure you control. No third party mining your chat history for training data.
Persistence — memory survives across sessions. It doesn’t forget your preferences, your projects, or your running context every time you start a new conversation.
Automation — cron-triggered briefings, monitoring, and notifications running independently of you being actively in a chat.
No lock-in — swap the underlying model provider without rebuilding your entire workflow. The agent layer stays yours.
Extensibility — every tool, skill, and integration is something you can read, edit, and fix yourself. When something breaks, you’re not waiting on a support ticket.
Is This For Everyone?
Honestly — no. If you just want quick answers to questions, a hosted chatbot is easier and requires zero setup. This approach makes sense if you:
Automate things regularly (deployments, monitoring, content workflows)
Care about where your data lives
Like understanding and controlling your own tools instead of trusting a black box
Already run Linux servers and are comfortable in a terminal
If that’s you, self-hosting your AI agent stack is one of the more satisfying things you can build right now — it’s the same shift we already made with self-hosted NAS systems, home automation, and Pi servers, just applied to AI.
What’s Next
I’ll be covering the deeper technical bits in follow-up posts and on the YouTube channel — setting up specific integrations, writing custom skills, and the security considerations that come with giving an AI agent terminal and browser access on your own machine (spoiler: sandboxing and permission boundaries matter a lot).
If you’re building something similar or have questions about the setup, drop them in the comments.
]]>A practical walkthrough of building a self-hosted AI assistant using OpenClaw and Hermes — no cloud subscriptions, no vendor lock-in, full control over your data.Cybersecurity Tips and Trickshttps://mistrysiddh.com/2025/01/13/Cybersecurity-tips-and-tricks/2025-01-13T03:33:44.000Z2026-07-24T14:33:54.387Z
How to Protect Yourself from Hackers and Online Scams
Summary Cybersecurity is about keeping your online world safe from threats like hackers and scammers. Think of it as locking the doors to your digital life. Whether it’s protecting personal data, avoiding fraud, or using technology responsibly, staying secure online is essential in today’s fast-paced digital age. In this guide, we’ll explore simple yet effective steps you can take to safeguard yourself and your loved ones from cyber threats.
The internet has made our lives easier in so many ways. We shop online, manage our bank accounts, connect with friends, and even work remotely. But unfortunately, hackers and scammers are constantly looking for ways to take advantage of us.
The good news? You don’t have to be a tech expert to protect yourself online. With a few simple habits, you can significantly reduce your risk of falling victim to cybercrimes. Let’s break it down!
1. Use Strong, Unique Passwords
Think of your password as the lock on your front door. A weak password is like leaving your door unlocked. Here’s how to make a strong one:
Use at least 12 characters.
Mix letters (uppercase and lowercase), numbers, and symbols.
Don’t reuse passwords across different accounts.
👉 Tip: Use a password manager app (like LastPass or Dashlane) to remember them for you.
2. Double-Check Before You Click
Have you ever received an email or message asking you to click a link or download something? Scammers often use tricks like this to steal your information.
If you don’t know the sender, don’t click!
Check for oddities in the email, like misspellings or unusual requests.
👉 Tip: If an email claims to be from your bank or a company, visit their website directly instead of using the link in the email.
3. Keep Everything Updated
Your devices and apps often release updates to fix security issues. If you skip these updates, hackers might find ways to break in.
Turn on automatic updates for your phone, computer, and apps.
Update antivirus software regularly (it’s like a digital security guard).
👉 Tip: If you see a notification about updates, don’t delay—do it right away!
4. Watch What You Share Online
Social media is fun, but sharing too much can be risky. Hackers use personal details like your birthday, pet’s name, or school name to guess passwords or trick you.
Avoid posting private information, like your address or travel plans.
Be cautious about what you share in public profiles.
5. Use Two-Step Verification
This is like adding a second lock to your door. Even if someone steals your password, they can’t get in without a second step, like a code sent to your phone.
Look for “Two-Factor Authentication” or “2FA” in your account settings.
👉 Tip: Use apps like Google Authenticator instead of relying on text messages for these codes.
6. Stay Alert to Scams
Scammers are smart, but you can outsmart them. Here’s what to watch for:
Fake calls or texts: If someone claims to be from your bank or a company and asks for sensitive information, hang up and call the company directly.
Too-good-to-be-true offers: If it feels too good to be true, it probably is.
7. Secure Your Wi-Fi at Home
Your Wi-Fi connects all your devices, so it’s important to keep it safe.
Change the default password on your router to something only you know.
Use a strong Wi-Fi password, not something easy like “password123.”
8. Check Your Bank Statements
Hackers sometimes make small charges on your credit card to test if it works before taking more.
Review your statements every month.
Set up alerts for unusual activity.
👉 Tip: If you see a charge you don’t recognize, report it to your bank immediately.
9. Back Up Your Data
Imagine losing all your photos, documents, or contacts—terrifying, right? Backing up your data keeps it safe.
Use an external hard drive or a cloud service like Google Drive or iCloud.
Back up important files regularly.
10. Stay Informed
Cybercriminals are always finding new tricks. By staying informed, you can stay ahead of them.
Follow trusted websites or news sources about online safety.
Share tips with your friends and family to help them stay safe too.
Final Thoughts
Online security doesn’t have to be complicated. Small steps like using strong passwords, keeping your software updated, and being cautious about what you click can go a long way.
If something feels suspicious, trust your instincts. It’s better to be safe than sorry. By staying alert and following these tips, you can enjoy the benefits of the digital world without falling victim to hackers and frauds.
💡 Remember: Staying safe online is a habit. Start today and protect your future!
Share this post to help others stay safe online too!
Safeguarding Your Digital World: A Comprehensive Guide to Cybersecurity
In our modern age, where digital technology reigns supreme, the need for cybersecurity has taken center stage. From individuals to corporations, the increasing frequency and sophistication of cyber threats make it crucial to bolster our digital defenses. This comprehensive guide aims to demystify the world of cybersecurity and provide you with practical steps to ensure your online safety.
1. Understanding Cybersecurity
At its core, cybersecurity involves a range of strategies and measures aimed at shielding digital systems, networks, and data from unauthorized access, malicious attacks, and potential damage. It’s a multi-layered approach that thwarts threats like hacking, phishing, malware, and ransomware.
2. Common Cyber Threats
Let’s familiarize ourselves with some prevalent cyber threats:
Phishing: Deceptive attempts to acquire sensitive information.
Malware: Destructive software that can compromise, disrupt, or gain unauthorized access.
Ransomware: Encrypts data and demands payment for its release.
Data Breaches: Unauthorized access to sensitive information.
Social Engineering: Manipulating individuals into revealing confidential data.
3. Essential Cybersecurity Practices
Here are some fundamental practices for robust cybersecurity:
Strong Passwords: Craft intricate passwords with a mix of characters, avoiding easily guessable information.
Multi-Factor Authentication (MFA): Add an extra layer of security by requiring multiple verification steps.
Regular Updates: Keep software and systems up to date to patch vulnerabilities.
Firewalls and Antivirus: Install reliable firewalls and antivirus software to prevent breaches.
Secure Wi-Fi: Use robust encryption, change router passwords, and avoid public Wi-Fi for sensitive tasks.
Data Encryption: Safeguard sensitive data through encryption to prevent unauthorized access.
Backup Data: Regularly back up crucial files to an external, secure location.
4. Cyber Hygiene for Individuals
Practice good “cyber hygiene” with these individual-oriented steps:
Email Vigilance: Be cautious of unexpected emails, avoid clicking suspicious links, and verify sender identities.
Social Media Awareness: Limit sharing personal information and adjust privacy settings.
Safe Browsing: Verify URLs, stick to secure connections (HTTPS), and steer clear of untrusted websites.
App Permissions: Review and restrict app permissions to only necessary functions.
5. Cybersecurity for Businesses
Businesses need specialized measures to protect their digital assets:
Employee Training: Regularly educate staff about cybersecurity threats and best practices.
Data Management: Safeguard sensitive data with encryption and access controls.
Incident Response Plan: Develop a clear strategy for addressing cyber incidents to minimize damage.
Vendor Security: Assess third-party vendor security practices before sharing data.
6. Staying Informed
Stay updated on evolving cybersecurity trends through reliable sources, industry news, and security blogs.
7. Seek Professional Help
For intricate cybersecurity needs, consider enlisting experts or consultants to assess, advise, and bolster your security measures.
In today’s interconnected world, cybersecurity is everyone’s responsibility. By adopting proactive measures, staying informed, and cultivating cautious digital habits, you can shield your digital presence and contribute to a safer online environment. Remember, the most powerful defense against cyber threats is knowledge and preparedness.
Donation
]]><p><img src="https://c.wallhere.com/photos/96/13/Mr_Robot_Rami_Malek-1412613.jpg!d" alt="Cyber Security"></p>
<h1>Safeguarding Your Digital ROS on Raspberry PI 4https://mistrysiddh.com/2022/10/17/ROS-on-RaspberryPI4/2022-10-17T01:36:04.000Z2026-07-24T14:33:54.390Z
Overview
We will be install ROS on Raspberry PI 4 without Ubuntu. In this tutorial we we will be using docker insted of using ubuntu or any other software.
Requirments
Laptop or Desktop
Stable internet connection(Mobile or Router no matter which connection is it)
Raspberry Pi with 4GB+ ram (mine is Raspberry Pi 4 B+ model with 8GB of ram)
MicroSD card with a minimum of 32GB size
Power supply (power bank or cell phone adaptor)
MicroB to HDMI with monitor(optional) if you’re going to use a monitor then you will be needing of keyboard
Ok first of all we need some software which will help us to flash memory card so that we can install os in the memory card to boot in pi.
Go to https://www.raspberrypi.com/software/ and download software according to your OS I’m using Zorin OS which is based on Ubuntu so I will be using the terminal. If you are using terminal use the following command
1
sudo apt install rpi-imager
as you can see in the below image I have already installed it on my device
Go ahead and open it up after opening it up plugin your 8GB or higher sd card on your laptop. as you can see in the image I have inserted 8GB of card
Now do the following steps as soon in the photo’s
Select Raspberry Pi OS(other)
Then select Raspberry Pi OS with desktop
Now select your disk but before writing your os we will configure it first so that we don’t have to connect any kind of ethernet cable or mini Wi-Fi. Press ALT + SHIFT + X to open secret setting
Note: set your hostname and remember it we will be needing it later
Click on Yes and let it complete it. After that, you will be granted this message so it means that it is been completed.
Step 2 - Booting UP
Remove your memory card from the computer and plug that it into pi and power it on, well as the pi is doing some process grab a cup of coffee and wait for a few minutes.
Open up your terminal and enter the following command
1
2
# as you remember I have told you to set your hostname in the software and remember it.
ssh pi@hostname.local
Replace your hostname with the hostname you have set while preparing the sd card. In my case, I have set my hostname with datacenter so my command will be like this
1
ssh pi@datacenter.local
as soon as you hit enter it will as you for a conformation like this
1
2
3
4
~ ➤ ssh pi@datacenter.local
The authenticity of host 'datacenter.local (192.168.32.200)' can't be established.
ECDSA key fingerprint is SHA256:VlnqrEfP5pLc62h2TQbN0Z4pEudRsmRQL4+LqDD6ZB8.
Are you sure you want to continue connecting (yes/no/[fingerprint])?
answer it with yes after that it will as you for a password which we have set during the software installation. As you have given the password right then you will see that you have been login into your account successfully like I did.
Congratulation we have been login successfully into our pi take a break grab a cup of coffee and relax.
Step 3 - Software setup
As we successfully login into pi first we will update the repository as well as we will be upgrading it by the following command don’t worry if you haven’t used Linux in your life this will be your first experience as well as it will be really easy just follow my steps.
The above command will update the repositories as well as it will be upgrading all the packages which are outdated so that we don’t get any kind of error while installing. It will take a few minutes after all the process is completed we will check once again if there is any software that is left to upgrade by the following command.
1
sudo apt update && sudo apt list --upgradable
The following command will check whether any package is upgradable or not, if its all upgrade then it will return it with this message
Package Installation
Now we will install some few pre-required software so that we will use it properly. Follow me oh and don’t forget your cup of coffee ;)
1
2
3
sudo apt update sudo apt install nano wget git curl htop -y sudo init 6 # this command will restart your Raspberry PI4
Step 4 - Getting docker
There is a script which will help us to easily install docker on our PI without any command just a single command and then run it. Right simple as it says lets give it a run.
docker version Client: Docker Engine - Community Version: 20.10.19 API version: 1.41 Go version: go1.18.7 Git commit: d85ef84 Built: Thu Oct 13 16:45:42 2022 OS/Arch: linux/arm64 Context: default Experimental: true
Server: Docker Engine - Community Engine: Version: 20.10.19 API version: 1.41 (minimum version 1.12) Go version: go1.18.7 Git commit: c964641 Built: Thu Oct 13 16:44:07 2022 OS/Arch: linux/arm64 Experimental: false containerd: Version: 1.6.8 GitCommit: 9cd3357b7fd7218e4aec3eae239db1f68a5a6ec6 runc: Version: 1.1.4 GitCommit: v1.1.4-0-g5fd4c4d docker-init: Version: 0.19.0 GitCommit: de40ad0
Step 5 - Installing Docker composer
Docker Compose is a tool for automating Docker projects using a YAML file. With the help of thi file you can create many project from scratch as I did.
1
sudo apt install python3-pip -y
PIP is a tool which will help us to install docker composer. If it already install then we will move on to the next step
1
sudo pip3 install docker-compose
After installing docker composer we will check wheather it is installed properly or not
1 2 3 4 5
docker-compose version docker-compose version 1.29.2, build unknown docker-py version: <module 'docker.version' from '/usr/local/lib/python3.10/dist-packages/docker/version.py'> CPython version: 3.10.7 OpenSSL version: OpenSSL 3.0.5 5 Jul 2022
Step 6 - Installation of ROS (semi-final step)
Before going further we will just give it a reboot so that we make sure that everything is working propely
1
sudo init 6
As we have rebooted our system we will now search for our docker repository by using docker search command
1 2 3 4
docker search siddhmistry NAME DESCRIPTION STARS OFFICIAL AUTOMATED siddhmistry/mrfoxie 0 siddhmistry/ros_rpi4 ROS for Raspberry PI 4 0
We need to install second one which is second one siddhmistry/ros_rpi4 follow the following steps
As we have completed all the steps try to run roscore if this commands works then you have successfully installed it. Press Ctrl + C to exit roscore after that type exit to exit it. Now that we have done everything we just need to install just a small thing which is called Portainer which will help to run this container easily
Step 8 - Installing Portainer
As we know we have already install docker so we will start installing Portainer so just follow the steps
First, create the volume that Portainer Server will use to store its database:
1
docker volume create portainer_data
Then, download and install the Portainer Server container:
Portainer Server has now been installed. You can check to see whether the Portainer Server container has started by running docker ps:
1 2 3
docker ps CONTAINER ID IMAGE COMMAND CREATED STATUS PORTS NAMES de5b28eb2fa9 portainer/portainer-ee:latest "/portainer" 2 weeks ago Up 9 days 0.0.0.0:8000->8000/tcp, :::8000->8000/tcp, 0.0.0.0:9443->9443/tcp, :::9443->9443/tcp portainer
Now that the installation is complete, you can log into your Portainer Server instance by opening a web browser and going to: portainer
1
https://localhost:9443
When you open the url you will be asked to steup admin username and password after login into the admin panel it looks like this
Here you will see a local enviroment click on it and this page will open it up:
At the left side panel you will able to see Containers option. When you open that page it will grant you with some containers.
You will see that there is a container name ROS_PI4 select it and press start anf baam it started working. Portainer is a tool where it will help you control your container and also to add more containers in it. I hope you loved it.
]]><p><img src="/images/posts/ros-raspberrypi.png" alt="ROS"></p>
<h1>Overview</h1>
<p>We will be install ROS on Raspberry PI 4 without Ubuntu.Raspberry Pi NAS Systemhttps://mistrysiddh.com/2022/02/11/Raspberry-pi-NAS-System/2022-02-11T08:47:46.000Z2026-07-24T14:33:54.390Z
Overview
We will be seeing a fully functional NAS server on Raspberry Pi(all pi version) homemade with simple few lines of command and with one software require before we start we will be requiring a few things before we start.
Requirments
Laptop or Desktop
Stable internet connection(Mobile or Router no matter which connection is it)
Raspberry Pi with 4GB+ ram (mine is Raspberry Pi 4 B+ model with 8GB of ram)
MicroSD card with a minimum of 8GB size
Power supply (power bank or cell phone adaptor)
MicroB to HDMI with monitor(optional) if you’re going to use a monitor then you will be needing of keyboard
Ok first of all we need some software which will help us to flash memory card so that we can install os in the memory card to boot in pi.
Go to https://www.raspberrypi.com/software/ and download software according to your OS I’m using Zorin OS which is based on Ubuntu so I will be using the terminal. If you are using terminal use the following command
1
sudo apt install rpi-imager
as you can see in the below image I have already installed it on my device
Go ahead and open it up after opening it up plugin your 8GB or higher sd card on your laptop. as you can see in the image I have inserted 8GB of card
Now do the following steps as soon in the photo’s
Select Raspberry Pi OS(other)
Then select Raspberry Pi OS Lite (Legacy)
Now select your disk but before writing your os we will configure it first so that we don’t have to connect any kind of ethernet cable or mini Wi-Fi. Press ALT + SHIFT + X to open secret setting
Note: set your hostname and remember it we will be needing it later
Click on Yes and let it complete it. After that, you will be granted this message so it means that it is been completed.
Step 2
After that plug, it into pi and power it on, well as the pi is doing some process grab a cup of coffee and wait for a few minutes.
Open up your terminal and enter the following command
1 2
# as you remember I have told you to set your hostname in the software and remember it. ssh pi@hostname.local
Replace your hostname with the hostname you have set while preparing the sd card. In my case, I have set my hostname with datacenter so my command will be like this
1
ssh pi@datacenter.local
as soon as you hit enter it will as you for a conformation like this
1 2 3 4
~ ➤ ssh pi@datacenter.local The authenticity of host 'datacenter.local (192.168.32.200)' can't be established. ECDSA key fingerprint is SHA256:VlnqrEfP5pLc62h2TQbN0Z4pEudRsmRQL4+LqDD6ZB8. Are you sure you want to continue connecting (yes/no/[fingerprint])?
answer it with yes after that it will as you for a password which we have set during the software installation. As you have given the password right then you will see that you have been login into your account successfully like I did.
Congratulation we have been login successfully into our pi take a break grab a cup of coffee and relax.
Step 2 Software setup
As we successfully login into pi first we will update the repository as well as we will be upgrading it by the following command don’t worry if you haven’t used Linux in your life this will be your first experience as well as it will be really easy just follow my steps.
The above command will update the repositories as well as it will be upgrading all the packages which are outdated so that we don’t get any kind of error while installing our NAS software. It will take a few minutes after all the process is completed we will check once again if there is any software that is left to upgrade by the following command.
1
sudo apt update && sudo apt list --upgradable
The following command will check whether any package is upgradable or not, if its all upgrade then it will return it with this message
Packages installation
Now we will be requirement few software for NAS to install without any error follow me
1
sudo apt install wget htop -y
These packages are preinstalled but in some cases, these packages are not been installed so we will be making sure that it’s installed.
Script installation
This script will not affect your network connection but if it did then I will leave a tutorial at the end of installation (Wi-Fi setup). Clear your terminal by using the clear command it will clear your terminal so that you can see it easily. Now past this script into the terminal so that installation start’s
Sit back and relax until the process is been done till that time go ahead and give me a cup of coffee so that I can bring up various kinds of this topic so that you can enjoy it
Congratulation it’s been installed completed for our protection we will reboot our system with the following command sudo reboot.
Step 3 NAS setup on browser
As in Step 2 Software setup we have installed once again we will be login into ssh account to check the IP address of our Pi use the following command to check the IP address
1
hostname -I
After finding your IP address use that IP address and open it in the browser with https://your_ip_address and it will grant you this page
Now now don’t be frightened of the login page because you don’t know the password and username well of course I also don’t know. Just joking type the following and it will let you in
1 2
username: admin password: openmediavault
Congratulation you have successfully login, now before doing anything we will go ahead and change the password you will grant with this screen
Changing admin panel password
Go to System >> General Settings >> Click on Web Administrator Password then enter your new password after doing that we will plug in any kind of hard drive or some sort of memory storing device
Storage setup
As we have inserted external storage head over to Storage >> Disk and there you will be able to see your storage mounted on pi in my case I have inserted 128GB of memory card for the testing purpose also I have a few files copied into it
Select the disk and then click on Wipe
![Disk Wipe]
As we have confirmed that our storage is been mounted on our pi now we will make a shared folder so that we can access it from any device.
Now select the quick option
File System setup
After wiping the data from the drive click on File System in the Storage section. Click on Add button and select Device and select the device and give it a label of your choice I will be giving it the name DataCenter, and make sure that you select EXT4 in File System.
After hitting Yes to add device take a cup of coffee and wait for it
Select your device and click on the mount option to mount your device. A pop-up has been visible on the top just hit on the Apply button to apply changes so that to make sure that what are we going to make changes will work properly. It will take a few minutes to complete the process.
Sharing Folder setup
Now we will head to Sharing Folder Setup to set up our sharing folder. Go to Access Rights Management > Shared Folders when you will go there you will find it empty because we haven’t set up any sharing folder go ahead and hit that Add button without any thoughts.
Fill in all the details according to your need and make sure to leave Permission as it is until and unless you know the purpose of it. I will be labeling it as DataCenter if you want to comment on that device then you can otherwise Save it, again you will see Apply button on the top right side of the screen as shown in the image below it will take a while to apply the changes.
We will permit it so that we can Read/Write files into it. Select your newly created folder and click Privileges and give Read/Write to both pi users. Hit save and apply.
Services Setup
Go to the Services section and select SMB/CIFS as soon as you select it you will be granted a screen with soo many scary options but don’t worry we will be using only 2 options only. So go ahead and click sharing in the SMB/CIFS section.
Go ahead click on the Add button select your shared folder which you have been created. Hit save and apply don’t change any other kind of options if your expert then only does it or else let it be as it is. Go back to the SMB/CIFS setting page and enable it. Hit save and apply. Take a cup of coffee and relax for a bit because we are coming to the most intrusting part which is accessing it from our devices.
Accessing our NAS
Before we move on `Windows User` please see the above video to enable `SMB`, as I'm on Ubuntu I can directly access it
If you try to access it, it will as you for authentication so use your pi account and password which you used while setting up os if it fails then go to Access Rights Management > User, select pi user, and edit it after that add your new password and save it. go back to the folder and try to login back and you will be successfully logged in to NAS Folder
Wi-Fi Setup
If you’re going to use Wi-Fi then connect to a monitor and attach a keyboard then simply type the following command in the terminal to access the raspberry pi configuration setup
1 2
sudo raspi-config # it will represent you with the screen bellow
Select System Options > Wireless LAN > Enter your Wi-Fi Name > Enter your Wi-Fi password
After completing all the above steps reboot your system with sudo reboot and bam done.
]]>Use your Raspberry Pi as NAS server at home or on a drive wherever you go. Simple steps to install and easy to set up everythingUninstall Edgehttps://mistrysiddh.com/2021/08/20/Uninstall_Edge/2021-08-20T05:04:48.000Z2026-07-24T14:33:54.390ZThe Problem
Microsoft Edge has taken over PDF viewer, and other default web tasks. Even when manually removing it will reinstall via windows updates.
Removing the Base Install
We first need to find the Edge install of the chromium edition in your Program Files.
You now need to add a registry entry. The following location Computer\HKEY_LOCAL_MACHINE\SOFTWARE\Microsoft\EdgeUpdate needs to be added with a DWORD called DoNotUpdateToEdgeWithChromium with a value of 1.
You can do this with a simply reg file. (stopedge.reg)
]]>This goes over Removing Microsoft Edge Chromium edition and keeping it removed.Guiscrcpyhttps://mistrysiddh.com/2021/07/20/GUIScrcpy/2021-07-20T08:52:15.000Z2026-07-24T14:33:54.388Z
First of all, you need to know the Android version of your phones. You can find it on your phone information section. Try to tap Settings > About Device > Software information (or System in some Android version) > Android version and then you can know which Android version your phone have on.
Now connect your phone with your desktop.
Guiscrcpy & Scrcpy installation
Goto Guiscrcpy release and scrcpy files and place it in one folder like this
Extract all the file of scrcpy*.zip into a folder after doing that open Guiscrcpy. It will ask you to locate scrcpy.exe no go into the extraced folder and select scrcpy.exe
!
After doing that connect your phone to your device and Start Scrcpy
Congratulations now you can cast you screen on your laptop or Desktop.
Watch Netflix Movie on larger screen with mobile plan (Top Secret)
]]>Screen cast your phone and record high quality games on your laptop or desktopCreating a Website on Raspberry Pi at homehttps://mistrysiddh.com/2021/07/18/Pi-Site/2021-07-18T16:54:13.000Z2026-07-24T14:33:54.389Z
Overview
This is perfect for setting up your first website and learning not only administering a wordpress site, but learning Linux. You will need a Raspberry Pi, a couple hours, and a computer to download the image on. The Raspberry Pi (RPI) is a perfect device for learning these things.
You will be asked Enter current password for root (enter for none): — press Enter.
Type in Y and press Enter to Set root password?.
Type in a password at the New password: prompt, and press Enter. Important: remember this root password, as you will need it later to set up WordPress.
Type in Y to Remove anonymous users.
Type in Y to Disallow root login remotely.
Type in Y to Remove test database and access to it.
Type in Y to Reload privilege tables now.
When complete, you will see the message All done! and Thanks for using MariaDB!.
Login to MySQL with sudo mysql -uroot -p and enter the password you set above.
You will see the terminal prompt change and you can enter the following:
1 2 3
create database wordpress; GRANT ALL PRIVILEGES ON wordpress.* TO 'root'@'localhost' IDENTIFIED BY 'YOURPASSWORD'; FLUSH PRIVILEGES;
IMPORTANT: Exit SQL Prompt with Ctrl + D and change YOURPASSWORD above to your password!
Reboot with sudo reboot
Wordpress Configuration
Remote Access can be done with SSH from any system. Find your Raspberry Pi IP with ip a. This IP is only your Local IP and not accessible from the outside world.
Initial setup can be done from any computer in the same network as the RPI. Type your pi ip address from above into your browsers address bar.
]]>This is a guide on how to create a website on a Raspberry Pi. This will teach you the basics of using a LAMP stack.Update any PC to Windows 11https://mistrysiddh.com/2021/07/10/Update_PC_To_Windows_11/2021-07-10T13:36:27.000Z2026-07-24T14:33:54.390Z
Windows 11 does checks for TPM and Secure boot before it allows the upgrade process to start. However, these can be bypassed.
Note: It is important to understand Microsoft can at ANY TIME enforce these rules or ignore these modifications which means you would NO LONGER recieve updates
Here is the registry edits that need to be made: (win11bypass.reg)
Extract both the ISO and zip in that folder after that open fix_TPM_error and copy both the files and past it in 21996.1.210529-1541.co_release_CLIENT_CONSUMER_x64FRE_en-us (1)/sources folder it will as you for replacing the file replace it.
Now go back 21996.1.210529-1541.co_release_CLIENT_CONSUMER_x64FRE_en-us (1) folder and run setup.exe select the options of your like.
Congratulation
Congratulation now you have successfully install Windows 11 on your system
]]>This is a guide going over updating any PC to Windows 11 that “doesn’t meet requirements” or doesn’t use Secure Boot or has a TPM 2.0 chip.Announcementhttps://mistrysiddh.com/2021/07/07/announcement/2021-07-07T00:22:36.000Z2026-07-24T14:33:54.392ZApplication Launched
I’m happy to announce that play store has accepted my application it was really tough for me but finally it accepted.So now you can download my Official App from play store here is the link https://bit.ly/2Vch9gi
]]>Finally application has been accepted by Google Play Store.Face Detection using OpenCV + Python (🐍)https://mistrysiddh.com/2021/06/21/Face-Detection/2021-06-21T10:35:37.000Z2026-07-24T14:33:54.388Z
What is Face Detection?
Face detection is AI-based computer technology that is used to extract and identify human faces from digital images. When integrated with biometric security systems (particularly, facial recognition ones), this kind of technology is what makes it possible to monitor and track people in real-time. In applications that use facial tracking, analysis, and recognition, face detection typically works as the first step and has a significant impact on how sequential operations within the app will perform.
Face detection helps with facial analysis by identifying the parts of a video or an image that should be focused on when determining gender, age, and emotions. Similarly, with facial recognition systems (which create “faceprint” maps of facial features), face detection data is included in the system’s algorithms. And why? Face detection helps determine which parts of the video or image are needed to produce a faceprint.
HOW DOES FACE DETECTION WORK?
Face detection technology uses machine learning and algorithms in order to extract human faces from larger images; such images typically contain plenty of non-face objects, such as buildings, landscapes, and various body parts.
Facial detection algorithms usually begin by seeking out human eyes, which are one of the easiest facial features to detect. Next, the algorithm might try to find the mouth, nose, eyebrows, and iris. After identifying these facial features, and the algorithm concludes that it has extracted a face, it then goes through additional tests to confirm that it is, indeed, a face.
To make algorithms as accurate as possible, they must be trained with huge data sets that contain hundreds of thousands of images. Some of these images contain faces, while others do not. The training procedures help the algorithm’s ability to decide whether an image contains faces, and where those facial regions are located.
Also, now would be a good time to give you definitions of the main types of algorithms – ML, AI, and Deep Learning.
Machine Learning (ML): ML algorithms use statistics to find patterns in huge amounts of data. This data can include words, numbers, images, clicks, and more. ML is the process behind many modern services – voice assistants (Siri and Alexa), search engines (Google and Baidu), and recommendation systems (Spotify and Netflix);
Artificial Intelligence (AI): If an ML solution is programmed to learn how to perform a task, rather than just simple performance, then it is AI. Systems that use AI demonstrate behaviors similar to human intelligence – for instance, problem solving, planning, learning, perception, manipulation, and reasoning;
Deep Learning: This algorithm is a subset of machine learning, and it is what forms deep neural networks; essentially, machines are given a greater ability to find and amplify tiny patterns. Such networks have any layers of computational nodes that collaborate to sift through data and deliver predictions.
Now, as for the exact technologies used to develop face detection applications; these include:
OpenCV;
Matlab;
Tensorflow;
Neural Networks.
All of these follow almost the exact same procedure for face detection.
FACE DETECTION METHODS
Three researchers from the University of California, David Kriegman, Ming-Hsuan Yang, and Narendra Ahuja, published a classification of facial detection methods. There are four classifiable categories, of which face detection algorithms can belong to 2+ groups. Let’s take a look at each category.
Feature-Based Method
This method located faces by extracting structural features. First, an algorithm is trained as a classifier. Next, it is used to sort facial regions from non-facial regions. The general idea is to move past humans’ instinctive knowledge of faces. When feature-based approaches tackle photos with many faces, they have a 94% success rate.
Summary: Features such as a person’s nose or eyes are used to detect a face.
Knowledge-Based Method
A knowledge-based algorithm is dependent upon a set of rules, and it is built on human knowledge. For instance, “rules” might include that a face should have eyes, a nose, and a mouth in certain positions relative to each other. However, this kind of method comes with one huge challenge: it is very difficult to build an appropriate rules set. If the rules are too general, there may be many false positives – and, conversely, if the rules are too detailed, the system could generate many false negatives.
Summary: A face is determined based on whether it meets a set of rules made by a human.
Template Matching Method
With a template matching algorithm, parameterized or pre-defined templates are used to locate or detect faces – the system measures the correlation between the input photos and the templates. For instance, the template may show that a human face is divided into nose, mouth, eyes, and face contour regions. Also, a facial model could be comprised of just edges and use the edge detection method – implementation of this approach is easy, but it is insufficient for face detection.
Summary: Images are compared to standard face patterns that have been previously stored.
Appearance-Based Method
An appearance-based algorithm uses a set of training images to “learn” what a face should look like. In general, this method relies on machine learning and statistical analysis to determine relevant facial characteristics. An appearance-based approach is generally considered to be stronger than the previously mentioned methods.
Summary: Statistical analysis and machine learning are combined to find a face image’s characteristics.
FACE DETECTION TECHNIQUES
Some of the more specific facial detection techniques include:
Removing the background. Let’s say an image has a pre-defined, static background or a plain, single-color background – removing it can help determine the face’s boundaries;
With color images, the color of the skin can sometimes be used to find faces;
Motion can be used to detect faces. In a real-time video, a person’s face is nearly always in motion. However, a drawback of this technique is that a face could be confused with other moving objects.
When the aforementioned strategies are combined, they can create a comprehensive face detection approach.
WHAT ARE THE CHALLENGES IN FACE DETECTION?
Researchers Ashu Kumar, Amandeep Kaur, and Munish Kumar published a review of face detection techniques, which included a detailed explanation of the challenges that facial detection faces. To sum up their findings, the challenges in face detection include:
Odd expressions. A human face might have an odd expression, making it difficult for facial detection algorithms to identify it as a face;
Face occlusion. If a face is hidden by hair, a hat, a hand, glasses, or a scarf, it may result in a false negative;
Illuminations. An image might not have uniform lighting effects; part of the image may be overexposed, while another part is very dark. Again, this can contribute to false negatives;
Complex background. When lots of objects are present in an image, face detection’s accuracy is reduced;
Too many faces. If there is a large number of human faces in an image, face detection software may have a hard time distinguishing between some of them;
Low resolution. If an image’s resolution is poor, it is more difficult to detect faces;
Skin color. If somebody’s skin color falls outside of the gradient that is recognized by the algorithm, their face might not be detected.
HOW DOES FACE DETECTION WORK WITH DEEP LEARNING?
As we mentioned earlier, deep learning is a subset of machine learning in which large neural networks process huge amounts of data and make complex predictions. So how does deep learning factor into face detection? Well, multiple deep learning methods have been developed specifically for facial detection.
One of the most popular deep learning approaches is the Multi-Task Cascaded Convolutional Neural Network – or, MTCNN. This approach is popular because it achieved cutting-edge results (for the time) on a variety of benchmark datasets – plus, it is able to use landmark detection to recognize the eyes, mouth, and other facial features.
MTCNN uses a cascade structure that contains three networks: P-net, R-Net, and O-Net. The image is first rescaled to different sizes (or an image period). P-Net proposes facial regions, R-Net filters the bounding boxes, and O-Net proposes facial landmarks.
WHY IS FACE DETECTION IMPORTANT TODAY?
Face detection is the initial step in face analysis, face tracking, and, most importantly, face recognition. The latter industry is growing by leaps and bounds, and is applied to device unlocking, banking, hospitality, law enforcement, building security, and more. Face detection is necessary for facial recognition algorithms to know which parts of an image must be used to generate faceprints.
FACE DETECTION VS. FACE RECOGNITION: WHAT’S THE DIFFERENCE?
Facial recognition is merely one application of face detection. The former is used for biometric verification and device unlocking, whereas the latter can also be applied to facial analysis and tracking. For a more comprehensive look at face recognition, check out our Types of Biometrics guide.
ADVANTAGES AND DISADVANTAGES OF FACE DETECTION SYSTEMS
While face detection systems can be powerful, they are by no means foolproof, as demonstrated by our list of challenges. Let’s take a look at the advantages and disadvantages that face detection systems can bring.
ADVANTAGES OF FACE DETECTION
Better security. Face detection augments surveillance tactics and forms the basis of the identification process of terrorists and criminals;
Easy to integrate. Most face detection solutions are compatible with security software;
Automated identification. Face detection lets facial identification be automated, thus increasing efficiency alongside a heightened rate of accuracy.
DISADVANTAGES OF FACE DETECTION
Huge storage requirements. Machine learning technology requires powerful data storage;
Detection can be vulnerable. We’ve outlined the way in which facial detection can be thrown off;
Potential privacy issues. There is disagreement on whether face detection is compatible with human privacy rights.
PROS AND CONS TABLE SUMMARY
Advantages of Face Detection
Disadvantages of Face Detection
Better security
Huge storage requirements
Easy to integrate
Vulnerable detection
Automated identification
Potential privacy issues
HOW FACE DETECTION ALGORITHMS ARE USED
Before we wrap up this guide, we wanted to give some examples of how face detection algorithms are applied in the real world. Some applications include photography, lip reading, marketing, and more.
FACIAL MOTION CAPTURE
With applications such as Snapchat, people’s faces can be altered in real-time with fun filters. Facial detection makes this possible, as its algorithms tell the applications that there is a face that can be traced and changed.
FACIAL RECOGNITION
Facial recognition adds increased security to nearly every global industry. It seeks to identify a person and then authenticate their identity – but for a person’s faceprint to be analyzed via facial recognition, the facial area to be assessed is determined by face detection.
PHOTOGRAPHY
Facial recognition can be used to “tag” people’s faces in photos across social media platforms, and facial detection forms the foundation of this application. Furthermore, facial detection technology can be used alongside tracking to focus on a person’s face while the photo is being taken.
MARKETING
Facial surveillance can help stores determine customers that have visited a few times and offer them perks or discounts – thus fostering increased customer loyalty.
EMOTIONAL INFERENCE
Emotion recognition applications are still in the works; when they are fully developed, AI might be able to “read” nonverbal cues, gestures, body movements, and facial expressions to convey a person’s feelings.
LIP READING
The detection, modeling, and tracking of lips during videos can be used to generate automatic subtitles. Such an application can be found on YouTube, where some videos have the option to turn on subtitles, even if the creator has not provided any.
SUMMARY
To sum up the key points of this guide:
Face detection is AI-based computer technology that is used to extract and identify human faces from digital images;
Face detection algorithms can be feature-based, knowledge-based, template matching, appearance- based, or a combination of methods;
Advantages of face detection include better security, easy integration, and automated identification;
Disadvantages include huge storage requirements, vulnerable detection, and potential privacy issues.
Face detection is the foundation of a huge number of facial applications – we can see it in our day-to-day life. When we unlock our smartphone via face recognition, that would not be possible without face detection. The same goes for facial recognition surveillance systems, photo tagging, and Snapchat filters. There are many exciting applications in the works that we can thank face detection for!
Tutorial Time
Now we will see a small example of OpenCV and Python with its explanations, before we start we will need following software and if you are Linux base OS then you can skip installation process. Lets start.
Installation on Windows
Software we will be using
PyCharm Community version
Latest version of python
And most import is your support. Lets start.
1. PyCharm Community version
First open your favorite browser and paste this link in there https://www.jetbrains.com/pycharm/download/ after that click on download under Community section.
After downloading it just open the installer you shall be granted with this screen
Click on next and complete installation process.
2. Python
After completing installation of PyCharm now we will install Python, so same copy and past this link https://www.python.org/downloads/ in browser and download installer
Now open the installer and start the installation process and make sure that you check all the options in Optional Features like this
Now we are set for tutorial so open up your PyCharm.
Coding
First of all we will be opening PyCharm from start menu under JetBrains folder
Create a new project named it OpenCV.
After creating new project it will take few minutes to setup editor for us and after completing this will on your screen
Package Installation
Now clear everything in main.py and it should be empty after that we will be creating a text file called requirement.txt in your project folder using cmd for that you have to open cmdand navigate to you project folder like this
now type notepad.exe requirement.txt it will ask you for create a new file and click on yes after that paste bellow packages name there.
1 2 3 4
opencv-python opencv-contrib-python numpy pillow
Save the file and close it now as we have saved the file we need to install all this packages by bellow command it will take a few minutes depending on your data transfer speed
1
pip install -r requirement.txt
I have already installed it so it will give me this output
Video detection
Close cmd and come back to your PyCharm, after we have installed all the required packages we will make a simple program for video capture so that we know that our video camera is working or not, but before we code in PyCharm we have to import all this packages we installed so follow me. First got to menu then File > Settings and you will see this window.
Open Project: OpenCV and in that select Python Interpreter in that add all this packages
Now we will be coding a small program on video detection.
1 2 3 4 5 6 7 8 9 10 11
import cv2 #importing opencv package capture = cv2.VideoCapture(0) # we will create a variable name capture to capture webcam of our device which is "0" or else you can write ip address in '' of your webcam
while(True): ret, frame = capture.read() # to read data from video capture variable cv2.imshow("Video Feed",frame) # to show live video camera feed if cv2.waitKey(1) & 0xFF == ord('q'): # we have set waitKey at 0 means infinite or you can write any miliseconds and for ord('q') for quiting in live feed by pressing q on keyboard break
capture.release() cv2.destroyAllWindows()
Now press shift + F10 from keyboard or go-to menu Run > Run ‘main’ to run the program you may be able to see a new window with the name Video Feed try it yourself and you will be able to see your face.
This is test image which I will be using it.
OpenCV Cascade
It means that our camera of our system is working properly now we need face detection cascades there are two ways of finding that files first is by downloading from here or by following commands open your cmd and type python or py after that type following commands
1 2
import cv2 print(cv2.__file__)
Go to the highlighted path and in there you will be able to see all the files and in that file there will be a folder called data will be there
Copy that folder and past it in your project and rename from data to cascade like this.
After doing we will be creating a new variable called face_cascade and in that variable we will use OpenCV, paste this code in your main.py file
1 2
import cv2 #add bellow this line face_cascade = cv2.CascadeClassifier('cascades/haarcascade_frontalface_alt.xml')
Using Face Classifier
Now we will be converting our colored BGR color to Gray color so that our cascade can understand the image properly, mostly face detection works in gray scale so we will be converting our colored frame to gray scale. For that you have to create a new variable called gray under ret, frame = capture.read(). Remember OpenCV uses BGR method while for other color code it is RGB you must be familiar with RGB so you will understand BGR. Now we will add this line into our code
1 2
ret, frame = capture.read() # add bellow this line gray = cv2.cvtColor(frame, cv2.COLOR_BGR2GRAY) # to convert BGR image to grayscale image
and don’t worry if your not able to understand the code I will be giving you project like so that you can download it and run it on your own. We will now detect faces in webcam, photo frame or video. For that we will be using gray scale which we have converted from BGR ti GRAY so for that we need detectMultiScale function for scale factor and minimum neighbors detection.
1 2
gray = cv2.cvtColor(frame, cv2.COLOR_BGR2GRAY) #add bellow this faces = face_cascade.detectMultiScale(gray, scaleFactor=1.5, minNeighbors=5) # you can play with the numbers as much as you want
now we will pe finding our face in frame by finding position and checking whether the face is present or not for that we will be using width, height, x direction, y direction of the video feed.
1 2 3
faces = face_cascade.detectMultiScale(gray, scaleFactor=1.5, minNeighbors=5) # add bellow this line for (x, y, w, h) in faces: print(x,y,w,h) # print coordinates of your face
This command will show you the coordinates of your face in the frame so that we can identify that someone is present here.
Now we will be drawing a square around our face so that we can clearly identify it for that we will be will be using gray scale image. Now we will make a region of interest or ROI using gray scale image to determine its width and height
1
2
3
4
for (x, y, w, h) in faces: print(x,y,w,h) # print bellow this line roi_gray = gray[y:y + h, x:x + h] # regoin of interest of gray scale image roi_color = frame[y:y + h, x:x + w] # regoin of interest of colored image
so now as we have found our region of interest we will check that whether it is working properly or not so we will capture our face by making a PNG fine
1
2
3
roi_color = frame[y:y + h, x:x + w] # add bellow this img_item = "my-image.png"# creating a variable name img_item cv2.imwrite(img_item, roi_color) # to create an image file where we can see our face only
What this above line will do is that it will create an PNG file with the name my-image.png in your project folder so that we can understand that which portion of our face is been captured.
After detecting our face and saving it in a PNG file what we will do is that we will create a border and track our live feed cam and see it more clearly
1 2 3 4 5 6
cv2.imwrite(img_item, roi_color) # add bellow this color = (0,0,255) # BGR format you can choose whatever you want go to this site to choose color https://wamingo.net/rgbbgr/ stroke = 2 end_cord_x = x + w end_cord_y = y + h cv2.rectangle(frame,(x, y), (end_cord_x, end_cord_y), color, stroke)
Until now what we have done is that we have just detecting our face using Cascades but as we have successfully done it so now we will be creating recognizer to recognize who is that person is for that we will be creating an algorithm. So now we will be creating new python file train-faces.py so that we will be writing all the algorithm in it to train our facial recognition system. After creating train-faces.py file we will create a folder of name images where we will be adding all images in it to train our trainer. Open train-faces.py and type the following code:
1 2
import os # to detect which kind of operating system we are been using example: Windows, Linux, Debian, Mac, etc. BASE_DIR = os.path.dirname(os.path.abspath(__file__)) # to automatical find out the path of our project
What we have done is that we told the system to find the path of our project automatically and also to detect os also and after detecting our project folder we will be adding our images directory so that we will be able to find all images at one place.
1 2
BASE_DIR = os.path.dirname(os.path.abspath(__file__)) # add bellow this image_dir = os.path.join(BASE_DIR, "images") # this will add images at the end of our base dir example: C:\User\Admin\Desktop\facedetection\images\
As our system or file has detected the path we will check all the images which are present in it.
1 2 3 4 5 6
image_dir = os.path.join(BASE_DIR, "images") # add bellow this line for root, dirs, files in os.walk(image_dir): # this will detect our image path for file in files: if file.endswith("png") or file.endswith("jpg"): # this is use to check whether there are png file or jpg files path = os.path.join(root, file) # this will join our project director and images folder path print(path) # to check all the apth of images
Now what we will do is that we will be giving labels to our directories which are present in images folder
1 2 3
path = os.path.join(root, file) # add bellow this line label = os.path.basename(root) # to give the label of our image folder print(label, path) # add label in old print function
So when we will run the code now we will be able to see path as well as label. So now we will be creating empty list.
Training images using NumPy array also we will be using PIL python library to grab pill of image
1 2 3
import cv2 #add bellow this import numpy as np from PIL import Image
After importing Image from PIL library we will be converting image into gray
1 2
print(label, path) # add bellow this pil_image = Image.open(path).convert("L") # to convert colored image to gray scale
Now we will be using NumPy array to train our images
1 2 3
pil_image = Image.open(path).convert("L") # add bellow this line image_array = np.array(pil_image, "uint8") print(image_array) # to check images array
We will check ROI of images so that we can train our trainer for that we need to import cv2 into our train-faces.py using our Cascades
1 2 3 4 5
import cv2 BASE_DIR = os.path.dirname(os.path.abspath(__file__)) # to automatical find out the path of our project
image_dir = os.path.join(BASE_DIR, "images") # this will add images at the end of our base dir example: C:\User\Admin\Desktop\facedetection\images\ face_cascade = cv2.CascadeClassifier('cascades/haarcascade_frontalface_alt2.xml') # add this line
After importing OpenCV and Cascades we will be detecting faces using detectMultiScale.
1 2 3 4 5
print(image_array) # add bellow this faces = face_cascade.detectMultiScale(image_array, scaleFactor=1.5, minNeighbors=5) for (x, y, w, h) in faces: roi = image_array[y:y + h, x:x + w] x_train.append(roi)
We will be giving labels so that it would be easy to understand it properly, also not that it would be easy to see who is the person in the video feed or photo frame for that we will be creating a variable.
1 2 3 4 5 6 7 8 9 10 11 12 13 14 15
face_cascade = cv2.CascadeClassifier('cascades/haarcascade_frontalface_alt2.xml') # add bellow this line current_id = 0# creating an id starting with 0 label_ids = {} # to create and empty directory # Now come down to this line print(label, path) # ad bellow this ifnot label in label_ids: # it will check whether the labels are there or not label_ids[label] = current_id current_id += 1 id_ = label_ids[label] print(label_ids) # to print label ids # Now come down to this line x_train.append(roi) # add bellow this line y_labels.append(id_) print(y_labels) print(x_train)
What we have done is that we have created labels ids for each and every image we have so after doing that we will saving all thoes lables so that it would be easy for our program to recognize it for that we need pickle so I assume that you know who to import any library so import pickle. Now go to the bottom of you train-faces.py file and paste bellow code but before pasting this code make sure to add # infront of print function.
1
2
withopen("labels.pickle", "wb") as f: pickle.dump(label_ids, f)
After this we will train our OpenCV recognizer for each an every images so that it can recognize it propely so for that we will create a variable call recognizer.
1
2
face_cascade = cv2.CascadeClassifier('cascades/haarcascade_frontalface_alt2.xml') # add bellow this line recognizer = cv2.face.LBPHFaceRecognizer_create() #creating our face recognizer
Successful creation of our recognizer we will be needing numpy array to save all those array in a single file and remember one thing the more numbers of photo will take more time to write it also it deppends on speed of your devices also.
1
2
3
4
withopen("labels.pickle", "wb") as f: pickle.dump(label_ids, f) # add bellow this recognizer.train(x_train, np.array(y_labels)) # using numpy array we will be training our recognizer recognizer.save("trainer.yml") # and from above training we will be saving it in a single file called trainner.yml
As we have completed our train-faces.py we will run it and train our project so that we can recognize our faces, so now go to your cmd and type py tain-faces.py and wait until you get this message
1
Process finished with exit code 0
After you see this message it means that our trainer has been successfully trained so main.py is been left to update for final run. Now open your main.py file and past this line
1 2 3 4 5
face_cascade = cv2.CascadeClassifier('cascades/haarcascade_frontalface_alt2.xml') # add bellow this recognizer = cv2.face.LBPHFaceRecognizer_create() #creating our face recognizer recongnizer.read("trainer.yml") withopen("labels.pickle", "rb") as f: og_labels = pickle.load(f)
What we did is imported trainer.yml so that we can read all the data we have been trained data. After that we will be import all the the tags and ids we have created.
1 2 3 4
roi_color = img[y:y + h, x:x + w] # add bellow this line id_, conf = recognizer.predict(roi_gray) if conf>= 45: print(id_)
Loading Label Names from Pickle
Now we will labels from labels.pickle so that we can identify labels, so what we will do is fetch all the labels from that file.
1 2 3
recognizer.read("trainer.yml") # add bellow this
labels = {"person_name": 1} # display person name
What we did is we will display person name so to do that we are going to add this line to display it
1 2
og_labels = pickle.load(f) # add bellow this labels = {v:k for k,v in labels.items()}
Now we will print ids
1 2
print(id_) # add bellow this
Put Text on your face
We will put text on our webcam face recognition so that we can identify who is that person is for that we will be using putText function.
1 2 3 4 5 6
if conf >= 45: print(id_) print(labels[id_]) # add bellow this font = cv2.FONT_HERSHEY_SIMPLEX name = labels[id_] color = (0,0,255) # BGR choose any color you like
We will resize little bit so that it reads perfectly in train-faces.py
import cv2 import pickle # url = '' # add your remote ip of webcam example 'http://192.168.0.1/video' or 'http://192.168.0.1' depending on your ip even you can use security camera ip also face_cascade = cv2.CascadeClassifier('cascades/haarcascade_frontalface_alt2.xml')
recognizer = cv2.face.LBPHFaceRecognizer_create() recognizer.read("trainer.yml") labels = {"person_name": 1} withopen("labels.pickle","rb") as f: og_labels = pickle.load(f) labels = {v:k for k,v in og_labels.items()} cap = cv2.VideoCapture(0) # comment this if your using ip camera # cap = cv2.VideoCapture(url) # uncomment this line to use remote camera url cap.set(3,512) cap.set(4,512) cap.set(10,150)
whileTrue: # Capture frame-by-frame ret, frame = cap.read() gray = cv2.cvtColor(frame, cv2.COLOR_BGR2GRAY) faces = face_cascade.detectMultiScale(gray, scaleFactor=1.5, minNeighbors=5) for (x, y, w, h) in faces: # print(x,y,w,h) roi_gray = gray[y:y+h, x:x+w] roi_color = frame[y:y+h, x:x+w] id_, conf = recognizer.predict(roi_gray) if conf>=45: # and conf<=85: # print(id_) # print(labels[id_]) font = cv2.FONT_HERSHEY_SIMPLEX name = labels[id_] color = (0,255,0) stroke = 2 cv2.putText(frame, name, (x,y), font, 1, color, stroke, cv2.LINE_AA)
img_item = "test.png" cv2.imwrite(img_item, roi_color) color = (0,255,0) # BGR stroke = 2 end_cord_x = x + w end_cord_y = y + h cv2.rectangle(frame, (x, y), (end_cord_x, end_cord_y), color, stroke)
# Display the resulting frame cv2.imshow('Frame',frame) if cv2.waitKey(1) & 0xFF == ord('q'): break
Here is the source code OpenCV Facial Recognition on GitHub if you have any issues then you can ask there.
]]>Face detection is a computer technology being used in a variety of applications that identifies human faces in digital images. Face detection also refers to the psychological process by which humans locate and attend to faces in a visual scene.WSL Graphicshttps://mistrysiddh.com/2021/06/19/WSLG/2021-06-19T04:29:27.000Z2026-07-24T14:33:54.391ZRecaps
In previous post we have seen how to install Windows Subsystem Linux in your windows 10, so in this we will see how to use GUI on your system without any kind of software or other utilities. The main purpose of using this is so that you can easily use both the windows and Linux apps together on single operating system, after you have installed this WSLG on your system it will look like this.
Let’s start the installation process.
Brief Introduction
WSLg is short for Windows Subsystem for Linux GUI and the purpose of the project is to enable support for running Linux GUI applications (X11 and Wayland) on Windows in a fully integrated desktop experience.
WSLg provides an integrated experience for developers, scientists or enthusiasts that prefer or need to run Windows on their PC but also need the ability to run tools or applications which works best, or exclusively, in a Linux environment. While users can accomplish this today using a multiple system setup, with individual PC dedicated to Windows and Linux, virtual machine hosting either Windows or Linux, or an XServer running on Windows and projected into WSL, WSLg provides a more integrated, user friendly and productive alternative.
WSLg strives to make Linux GUI applications feel native and natural to use on Windows. From integration into the Start Menu for launch to appearing in the task bar, alt-tab experience to enabling cut/paste across Windows and Linux applications, WSLg enables a seamless desktop experience and workflow leveraging Windows and Linux applications.
Installation
Pre-requirements
Before you begin installation of WSLG you have to check few thing on your system so that there is no error while installation. Here are the requirements:
Windows 10 Insider Preview build 21362+ (required for now but in future it will be available for normal builds if you aren’t on this build then go to setup Windows Insider and get latest versions of Insider Preview build)
Choose your GPU (if you have already install drivers then you can skip this steps)
I assume that you have installed WSL on your system but if you haven’t installed it yet then go to WSL2 Installation and install it. Moving further If you have an existing WSL installation without WSLg and want to update to the latest version of WSL which includes WSLg, run the command wsl --update from an elevated command prompt, and also download and install Linux GUI support on your system so that the software requirement to run WSLg will be installed automatically.
Please note that WSLg is only compatible with WSL 2 and will not work for WSL distribution configured to work in WSL 1 mode. Verify that your Linux distro is configured for running in WSL 2 mode, if not switch to WSL 2. While you can continue to run Linux distro in WSL 1 mode after installing WSLg if you so desired, a distro configured to run in WSL 1 mode will not be able to communicate with WSLg and will not be able to run GUI applications.
You can list your currently installed distro and the version of WSL they are configured for using the following command from an elevated command prompt.
1
wsl --list-v
If running in version 1 mode, switch to version 2. This can take a while.
1
wsl --set-version _distro_name_ 2
Restart WSL by running this command from an elevated command prompt, make sure to save any pending work first:
1
wsl --shutdown
Updating WSL + WSLg
To update to the latest version of WSL and WSLg released for preview, simply run wsl --update from an elevated command prompt or powershell.
You’ll need to restart WSL for the changes to take effect. You can restart WSL by running wsl --shutdown from an elevated command prompt. If WSL was currently running, it will shutdown, make sure to first save any in progress work! WSL will be automatically restarted the next time you launch a WSL application or terminal.
First Launch
If you have installed the Ubuntu Linux distro per these instructions, you’ll find an Ubuntu icon in your start menu, launch it. This will launch the WSL 2 VM, launch the Ubuntu WSL distro in that VM and give you a terminal to interact with it. Voila! You’re running Linux on Windows!
If you would like to explore additional Linux distributions built for WSL, you can use the wsl --list --online command from an elevated command prompt to enumerate the list of available distributions for your system. You can have multiple Linux distributions installed within WSL and they will happily coexist side-by-side, so don’t be scared to experiment and try things out. Now let’s install and try some apps
Install and run GUI apps
If you want to get started with some GUI apps, you can run the following commands from your Linux terminal to download and install some popular applications. If you are using a different distribution than Ubuntu, it may be using a different package manager.
Once these applications are installed, you’ll find them in your start menu under the distro name. For example Ubuntu -> Microsoft Edge. You can also launch these from your terminal window using the commands:
xcalc, xclock, xeyes
gimp
gedit ~/.bashrc
nautilus
vlc
google-chrome
teams
microsoft-edge
Congrats you are done and ready to use GUI apps!
]]>WSLg is short for Windows Subsystem for Linux GUI and the purpose of the project is to enable support for running Linux GUI applications (X11 and Wayland) on Windows in a fully integrated desktop experience.WSL Installhttps://mistrysiddh.com/2021/06/15/WSL2Install/2021-06-15T06:31:11.000Z2026-07-24T14:33:54.391Z
What is WSL?
The Windows Subsystem for Linux lets developers(WSL) run a GNU/Linux environment – including most command-line tools, utilities, and applications – directly on Windows, unmodified, without the overhead of a traditional virtual machine or dual-boot setup. You can:
Choose your favorite GNU/Linux distributions from the Microsoft Store.
Run common command-line tools such as grep, sed, awk, or other ELF-64 binaries.
Run Bash shell scripts and GNU/Linux command-line applications including:
Install additional software using your own GNU/Linux distribution package manager.
Invoke Windows applications using a Unix-like command-line shell.
Invoke GNU/Linux applications on Windows.
What is WSL 2?
WSL 2 is a new version of the Windows Subsystem for Linux architecture that powers the Windows Subsystem for Linux to run ELF64 Linux binaries on Windows. Its primary goals are to increase file system performance, as well as adding full system call compatibility.
This new architecture changes how these Linux binaries interact with Windows and your computer’s hardware, but still provides the same user experience as in WSL 1 (the current widely available version).
Individual Linux distributions can be run with either the WSL 1 or WSL 2 architecture. Each distribution can be upgraded or downgraded at any time and you can run WSL 1 and WSL 2 distributions side by side. WSL 2 uses an entirely new architecture that benefits from running a real Linux kernel. Let’s see the comparison between WSL 1 and WSL 2
Comparing WSL 1 and WSL 2
The primary difference and reasons for updating the Windows Subsystem for Linux from WSL 1 to WSL 2 are to:
increase file system performance,
support full system call compatibility. WSL 2 uses the latest and greatest in virtualization technology to run a Linux kernel inside of a lightweight utility virtual machine (VM). However, WSL 2 is not a traditional VM experience.
Comparing features
Feature
WSL 1
WSL 2
Integration between Windows and Linux
✅
✅
Fast boot times
✅
✅
Small resource foot print compared to traditional Virtual Machines
✅
✅
Runs with current versions of VMware and VirtualBox
✅
✅
Managed VM
❌
✅
Full Linux Kernel
❌
✅
Full system call compatibility
❌
✅
Performance across OS file systems
✅
❌
Performance across OS file systems
We recommend against working across operating systems with your files, unless you have a specific reason for doing so. For the fastest performance speed, store your files in the WSL file system if you are working in a Linux command line (Ubuntu, OpenSUSE, etc). If you’re working in a Windows command line (PowerShell, Command Prompt), store your files in the Windows file system.
For example, when storing your WSL project files:
Use the Linux file system root directory: \\wsl$\Ubuntu-18.04\home\<user name>\Project
Not the Windows file system root directory: C:\Users\<user name>\Project
All currently running distributions (wsl -l) are accessible via network connection. To get there run a command [WIN+R] (keyboard shortcut) or type in File Explorer address bar \\wsl$ to find respective distribution names and access their root file systems.
You can also use windows commands inside WSL’s Linux Terminal. Try opening a Linux distribution (ie Ubuntu), be sure that you are in the Linux home directory by entering this command: cd ~. Then open your Linux file system in File Explorer by entering (don’t forget the period at the end): powershell.exe /c start .
WSL 2 is only available in Windows 10, Version 1903, Build 18362 or higher. Check your Windows version by selecting the Windows logo key + R, type winver, select OK. (Or enter the ver command in Windows Command Prompt). You may need to update to the latest Windows version. For builds lower than 18362, WSL is not supported at all.
Installation of WSL 2
There are two options available for installing Windows Subsystem for Linux (WSL):
The wsl --install simplified install command requires that you join the Windows Insiders Program and install a preview build of Windows 10 (OS build 20262 or higher), but eliminates the need to follow the manual install steps. All you need to do is open a command window with administrator privileges and run wsl --install, after a restart you will be ready to use WSL.
Manual Installation Steps
If you are not on a Windows Insiders build, the features required for WSL will need to be enabled manually following the steps below.
Step 1 - Enable the Windows Subsystem for Linux
You must first enable the “Windows Subsystem for Linux” optional feature before installing any Linux distributions on Windows.
To update to WSL 2, you must be running Windows 10.
For x64 systems: Version 1903 or higher, with Build 18362 or higher.
For ARM64 systems: Version 2004 or higher, with Build 19041 or higher.
Builds lower than 18362 do not support WSL 2. Use the Windows Update Assistant to update your version of Windows.
If you are running Windows 10 version 1903 or 1909, open “Settings” from your Windows menu, navigate to “Update & Security” and select “Check for Updates”. Your Build number must be 18362.1049+ or 18363.1049+, with the minor build # over .1049. Read more: WSL 2 Support is coming to Windows 10 Versions 1903 and 1909. See the troubleshooting instructions.
Step 3 - Enable Virtual Machine feature
Before installing WSL 2, you must enable the Virtual Machine Platform optional feature. Your machine will require virtualization capabilities to use this feature.
If you’re using an ARM64 machine, please download the ARM64 package instead. If you’re not sure what kind of machine you have, open Command Prompt or PowerShell and enter: systeminfo | find "System Type". Caveat: On non-English Windows versions, you might have to modify the search text, for example, in German it would be systeminfo | find "Systemtyp".
Run the update package downloaded in the previous step. (Double-click to run - you will be prompted for elevated permissions, select ‘yes’ to approve this installation.)
Step 5 - Set WSL 2 as your default version
Open PowerShell and run this command to set WSL 2 as the default version when installing a new Linux distribution:
1
wsl --set-default-version2
Step 6 - Install your Linux distribution of choice
manual installation
If you are on Windows 10 Insider Preview build 21362+ then just type the following commands in powershell
1 2
#this command will show you list of all distribution which is been supported by windows wsl --list--online
as soon as paste the above command you will get this message there
1 2 3 4 5 6 7 8 9 10 11 12 13
PS C:\Users\SIDDH> wsl --list --online
The following is a list of valid distributions that can be installed.
Install using 'wsl --install -d <Distro>'.

NAME            FRIENDLY NAME
Ubuntu          Ubuntu
Debian          Debian GNU/Linux
kali-linux      Kali Linux Rolling
openSUSE-42     openSUSE Leap 42
SLES-12         SUSE Linux Enterprise Server v12
Ubuntu-16.04    Ubuntu 16.04 LTS
Ubuntu-18.04    Ubuntu 18.04 LTS
Ubuntu-20.04    Ubuntu 20.04 LTS
you can choose any of the distro you want to install in your system say for example if you want to install Ubuntu then just past the following command
1
wsl --install-d ubuntu
and it will start installing into your system after completion it will ask you for a username and password set those two parameters and you will be able to use Ubuntu in your system without dual-boot
Open the Microsoft Store and select your favorite Linux distribution.
The following links will open the Microsoft store page for each distribution:
Windows Terminal enables multiple tabs (quickly switch between multiple Linux command lines, Windows Command Prompt, PowerShell, Azure CLI, etc), create custom key bindings (shortcut keys for opening or closing tabs, copy+paste, etc.), use the search feature, and custom themes (color schemes, font styles and sizes, background image/blur/transparency).
Now you can use linux as well as windows at a same time. In next post we will be seeing how to GUI app in WSL2.
]]>The Windows Subsystem for Linux lets developers run a GNU/Linux environment -- including most command-line tools, utilities, and applications -- directly on Windows, unmodified, without the overhead of a traditional virtual machine or dual-boot setup.Nanotechnologyhttps://mistrysiddh.com/2021/04/20/Nanotechnology/2021-04-20T15:13:49.000Z2026-07-24T14:33:54.389ZWhat is Nanotechnology?
Nanotechnology is science, engineering, and technology conducted at the nanoscale, which is about 1 to 100 nanometers. Nanoscience and nanotechnology are the study and application of extremely small things and can be used across all the other science fields, such as chemistry, biology, physics, materials science, and engineering. It is the leading technology in the world where all the material are been made on the nanoscale level, you must have not been noticed that Microcontroller which we are using in our circuits and much more applications are been made up to the nanoscale level which is called VLSI Very Large Scale Integration. Nanotechnology is also called nanotech.
Origins
Wikipidia The concepts that seeded nanotechnology were first discussed in 1959 by renowned physicist Richard Feynman in his talk There's Plenty of Room at the Bottom, in which he described the possibility of synthesis via direct manipulation of atoms.
The term Nanotechnology was first used by Norio Taniguchi in 1974, though it was not widely known. Inspired by Feynman’s concepts, K. Eric Drexler used the term nanotechnology in his 1986 book Engines of Creation: The Comming Era of Nanotechnology which proposed the idea of a nanoscale “assembler” which would be able to build a copy of itself and the items of arbitrary complexity with atomic control. It’s also been said that nanotechnology will be able to perform AI level operation which will help to eradicate those diseases which humans can’t remove it, say for example AIDS, Radioactive materials from the body, also this CoronaVirus from current pandemic year.
Fundamental Concepts
Nanotechnology is the engineering of functional systems at the molecular scale. This covers both current work and concepts that are more advanced. In its original sense, nanotechnology refers to the projected ability to construct items from the bottom up, using techniques and tools being developed today to make complete, high performance products.
One nanometer (nm) is one billionth, or 10−9, of a meter. By comparison, typical carbon-carbon bond lengths, or the spacing between these atoms in a molecule, are in the range 0.12–0.15 nm, and a DNA double-helix has a diameter around 2 nm. On the other hand, the smallest cellular life-forms, the bacteria of the genus Mycoplasma, are around 200 nm in length. By convention, nanotechnology is taken as the scale range 1 to 100 nm following the definition used by the National Nanotechnology Initiative in the US. The lower limit is set by the size of atoms (hydrogen has the smallest atoms, which are approximately a quarter of a nm kinetic diameter) since nanotechnology must build its devices from atoms and molecules. The upper limit is more or less arbitrary but is around the size below which phenomena not observed in larger structures start to become apparent and can be made use of in the nano device.[26] These new phenomena make nanotechnology distinct from devices which are merely miniaturised versions of an equivalent macroscopic device; such devices are on a larger scale and come under the description of microtechnology.[27]
To put that scale in another context, the comparative size of a nanometer to a meter is the same as that of a marble to the size of the earth.[28] Or another way of putting it: a nanometer is the amount an average man’s beard grows in the time it takes him to raise the razor to his face.[28]
Two main approaches are used in nanotechnology. In the “bottom-up” approach, materials and devices are built from molecular components which assemble themselves chemically by principles of molecular recognition.[29] In the “top-down” approach, nano-objects are constructed from larger entities without atomic-level control.[30]
Areas of physics such as nanoelectronics, nanomechanics, nanophotonics and nanoionics have evolved during the last few decades to provide a basic scientific foundation of nanotechnology.
Current research
Nanomaterials
The nanomaterials field includes subfields which develop or study materials having unique properties arising from their nanoscale dimensions.
Interface and colloid science has given rise to many materials which may be useful in nanotechnology, such as carbon nanotubes and other fullerenes, and various nanoparticles and nanorods. Nanomaterials with fast ion transport are related also to nanoionics and nanoelectronics.
Nanoscale materials can also be used for bulk applications; most present commercial applications of nanotechnology are of this flavor.
Progress has been made in using these materials for medical applications; see Nanomedicine.
Nanoscale materials such as nanopillars are sometimes used in solar cells which combats the cost of traditional silicon solar cells
Development of applications incorporating semiconductor nanoparticles to be used in the next generation of products, such as display technology, lighting, solar cells and biological imaging; see quantum dots.
Recent application of nanomaterials include a range of biomedical applications, such as tissue engineering, drug delivery, antibacterials and biosensors.
Research and development
Because of the variety of potential applications (including industrial and military), governments have invested billions of dollars in nanotechnology research. Prior to 2012, the USA invested $3.7 billion using its National Nanotechnology Initiative, the European Union invested $1.2 billion, and Japan invested $750 million. Over sixty countries created nanotechnology research and development (R&D) programs between 2001 and 2004. In 2012, the US and EU each invested $2.1 billion on nanotechnology research, followed by Japan with $1.2 billion. Global investment reached $7.9 billion in 2012. Government funding was exceeded by corporate R&D spending on nanotechnology research, which was $10 billion in 2012. The largest corporate R&D spenders were from the US, Japan and Germany which accounted for a combined $7.1 billion.
Rank
Organization
Country
First Patents
1
Samsung Electronics
South Korea
2578
2
Nippon Steel & Sumitomo Metal
Japan
1490
3
IBM
United States
1360
4
Toshiba
Japan
1298
5
Canon Inc.
Japan
1162
6
Hitachi
Japan
1100
7
University of California, Berkeley
United States
1055
8
Panasonic
Japan
1047
9
Hewlett-Packard
United States
880
10
TDK
Japan
839
]]>Nanotechnology, also shortened to nanotech, is the use of matter on an atomic, molecular, and supramolecular scale for industrial purposes. The earliest, widespread description of nanotechnology referred to the particular technological goal of precisely manipulating atoms and molecules for fabrication of macroscale products, also now referred to as molecular nanotechnology.Roboticshttps://mistrysiddh.com/2021/04/13/Robotics/2021-04-13T09:32:14.000Z2026-07-24T14:33:54.390Z
Robotics
Robotics is the intersection of science, engineering and technology that produces machines, called robots, that substitute for (or replicate) human actions. As you have seen in the movie such as I robot, wall-e, Transformer etc. where robots are been there. As time passes technology also evolves not also that it gets smatter and smatter also.
What is a Robot?
A robot is the product of the robotics field, where programmable machines are built that can assist humans or mimic human actions. Robots were originally built to handle monotonous tasks (like building cars on an assembly line), but have since expanded well beyond their initial uses to perform tasks like fighting fires, cleaning homes and assisting with incredibly intricate surgeries. Each robot has a differing level of autonomy, ranging from human-controlled bots that carry out tasks that a human has full control over to fully-autonomous bots that perform tasks without any external influences.
Characteristics
Robots all consist of some sort of mechanical construction. The mechanical aspect of a robot helps it complete tasks in the environment for which it’s designed. For example, the Mars 2020 Rover’s wheels are individually motorized and made of titanium tubing that help it firmly grip the harsh terrain of the red planet.
Robots need electrical components that control and power the machinery. Essentially, an electric current (a battery, for example) is needed to power a large majority of robots.
Robots contain at least some level of computer programming. Without a set of code telling it what to do, a robot would just be another piece of simple machinery. Inserting a program into a robot gives it the ability to know when and how to carry out a task.
Robots all consist of some sort of mechanical construction. The mechanical aspect of a robot helps it complete tasks in the environment for which it’s designed. For example, the Mars 2020 Rover’s wheels are individually motorized and made of titanium tubing that help it firmly grip the harsh terrain of the red planet. Robots need electrical components that control and power the machinery. Essentially, an electric current (a battery, for example) is needed to power a large majority of robots. Robots contain at least some level of computer programming. Without a set of code telling it what to do, a robot would just be another piece of simple machinery. Inserting a program into a robot gives it the ability to know when and how to carry out a task.
Utilization of Robotics
According to the International Federation of Robotics, 1.3 million industrial robots will be in use by 2018. Robotics continues to emerge as a large and influential market.
The following five industries are utilizing this new technology to boost efficiency and convenience for both businesses and consumers.
1. Health Care
Advances in robotics have the potential to change a wide variety of health care practices, such as surgery, rehabilitation, therapy, patient companionship, and everyday activities. Robotic instruments used in health care are not designed to take over the duties of health care professionals, but rather to make their work easier.
The da Vinci Surgical System, for example, utilizes the hand movements of the operating surgeon to control tiny, precise instruments inside the patient’s body. This allows for minimally invasive procedures in surgeries such as cardiac, colorectal, gynecologic, head and neck, thoracic, and urologic.
For patients who have suffered strokes or spinal cord injuries, or who are paralyzed, robotic devices such as exoskeletons have the ability to assist and guide them during rehabilitation. In addition, robotic lifting machines can help nurses lift patients who are elderly or immobile. Companion and therapeutic robots such as Paro can also comfort patients with mental health issues with a system of sensors, microphones, and cameras.
2. Agriculture
To help increase productivity while lowering overall costs, the agriculture industry has been actively working to adopt different forms of robotic technology. Farmers have already been using tractors and harvesters that are self-guided by GPS. Recently, there has been a rise in the experimental use of autonomous systems that automate operations like pruning, thinning, mowing, spraying, and weed removal. Sensor technology is also being utilized to manage pests and diseases that affect crops.
3. Food Preparation
One of the more extravagant advancements in robot technology will soon be available in the kitchen. Automated and intelligent robots — such as those invented by Moley Robotics — will be able to prepare and cook hundreds of meals in a home kitchen. This robotic chef will be controlled via a smartphone, and once the controller chooses a recipe and arranges pre-packaged containers of cut and prepared ingredients, the robot will be able to cook the predetermined meal quickly and efficiently. Moley Robotics is also developing a consumer-friendly version of a robot kitchen, which will include a built-in smart dishwasher and refrigerator.
4. Manufacturing
Robotics are being used in many aspects of manufacturing to help increase productivity and efficiency while lowering production costs. Similar to the health care industry, many robots in manufacturing collaborate with workers to perform repetitive, monotonous, or intricate tasks under the worker’s guidance and control. With these machines, precision is valued more than speed, as is the ability to be reprogrammed for specific tasks of different sizes and complexities. Robotic manufacturing technology is also becoming safer to operate. Cameras, sensors, and automatic shut-off capabilities enable robots to sense and stay clear of humans in the workplace.
5. Military
In the military and public safety sectors, robotic technology is being applied in many areas. One highly visible area involves unmanned drones. These machines can be used for surveillance and support operations on the battlefield. Military drones flying over areas of war and conflict, in hostage situations, and for natural and manmade disasters are able to assess danger levels and provide soldiers and first responders with real-time information. Drones are revolutionizing disaster response since they can access hazardous areas with greater speed and precision without placing human responders in harm’s way.
Robotic devices are already establishing a wide presence in several commercial industries. As robotic technologies become more affordable, they will soon be available in various forms for consumers as well, with the ability to impact our lives in countless ways.
Pros && Cons
Pros
The first and the foremost advantage of having robots in workplaces is their cost. Robots are much cheaper than humans and their cost is now decreasing.
It’s a fact that we cannot compare human abilities with robots but robotic capabilities are now growing quickly. For example, if you run an essay writing service, you can use robots to perform every kind of research related to any subject.
Because robots are more active and don’t get tired like humans, the collaboration between humans and robots is reducing absenteeism. The pace of human cannot increase hence robots are helping humans.
Robots are more precise than humans; they don’t tremble or shake as human hands. Robots have smaller and versatile moving parts which help them in performing tasks with more accuracy than humans.
There is no doubt that robots are significantly stronger and faster than humans.
Robots come in any shape and size, depending upon the need of the task.
Robots can work anywhere in any environmental condition whether it is space, underwater, in extreme heat or wind etc. Robots can be used everywhere where human safety is a huge concern.
Robots are programmed by a human; they cannot say no to anything and can be used for any dangerous and unwanted work where humans may deny to offer their services. For example, many robotic probes have been sent into space but have never returned.
Robots in warfare are saving more lives and have now proven to be very successful.
Robots are now being used in the chemical industry and can, for example deal with chemical spills in a nuclear plant, which would otherwise pose a major health concern.
The best thing about robots is that they never get tired and can literally work on certain tasks 24 x 7. The human brain gets tired if it’s working continuously but robots never get tired of what they are programmed to do and they can work on certain tasks error free.
Cons
Where robots are increasing the efficiency in many businesses, they are also increasing the unemployment rate. Because of robots, human labour is no longer required in many factories and manufacturing plants.
Robots can certainly handle their prescribed tasks, but they typically cannot handle unexpected situations.
The ROI of your business may suffer if your operation relies on too many robots. They have higher expenses than humans, so at the end of the day you may not always achieve the desired ROI.
Robots may have AI but they are certainly not as intelligent as humans. They can never improve their jobs outside the pre-defined programming because they simply cannot think for themselves.
Robots installed in workplaces still require manual labour attached to them. Training those employees on how to work with the robots definitely has a cost attached to it.
Robots have no sense of emotions or conscience. They lack empathy and this is one major disadvantage of having an emotionless workplace.
Robots operate on the basis of information fed to them through a chip. If one thing goes wrong the entire company bears the loss.
Where a robot saves times, on the other hand it can also result in a lag. It is, after all, a machine so you cannot expect too much from them. If a robot malfunctions, you need extra time to fix it, which would require reprogramming.
If ultimately robots would do all the work, and the humans will just sit and monitor them, health hazards will increase rapidly. Obesity will be on top of the list.
So there are advantages, but there are disadvantages as well. It is the twenty first century and we cannot work without machines.
Humans are still considered far more efficient than robots when it comes to decision making powers, handling difficult situations, brainstorming, and generally bringing a sense of emotion and empathy into a workplace.
]]>Robotics is the intersection of science, engineering and technology that produces machines, called robots, that substitute for (or replicate) human actions. WALL-E. These over-exaggerated, humanoid concepts of robots usually seem like a caricature of the real thing...or are they more forward thinking than we realize? Robots are gaining intellectual and mechanical capabilities that don’t put the possibility of a R2-D2-like machine out of reach in the future.Agnikul Cosmoshttps://mistrysiddh.com/2021/03/29/agnikul-cosmos/2021-03-29T09:59:18.000Z2026-07-24T14:33:54.392ZAgnikul
"Agnikul” is a derivative of the Sanskrit word - “Gurukul” and it could be interpreted to mean “a place where people learn to use fire”. They are a group of enthusiasts, rocket scientists, engineers, programmers, lawyers, and more.
First we will see little bit of information of 3D printer.
3D Printer
3D printing, or additive manufacturing, is the construction of a three-dimensional object from a CAD model or a digital 3D model. The term “3D printing” can refer to a variety of processes in which material is deposited, joined or solidified under computer control to create a three-dimensional object, with material being added together (such as plastics, liquids or powder grains being fused together), typically layer by layer.
What is 3D Printer?
3D printing or additive manufacturing is a process of making three dimensional solid objects from a digital file. The creation of a 3D printed object is achieved using additive processes. In an additive process an object is created by laying down successive layers of material until the object is created. Each of these layers can be seen as a thinly sliced cross-section of the object. 3D printing is the opposite of subtractive manufacturing which is cutting out / hollowing out a piece of metal or plastic with for instance a milling machine. 3D printing enables you to produce complex shapes using less material than traditional manufacturing methods.
How does 3D Printer works?
3D printing also called additive manufacturing can be thought has creative object using successive addition. 3D printer usually works by printing a layer over a previous printed layer and repeating the task till the objective is completed. Just like 2D printers, 3D printers also come equipped with different techniques to achieve the same task. Each having it’s own advantages. FDM method being the most widely used, achieves the printing task by melting a filament and tracing a pre determined path with the extruder and then rising the extruder and then tracing the next path over the previous one.
Agnikul
Bringing Space Within Everyone’s Reach Going to space shouldn’t be the hardest part of utilizing, living in or working from space. So, why not design & build a product that makes the earth-to-space journey as simple, as quick and as affordable as possible?
Configuration
Parameters
Value
Max Payload
100kg to 700KM LEO (Low Earth Orbit)
Height
18M
Diameter
1.3M
Lift off Mass
14000KG
Stage 1
Agnibaan’s first stage is powered by 7 Agnite engines each delivering 25 kN of thrust at sea level. All of these engines are electric pump fed engines allowing for simplified engine design and highly configurable engine clustering architectures.
Capable of operating with a sea level Isp of 285 seconds, the entire combustion section here is a single piece assembly and 100% 3D printed.
Stage 2
Our second stage is powered by the Agnite vacuum optimized engine. Agnite is the same engine that powers our first stage as well. It can deliver upto 355 seconds of Isp in vacuum. Running an electric pump fed engine offers greater & finer propellant utilization techniques to enhance payload capacity.
Stage 3 - Baby Stage
An optional baby stage sits inside the payload fairing with an envelope large enough for almost all small satellite needs.
Agnibaan is a customizable vehicle. When we were at the drawing board, we carefully analyzed what our customers really needed. We then engineered enough flexibility into the vehicle while carefully designing to ensure reliability. Removing a few engines and flying is more involved than it sounds. We had to ensure vehicle controllability, stability, lift off thrust-to-weight ratio (& many other parameters) made sense for each of these versions.
Technology is eveloving day by day we don’t know what’s will the next invention will be done by human being no one can predict, also not that the technology has reach to that level that we can create own hyperdrive and travel through gallaxys in the space from one to anther.
]]><h2 id="Agnikul">Agnikul</h2>
<p><img src="/images/posts/agnikul-cosmos.png" alt="Agnikul"></p>
<p>"Agnikul” is a derivative of the SanAre We Living in Simulation Part 06https://mistrysiddh.com/2021/02/05/Are-We-Living-In-Simulation-Part-06/2021-02-05T06:08:49.000Z2026-07-24T14:33:54.386ZRecap
As in part 1, we have talked about Quantum Computers, Facebook AI Chat, and Predictions of AI Robots wherein part 2 we had a recap of part 1 and also The Matrix movie, Roswell UFO Incident, wherein part 3 we discussed on MKUltra performed by US Central Intelligence Agency, Black Mirror: Bandersnatch movie where you can control Stefan Butler by given two choices which leads to a different path in the movies. In part 4 we talked about UFO also we seen Space Mysteries of Restored Apollo 11 and also we saw the video a mysterious video where an unidentified spacecraft refuelling itself from the sun. In part 5 we talked about time travel where we seen some of the most known time travel and reference in the article about Sid Hurwich which was about time machine which can Freeze Time, also we saw many mysteries of Mike Tyson Match, Charlie Chaplin Moive, London Bridge Opening, A man from 2256, Swiss ring watch, 1500 years old mummy wearing Adidas sneaker shoe, 17th century astronaut, The man from Taured , John Titor well if the time travel is possible then it would be much more terrifying then we thought because they can go back to time and change the future or can destroy the future but there are many rules of travelling back or forward in time.
Cicada 3301
Everything you need to know about Cicada 3301 (An internet Mystery)
Of late, you can find several puzzle games online available in the market for users all around the world. These puzzle games are easy to play and you are not going to face any issues or confusion for sure. But Cicada 3301 is something different from those types of puzzle games which you might have played in the past with your family members and relatives in your free time. On the year 4th January 2012, the mysterious and hardest puzzle on the internet was launched named “Cicada 3301”. It is one of the most mysterious and elaborate puzzles available today for people across the world.
The main purpose of the puzzles each year has been to carefully recruit the best and talented individuals. But the ultimate purpose is still not known to the people. As per some reviews, it has been stated that Cicada 3301 is mainly a secret society to improve privacy, cryptography, and anonymity. It would be better for you to understand that the name Cicada 3301 is given to a mysterious internet organization which has published sets of puzzle several times to recruit the most intelligent and fastest code breakers from all around the world. This puzzle was first published on sites like 4chan and Reddit and remains active for nearly a month. Do you want to know more about the Cicada 3301 and how it works? If yes is your answer, then here you would get all the information you are looking for right now!
What are the Points of Cicada 3301?
The main point of Cicada 3301 is to recruit highly intelligent and educated fast code breakers from all over the world through the sets of puzzles. They are looking for highly experienced and talented individuals. To search them, they have devised a test. Also, there is a message hidden in the image and you need to find them to reach them.
When did Cicada 3301 start?
On the year 4th of January 2012, the mysterious and hardest puzzle on the internet was launched named “Cicada 3301”. It is one of the most mysterious and elaborate puzzles available today for people worldwide. It is a puzzle where you need to have a good deal of technical knowledge, an understanding of number theory, including philosophy, classical music, knowledge of artist references, technological references, Mayan numerology, mathematics, cyberpunk literature, and the life cycles of cicadas. As per some speculations, Cicada 3301 is well-funded and large, considering that it has the deep knowledge to create such complex puzzles and at the same time, capable of supporting the existence of clues in a large number of locations, all far from one another.
In the year 2012, it was started, and then soon after one year, it again started for the people to solve the puzzles. There are thousands of people who have tried to solve the puzzle from their side but not able to do it due to a lack of intelligent and education skills. The puzzle looks similar to other online puzzles but very difficult to solve it. You should be well educated and highly intelligent for solving it easily without any problem. The mysterious organization Cicada 3301 has been releasing online encryptions since 2012, drawing top code-breakers to accept the challenges and nobody knows.
Who is Cicada 3301?
Cicada 3301 is a nickname given to an organization and it is not related to a particular person. All the set of puzzles to hire code breakers mainly focused on steganography, data security, cryptography, and even internet anonymity. Most people have claimed recently that Cicada 3301 is a secret society to improve anonymity, privacy, and cryptography. Some others have claimed that Cicada 3301 is a cult or religion. By considering the official statement of people who won the 2012 puzzle, 3301 uses non-puzzle based recruiting methods but created the puzzles because they were only looking for educated members with computer security and cryptography skills.
What is the mission of Cicada 3301?
The main mission of Cicada 3301 is still not known to the people due to its mysterious nature of work. As per some people reviews, it has been cleared that it is mainly for hiring intelligent and educated people in the organization. But the type of organization is still not known to the people and expected to be revealed very soon in the future for sure. This mysterious organization is trying to recruit the fastest and intelligent code breakers from all around the world.
What happens to those who solve cicada 3301?
Those people who solve cicada 3301 still in a dilemma and they are not able to understand what is the main reason behind creating those puzzles. In a recent interview, Puzzle solvers have also mentioned the puzzles they have solved from their end and how it is not so easy for them in the beginning. It is an internet mystery and people are getting aware of it. Many folks have tried from their end but some of them become successful and some of them did not get much success in solving those highly complex problems. It is expected that soon a new puzzle set will be published on the site and people are waiting to try their luck. In the future, it has been cleared that people will show more excitement and eagerness to solve these puzzles, and soon we will come to know about some more people who are giving it a try for sure.
What was the purpose of Cicasa 3301?
It is normally believed that the results of solving the puzzle would lead the individuals to better know who these people are. As a participant, you are going to solve one puzzle and then another puzzle will be given to you with much-increasing difficulty level for sure. All the participants need to have high and strong knowledge regarding “Cryptography, coding, Steganography, Encryption, and many more. It is a famous mystery as people want to know who these people who have started this puzzle. Also, want to know the main reason behind hiring such intelligent individuals in a team. As per certain claims, it is believed it to be a secret society while others normally believed that Cicada 3301 is a religion or cult.
At the beginning of 2013, it was the time of round 3 puzzles. Once again the image includes the message and the message led to the book and also book led to the link. The procedure was the same as before but this time message led to the book named “ Liber Primus” ( First book). The book was written in Latin and originated from Russia. The book was a mystery for most people and many still not able to know the exact reason behind it. However, a significant portion of the book has yet to be translated. Out of 74 pages, only 19 pages have been successfully translated. From the year 2015 to now, no puzzles have been found but still internet users all around the world waiting for this mystery.
Conclusion
Finally, you are aware of the Cicada 3301 and how it was solved by Joel and Marcus. All the above-mentioned points will help you in knowing what is Cicada 3301 and how it becomes an internet mystery for the users worldwide. You should note that the Cicada puzzle is not simple as most of the other puzzles available online and you need to be very educated and highly intelligent for solving the complex puzzles for sure.
It all started back in 2011 when a Reddit account began posting an indecipherable sequence of numbers and letters to a new subreddit, r/A858DE45F56D9BC9, or r/A858 for short. After languishing in Internet obscurity for nearly a year, another Reddit user requested more information, asking: “Do these seemingly random strings of numbers … correlate to something; is there some big joke I’m missing out on?” There was no reply, but enough people began to wonder the same thing themselves, and soon a sister subreddit, r/Solving_A858, was born. It consisted of “a dedicated group of computer science students, amateur cryptographers, and motivated enthusiasts” working together to crack the code, if indeed that’s what it was, reports the Daily Dot. At first, the creator kept the subreddit private, with only those proving themselves worthy allowed in, but it eventually opened to the public. It all started back in 2011 when a Reddit account began posting an indecipherable sequence of numbers and letters to a new subreddit, r/A858DE45F56D9BC9, or r/A858 for short. After languishing in Internet obscurity for nearly a year, another Reddit user requested more information, asking: “Do these seemingly random strings of numbers … correlate to something; is there some big joke I’m missing out on?” There was no reply, but enough people began to wonder the same thing themselves, and soon a sister subreddit, r/Solving_A858, was born. It consisted of “a dedicated group of computer science students, amateur cryptographers, and motivated enthusiasts” working together to crack the code, if indeed that’s what it was, reports the Daily Dot. At first, the creator kept the subreddit private, with only those proving themselves worthy allowed in, but it eventually opened to the public.
Today only a few of the thousands of r/A858 posts have been decoded, but they tend to be cryptic—such as an excerpt from the book Actions and Passions by Max Lerner and the ASCII image of Stonehenge, reported Bustle last year. The subreddit creator was pretty much silent until August 2015 when an account appeared in the sister “solving” subreddit that (after appropriate code-breaking, of course) allowed users to ask questions. Still, any answers were themselves cryptic, such as: “We cannot disclose the purpose. A858 will end when the purpose is disclosed or discovered.” Then on March 29, after having been private for some time (it switches between private and public regularly), r/A858 suddenly read: “The A858 Project Has Concluded. You may unsubscribe.” Many still think the project isn’t over. “I only hope A858 has a purpose,” one user writes. “I don’t particularly care if it is a good one.”
India
India has been called the land of mysteries since time immemorial, whether for its various enigmatic natural phenomena or eccentricities associated with its religions and culture. And while science has worked hard to debunk and find a logical reason behind every riddle, there remain some that give rationalists a run for their money. Here are some of modern India’s most puzzling aspects that are bound to make your eyes pop!
Kodinhi – Kerala’s village of twins
By any metric, conceiving twins and triplets is a rare natural occurrence around the world. In fact, on average only 16 out of 1,000 successful pregnancies in the world result in twins and this average is even lower in India at just 9. However, this ratio is heavily skewed in the sleepy hamlet of Kodinhi in Kerala, which has a record 400 pairs of twins in a population of just over 2,000 families! Geneticists and scientists have long tried to explain this rare phenomenon but are only now making some headway. While experts have pointed to genetics as an obvious factor, what’s even more mysterious is that irrespective of religion, lineage or their original heritage, all families living in the village have conceived more than the average pairs of twins over the last few generations, and the number is consistently growing.
Tanjore’s Brihadeeswara Temple
The ‘Big Temple’ in Thanjavur is renowned across the world as an architectural marvel and is one of India’s 36 World Heritage Sites. While there are many imposing and majestic temples in Tamil Nadu, what makes this temple particularly interesting is its architectural mysteries that still confound many. The granite structure is popular for having one of the tallest gopurams in India and at the apex lies an 81-tonne monolithic Shikhara mounted at a height of 66 meters. While architecture and science have advanced over centuries to create much greater marvels, taken in the context of its era of construction, dating back more than 1,000 years, this aspect of the temple still baffles experts. Questions about how the heavy and huge Shikhara was mounted at such a height and how such massive amounts of granite were carried to the site with no recorded quarries in the vicinity are still unanswered. By some accounts, the tower is constructed in such a way that it does not cast a shadow at noon on any day of the year as well!
Prahlad Jani – India’s fasting fakir!
India is a land of eccentric saints and sadhus, but none of these gurus has raised worldwide interest and flummoxed experts as much as Prahlad Jani, the sadhu who claims to have fasted without food or water for over 40 years. His claims had long been taken with a pinch of salt by scientists and experts and outright dismissed by rationalists. However, in 2010, Jani was part of an extensive study by a team of 35 Indian experts from the Defence Institute of Physiology and Allied Science, which lasted over 15 days. While the study was shrouded in mystery with the government deciding not to divulge any details, it was widely publicised that the guru, also known as Mataji, was in good health despite not eating or drinking water and being in isolation for more than ten days. What’s more, it was further claimed that he did not urinate or excrete during the duration of the tests. While the veracity of this account is still an open question, it certainly has raised interest among the world’s leading experts.
Kirti Stambha – the Iron Pillar of Delhi
While the concept of rust-resistant iron only became prominent during the industrial revolution in western civilization, there stands an iron pillar in Delhi that predates such known material technology by nearly a millennium! The Kirti Stambha or victory pillar of Delhi is a six-tonne structure that is constructed out of iron sometime in the 5th century and has stood the test of time without succumbing to rust. The science of this pillar has baffled scientists, primarily for the fact that such advanced technology for rust resistance was thought to be unknown elsewhere in the world at the time.
]]>Have you thought that there are internet mysteries too where some are been solved and some are not the internet is like an ocean where we don't know what will happen also we don't know who is spying on us what we search etc.Are We Living in Simulation Part 05https://mistrysiddh.com/2021/01/26/Are-We-Living-In-Simulation-Part-05/2021-01-26T15:55:36.000Z2026-07-24T14:33:54.386Z
As in part 1, we have talked about Quantum Computers, Facebook AI Chat, and Predictions of AI Robots wherein part 2 we had a recap of part 1 and also The Matrix movie, Roswell UFO Incident, wherein part 3 we discussed on MKUltra performed by US Central Intelligence Agency, Black Mirror: Bandersnatch movie where you can control Stefan Butler by given two choices which leads to a different path in the movies. In part 4 we talked about UFO also we seen Space Mysteries of Restored Apollo 11 and also we saw the video a mysterious video where an unidentified spacecraft refuelling itself from the sun.
What is Time?
Wikipedia Time is the indefinite continued progress of existence and events occur in apparently irreversible succession from the past, through the present, into the future. It is a component quantity of various measurements used to sequence events, to compare the duration of events or the intervals between them, and to quantify rates of change of quantities in the material and reality or the conscious experience. Time is often referred to as a fourth dimension, along with three spatial dimensions.
It is been told that time has never stopped or will never be stopped its a continuous flow. If we try to make changes in past or future it will affect the path one mistake and everything is messed up.
Time Travel
Time travel is the concept of movement between certain points in time, analogous to movement between different points in space by an object or a person, typically with the use of a hypothetical device known as a time machine.
Can we go back in time?
Although humans can’t hop into a time machine and go back in time, we do know that clocks on aeroplanes and satellites travel at a different speed than those on earth.
When did we knew that time travel is possible?
More than 100 years ago, a famous scientist named Albert Einstein came up with an idea about how time works. He called it relativity. This theory says that time and space are linked together. Einstein also said our universe has a speed limit: nothing can travel faster than the speed of light (186,000 miles per second).
Who was Sid Hurwich?
Born in 1918, Sid Hurwich was a Jewish appliance repairman living in Toronto Canada who used to experiment with various kinds of technology. As a child, Sid showed great interest in collecting random junk and assembling the pieces into working machines. Later as an adult, he became famous as the man who could fix anything that was broken.
In 1934, Sid earned the distinction of being the first private appliance repairman in all of Canada. He was such a skilled technician that the local power company succeeded in taking him out of the army so he could develop the infrastructure of the public electrical utility.
Sid Hurwich earned enough money to set up two successful companies of his own. He was still young when he got a heart attack, only 36 and he retired.
EXTRAORDINARY TIME MACHINE THAT COULD ‘FREEZE TIME’
However, he continued to experiment with technology and finally invented that extraordinary ‘freeze time’ machine that could also change the flow of time, and send out beams of influence to manipulate objects in distant locations.
Local authorities had problems to catch thieves in the wave of bank robberies that swept Toronto in 1969. So Hurwich contacted them and said that is possible to freeze time to find out what happened.
This account was given in the article in the Vancouver Sun-Times:
‘All I recall,’ said Bolton (one of the police officers in charge), ‘is that it was under the table – the device, whatever it was – and there was a bedspread over the table. He froze my service revolver. You couldn’t pull the trigger, you couldn’t lift it off the table and even on the table you couldn’t pull the trigger.’
and then Sid said:
“…. Now take a look at your watches.” I remember one of them said, “When did this happen?” and I said, “The minute you walked through that door. You walked in there about 25 minutes ago. Now, look at your watches. You’re late about 25 minutes.”’ As the security officers filed out of his home, Sid’s wife overheard one of them suggest that the army should be told about the device. ‘That was the first time it entered my mind for war or army purposes or anything like that.’
The time machine later was used by military and it ended up in Israel, accorded in publication Foreign Report in 1977.
“The device sends out electronic rays to alter the natural composition of electronic fields and centres of gravity of weapons, instrument dials and mechanical devices … (using) the Hurwich principle there was no reason why the new beams could not reach and disable tanks, ground-to-ground missiles and complete radar systems. The beams could also be tacked together to form a screen that would make whole zones safe from bombs and missiles,”
But does they still have that device and do they still use it?
What happened to Sid Hurwich and his time-altering machine?
Whether the time machine is still in possession of the Israeli military or not has been widely debated. Does the Israeli military still have the Hurwich device, and are they still using it on ‘special occasions’ or in dire situations of military crisis?
In ‘True Time Travel’ book by Richard Bullivant is written:
“Skeptics say that if they had a device that could provide a kind of shield from bombs and missiles, freeze weapons, and even slow or halt time, the Israeli military would be invincible and would not have suffered as many casualties as it has in its decades’ long struggles with its antagonists in the Mideast. Others counter, however, by saying that the Hurwich device may be a two-edged sword. If it can ‘freeze’ the weapons of the enemy, it would also freeze the weapons of those employing the device. Thus, the device can perhaps only be used in a limited way – enough to knock out radar detection and other enemy electronics, for example – but not to induce the full-blown time-freeze effect for the benefit of the user.”
Not only Richard wrote about it, but and many people over the years. Also, he said to police that it is not a new invention, and it is designed on principles that are already well known.
By now, researchers still can’t find out any information about him or his obituary. But, surely, he has passed on.
Truth or Fake
Proof of time travel: Physicists says that theoretical time travel is possible on both sides means in the future and the past. Time travel to the future seems practically possible.
In 1995 a match was played between the legendary boxers Mike Tyson and Peter McNeeley. It was not an extraordinary match.
But, when the footage of the match was watched closely next something unbelievable thing saw in the footage. In the footage, it was clear that someone was capturing the picture of Mike Tyson with a Smartphone.
In fact, at that time, there was no existence of such types of smartphones.
It is believed that he was that person who came from the future.
Charlie Chaplin Movie
“The Circus” was the super hit movie of Charlie Chaplin which was released in 1928.
Later, when someone was watching the movie closely, he saw unusual stuff in the movie.
He saw there was a scene in the movie in which a lady was talking on a mobile phone like device.
But at that time there was no existence of a mobile phone. The first mobile cell phone came into existence in 1973 which was of Motorola. Here is the video of it.
London Bridge Opening
Out of all proofs of time travel, this assumes to be solid evidence of time travel.
This photo was captured in 1941, during the re-opening ceremony of the South Fork Bridge in Gold Bridge, British Columbia.
The style of wearing a man’s clothes in this photo is completely contrasting from other people.
One gentleman is wearing a graphic t-shirt and black sunglass.
Moreover, there is also a modern camera like device in his hand.
But at that time all these things were not existed, which means these kinds of stuff were not invented.
Later the forensic report was also carried out of this photo but this image was found clean and clear; there was no tampering with it.
A man from 2256
A 44-year-old man Andrew Carlssin was arrested on Jan 28, 2003, in Toronto, Canada, by FBI. He was detained on the suspicion of illegal inside information of the stock market.
Because on the course of two weeks by investing just $800 he made out with over $350 million.
How was it possible? He made out around 126 high-risk trades and never loses a single cent.
And, during the four-hour confession, he stated he came from 2256.
The FBI did not get any evidence of fraud from his side.
On 3rd April 2003, an unidentified person came in the courtroom for a bail hearing and deposited $1 million for the bail of Andrew Carlssin. But after, they disappeared in the way and never have been met again.
Later, the FBI could not find out where both of them came from and where they went.
Swiss ring watch
A watch was discovered when archaeologists began unsealing a tomb in China. That tomb was from the Ming Dynasty, and it was of 400-year-old.
While unsealing they found a ring-like object inside the tomb. After investigation, it was found out that it was a small watch similar to be modern Swiss watch. This watch was 100 years old. Interestingly, when you see the watch from the front, you can read the time clearly on it.
Moreover, archaeologists also found there was no tampering with the tomb.
Consequently, if there was no tampering then how this watch went inside the 300-year-old tomb.
Astonishingly, at that time even Switzerland didn’t become a country. Many people correlate this puzzling discovery to time travel.
1500 years old mummy wearing Adidas sneaker shoe
The Mongolian Mummy was found in the Altai Mountains at the height of 10,000 feet from the ocean.
This mummy was of the 1500 years old, and the stunning thing about this was that this mummy was wearing Adidas like sneakers in her feet. (this mummy was assumed to be of a woman)
Adidas is a German company that started on August 18, 1949, by Adi Dassler and it is famous for its footwear.
Some people are relating the story of this mummy with the event of time travel.
This mummy was found in April 2016.
17th century astronaut
Very few are aware that the Soviet pilot Yuri Gagarin was the first person to travel to outer space in 1961. But the mystery remains unveiled is why there a figure that exactly looks like an astronaut engraved in the stone of a 16th-century cathedral?
Built between 1513 and 1733 there is a new cathedral of Salamanca, Spain when space travel was hardly thought of. This has made some people curious to speculate about the origin of the carving: is this the evidence of time travel? Or some other creatures from different planet engraved it? Or is some paranormal force at a play?
The Salamanca’s Astronaut is not a joke or a hoax, but a modern addition to the Cathedral; however, it has all the reserves of something which may provide confusion some 400 years from now.
New Cathedral Of Salamanca The building began at a time when the Gothic style was merging with the new Renaissance style. This cathedral retained more of its gothic counter because the administrators and the supervisors wanted the new cathedral to merge with the old one. Two elements were added that broke with the predominant style of the building: a Baroque and the bell tower.
The new cathedral of Salamanca was erected without the destruction of the old cathedral, but the walls of the newly erected lean on the North wall of the old one. This is the reason why the old cathedral had to be reinforced. The main entrance to the cathedral consists of three decorated arcs: each heading to the three naves of the church.
Who Did Carve The Astronaut Picture On The Cathedral?
The truth behind this carving is, unfortunately, less interesting. When the church was rebuilt centuries ago it went a restoration program and the stonemasons decided to carve some modern figures. It is a tradition of the cathedral builders to add details or new carvings as a sort of some signature. In this case with the cathedral, quarryman Jeronimo Garcia given the action to add more images to the front of the building including an astronaut among some vines.
There also been a weird looking dragon eating ice cream (even the ice cream cones were not invented until the 20th century), a bull, a crayfish and a lynx. But why the figures are chipped and broken even though it is not that much old? Vandalism in 2010
The vandalism has been recovered and now it has clear pictures today.
It is the only church that has some modern addition engraved on the building, Calahorra Cathedral in Spain (from the 16th century) has a cell phone that was added in 1996.
The man from Taured
The Man from Taured (sometimes referred to as the Taured Mystery of the Man Without a Country ) is a story about a man who arrives at a Japanese airport from a country called Taured. Many people have claimed this story to be true, so the crux of the problem pertains to Taured. One would notice that there is no country by the name of Taured, either today or during the purported time when the incident took place, i.e. the 1950s. The story ends with the man disappearing (forever) a day after arriving in Japan. Moreover, all of his documents, such as his passport and driver’s license also (conveniently) disappeared, thus making this strange story unsolvable.
The Man’s ArrivalThe Man’s Arrival
The story of the ‘Man from Taured’ begins quite specifically in many sources with a hot day in July 1954. On that particular day, a man was said to have arrived at Haneda Airport, known also as Tokyo International Airport. This man has been described as Caucasian looking with a beard. Whilst his primary language is said to have been French, it has been purported that he spoke Japanese and many other languages as well.
The sequence of events then differs according to which version of the story one encounters. In one version, this man hands over his passport to be stamped, and the Japanese immigration officer notices something strange. Whilst the passport looked authentic, the country where it was issued, ‘Taured’, was recognized as non-existent, either by the officer or one of his / her colleagues, indicating that the man should be taken away for interrogation. In another version, the man mentioned that he was from Taured, and when the immigration officer did not believe him, he showed him/her his passport.
Location of Taured
The next part of the story details the man trying to convince the immigration officers that Taured does indeed exist. According to the traveller, Taured was located between France and Spain and had by then been in existence for 1000 years.
When shown a map, the man pointed to the area occupied by the Principality of Andorra and was puzzled as to why his country was called Andorra on the map. Both sides refused to give in – the Japanese officers insisted that Taured did not exist, and the traveller argued otherwise.
Location of Andorra (center of green circle) in Europe (dark grey).
Vanished!
Eventually, the man was held by the officers, as they were suspicious that he might be some kind of criminal. They brought him to a nearby hotel for the night, whilst they conducted their investigation. To ensure that the man did not escape during the night, two guards were placed outside his room. The next morning, when the officers went to the man’s room, they realized that he had simply vanished, as there were no signs of his escape. Additionally, all of his documents, which may serve as evidence for the story’s validity, had disappeared as well.
Travel Through Time or Space? Or Just an Exaggeration?
One of the most notable explanations for this incident is that the man from Taured had somehow passed through a parallel dimension by accident, and ended up at Haneda Airport. It has been suggested that, based on this explanation, there is parallel earth which is similar to ours with the exception that the locations called Andorra here is known as Taured over there. Another suggestion is that the man was a time traveller from the future, thou this interpretation is arguably more problematic than the one supposing inter-dimensional travel.
It has also been suggested that an incident like that did indeed happen, though perhaps much less sensational. This more mundane story could have been embellished each time it was told, so much so that it eventually evolved into the great mystery that it is known as today.
Finally, it is also entirely possible that this story is merely an urban legend. The story of the ‘Man from Taured’ might not have even occurred in the first place, and may have just been the creation of someone’s imagination.
One legendary hoax captivated fans of the supernatural and the paranormal like few others. November 2, 2000, saw the first online post by the individual who would come to be known as “John Titor.” Titor claimed to be a man from the future, sent to the past to retrieve… a portable computer. Though shrouded by forum avatars, his specific instructions on what he was here to accomplish, and what society would look like in his version of the future, kicked off a frenzy of investigation, speculation, and deception that has lasted for nearly two decades.
Some people believed “John Titor” completely. Others became obsessed with errors and inconsistencies, digital detectives trying to uncover the truth behind the story. Before it was over, Titor would make his way to an animation studio in Japan, a wrestling ring in Pennsylvania, and a prison cell in Oregon.
John Titor is a name used on several bulletin boards during 2000 and 2001 by a poster claiming to be an American military time traveller from 2036. Titor made numerous vague and specific predictions regarding calamitous events in 2004 and beyond, attracting world-wide attention during the ensuing decade. His descriptions of the aftermath of a nuclear war—including the devastation of numerous countries around the world, a breakup of the United States into five smaller sovereignties, and general destruction of the global environment and infrastructure—inspired fiction and music, and triggered investigations by journalists and others. Subsequent closer examination of Titor’s assertions provoked widespread scepticism. Inconsistencies in his explanations, the uniform inaccuracy of his predictions, and a private investigator’s findings all led to the general impression that the entire episode was an elaborate hoax. A 2009 investigation concluded that Titor was likely the creation of Larry Haber, a Florida entertainment lawyer, along with his brother John, a computer scientist.
Titor’s Post
The first posts using John Titor’s military symbol appeared on the Time Travel Instituteforums on November 2, 2000, under the name TimeTravel_0. At that time the name “John Titor” was not being used. The posts discussed time travel in general, the first one being the “six parts” description of what a time machine would need to have to work (see below) and responses to questions about how such a machine would work. Early messages tended to be short. A second thread was also made due to shortcomings in the forum software at the time
The name “John Titor” was not introduced until January 2001, when TimeTravel_0 began posting at the Art Bell BBS Forums (which required a name or pseudonym for every account). The Titor posts ended in late March 2001.
Around 2003, various websites reproduced Titor’s posts, re-arranging them into narratives. Not all refer to the original dates posted.
In his online postings, Titor claimed to be an American soldier from 2036, based in Tampa, Florida. He was assigned to a governmental time-travel project, and sent back to 1975 to retrieve an IBM 5100 computer which he said was needed to debug various legacy computer programs in 2036; a possible reference to the UNIX year 2038 problem. The IBM 5100 runs the APL and BASICprogramming languages.
Titor had been selected for this mission specifically, given that his paternal grandfather was directly involved with the assembly and programming of the 5100. Titor claimed to be on a stopover in the year 2000 for “personal reasons,” to collect pictures lost in the (future) civil war and to visit his family, of whom he spoke often.
Titor also said he had been, for a few months, trying to alert anyone that would listen about the threat of Creutzfeldt–Jakob disease spread through beef products and about the possibility of civil war within the United States. When questioned about them by an online subscriber, Titor also expressed an interest in mysteries such as UFOs, which remained unexplained in his time. Titor suggested that UFOs and extraterrestrials might be travellers from much further into the future than his own time, with superior time machines.
Time Machine
Titor described his time machine on several occasions. In an early post, he described it as a “stationary mass, temporal displacement unit powered by two top-spin, dual positive singularities”, producing a “standard off-set Tipler sinusoid”.
The earliest post was more explicit, saying it contained the following:
Two magnetic housing units for the dual micro singularities
An electron injection manifold to alter mass and gravity of the micro singularities
A cooling and X-ray venting system
Gravity sensors, or a variable gravity lock
Four main caesium clocks
Three main computer units
According to the posts, the device was installed in the rear of a 1967 Chevrolet Corvette convertible and later moved to a 1987 truck having four-wheel drive.
Titor shared several scans of the manual of a “C204 Time Displacement Unit” with diagrams and schematics and posted some photographs of the device installed in the car.
Titor claimed that the “Everett–Wheeler model of quantum physics,” better known as the many-worlds interpretation, was correct. The model posits that every possible outcome of a quantum decision occurs in a separate “universe.” Titor stated that this was the reason the grandfather paradox would not happen; following the logic of the argument, Titor would be killing a different John Titor’s grandfather in a timeline other than his own.
The grandfather paradox is impossible. In fact, all paradox is impossible. The Everett–Wheeler–Graham or multiple world theory is correct. All possible quantum states, events, possibilities, and outcomes are real, eventual, and occurring. The chances of everything happening someplace at some time in the supervise are 100%.
Predictions
Although invoking the many-worlds interpretation of quantum mechanics, whereby events from his timeline may differ from our own, Titor also expressed assurance that the differences were minimal. As such, his descriptions have been interpreted as predictions and compared with historical events since 2001.
The most immediate of Titor’s predictions was of an upcoming civil war in the United States having to do with “order and rights”.He described it as beginning in 2004, with civil unrest surrounding the presidential election of that year. This civil conflict that he characterized as “having a Waco type event every month that steadily gets worse” would be “pretty much at everyone’s doorstep” and erupt by 2008.
As a result of the war, the United States would split into five regions based on various factors and differing military objectives. This civil war, according to Titor, would end in 2015 with a brief but intense World War III.
Titor refers to the exchange as “N Day”. Washington, D.C. and Jacksonville, Florida are specifically mentioned as being hit. After the war, Omaha, Nebraska would be the new U.S. capital. Titor was vague as to the exact motivations and causes for World War III. At one point, he characterized the hostilities as being led by “border clashes and overpopulation”. He also pointed to the contemporary conflict between Arabs and Israel as not a cause, but rather a milestone that precedes World War III.
Titor claimed that as a 13-year-old in 2011, he joined the Fighting Diamondbacks, a shotgun infantry unit in Florida, for at least four years. In other posts, he described himself as hiding from the war.
Criticism and discussion
As Titor gained significant attention, there also emerged analysis and discussion concerning the veracity of his claims about his origins and mission, and the future events he talked about. No John Titor or Titor family is known to exist, meaning that who posted as Titor used a pseudonym. The story has been called inconsistent as contradictions between statements at different times have been observed. Holding the many-worlds interpretation as correct, Titor claimed that his mission as a time traveller was to shape a timeline in which many chaotic events of his time, including World War III and the civil war in the US, never happened. In some supposed Titor’s appearances in the internet and other media segments before his main posts (notably in faxes to the radio talk show Coast to Coast AM in 1998), he stated that he was not able to change the future despite his efforts, suggesting one of the possible contradictions. Nevertheless, none of the specific events he predicted to a near future, chaotic or not, have come to happen (see below).
Some issues with the technology have also been considered. In one of Titor’s pictures of a supposed time machine, a laser beam is seen allegedly being bent by gravitational distortion, but the view of nearby objects is not distorted as would be expected. Also, Titor knew about technical features of the IBM 5100 which were not available to the public at the time, albeit widely commented in the industry, suggesting he had some advanced understanding of the machine or computers in general.
Predictive failures
One of Titor’s earliest assertions was that CERN would discover the basis for time travel sometime around 2001, with the creation of miniature black holes about half a year after his departure. This did not occur. An article published around the time he had predicted about miniature black holes created by CERN (a recurring theme, also ascribed to Fermilab and Brookhaven at various times)was taken by some to be evidence of this claim, but these events did not occur either.
The civil war did not break out after the 2004 US presidential election, nor did conflicts or military involvement in 2012. World War III did not happen in 2015.
Titor unambiguously claimed that the last Olympics would occur in 2004. While it is unclear if he meant the summer or winter Olympics, both have occurred since this time.
However, because Titor asserted that the many-worlds interpretation was proved correct by his time, his predictions could refer to another timeline and not ours, making them unfalsifiable. This led to different interpretations, including that he had effectively accomplished his mission by creating another timeline (despite his supposed previous statements that it would be too difficult), or that he inadvertently travelled to a different timeline (ours) and mistook it as his own, or that all-time travel is pointless if the chaotic timeline would not cease to exist.
Story and consistency
Potential contradictions have been observed in different Titor’s posts. In some of the posts, he claims that he was homeschooled, while in others he states that his basic education was conducted at the University of Florida. Similarly, he stated that he hid himself during the civil war in the U.S., while also stating in other instances that he fought in the war. In some posts, he claims that money is widely used and people still have credit cards, despite his statement that centralized banking no longer exists (this is either an inconsistency or implies the rise of private currencies).
Titor’s story could also have been inspired by science fiction works. The use of an automobile as a time machine, for example, had been a key plot device in the popular 1985 movie Back to the Future and its sequels (as the DeLorean sports car), among others. Additionally, commentators have pointed out similarities between the Titor story and Pat Frank‘s classic post-apocalyptic science fiction novel Alas, Babylon. Among other similarities, Alas, Babylon takes place in a small river-side town in Florida just before and after a nuclear war and describes the struggle to survive as a family in the aftermath. In the book, the protagonist lives in the fictional town of “Fort Repose”, while Titor claimed to live in the “Fort”, formerly the University of Florida. The prediction of tiny black holes as a result of time travel (specifically, the sending back of information) is a key plot point from the 1980 novel Thrice Upon A Time by James P. Hogan.
Some suggested that yet in the summer of 1998 before his posts, Titor sent two faxes to Art Bell’s radio program Coast to Coast AM, stating that “Y2K is a disaster. Many people freeze to death trying to get to warmer weather. The gov. tries to keep power by instituting martial law…” referring to popular legends of the time about the Y2K bug.
In the online story, Titor stated that a part of his mission was to prevent the coming world war by changing history. Yet some claimed that during an IRC chat in October 2000, a month before he began posting, Titor was asked if the future could be changed from his predictions, and answered: “It’s too late … I just wish things didn’t have to happen the way they will.”
Technology
Titor provided an image of a detail of a supposed time machine, with a laser pointer beam “being bent by the gravitational field produced outside the vehicle by the distortion unit”. The beam being “bent” reveals an inconsistency of objects near the beam not appearing to be bent as well: the framing of the window visible in the background, for instance, should appear distorted in proximity to a large gravity gradient, but it does not. Some have speculated the “beam” is an optical fibre.
Titor claimed that he was sent back to obtain an IBM 5100 because it could translate several types of computer code. According to IBM engineer Bob Dubke, Titor’s statements regarding the IBM 5100’s little-known ability to emulate and debug mainframe systems were correct. Supporters state that this information was not publicly available in 2000 or 2001 when Titor made his declaration, and Titor himself stated that this feature was “discovered” as late as 2036 when Unix, as the underlying source behind all computer operating systems still running local infrastructures and other computational tasks, was only two years away from no longer functioning due to 32-bit integer limitations. However, this emulation capability was widely known in the industry and commented on in-depth in numerous publications dealing with both the 5100 and programmable microcode in general. References to this were also available on the Internet as early as 1999 and therefore predated Titor’s postings.
Investigations
An Italian television program, Voyager – Ai confini della conoscenza, aired the results of an investigation of John Titor on May 19, 2008. Private investigator Mike Lynch found no registry evidence, past or present, of any individual named John Titor. He did, however, identify the John Titor Foundation, a for-profit company formed on September 16, 2003, with no office or address other than a rented post box in Kissimmee, Florida. An IP address connected with Titor also geolocated to Kissimmee.
In 2009, a report by John Hughston of the Hoax Hunter website named Larry Haber, a Florida entertainment lawyer, as the CEO of the foundation. Lynch concluded that Haber and his brother Morey Haber, a computer scientist, were very likely the men behind John Titor, whom they introduced in 1998, accompanied by different predictions, including chaos due to the Y2K“bug”. John Hughston also reported that John Titor is a registered trademark with the United States Patent and Trademark Office.
In popular culture
In 2003, the John Titor Foundation published a book, John Titor: A Time Traveler’s Tale (ISBN 1-59196-436-9), discussing his claims; the book is now out of print.
In 2004, Time Traveler Zero, a play based on the John Titor story, was staged in the United States.
The 2009 visual novel Steins; Gate, which was adapted into a critically acclaimed anime in 2011, is centred on John Titor and his theories. A civil war caused by SERN (the fictional version of CERN), due to their discovery of time travel, is covered as well.
]]>What if you are given one chance either to go in the future or the past. Which one will you choose? Will you go in past or will you go in future?Coronavirus News LIVE Updates: US Cases Top 25 Millionhttps://mistrysiddh.com/2021/01/25/Coronavirus-News-LIVE-Updates/2021-01-25T10:11:52.000Z2026-07-24T14:33:54.387ZCoronavirus News LIVE Updates: Tata in Talks to Launch Moderna Covid-19 Vaccine in India; US Cases Top 25 Million
Coronavirus News LIVE Updates: Tata Medical & Diagnostics is said to have started initial discussions with Moderna Inc for a partnership to launch its COVID-19 vaccine in India, the Economic Times reported today. Tata could team up with the India’s Council of Scientific & Industrial Research (CSIR) to carry out clinical trials of Moderna’s vaccine candidate in India, the report added, citing officials familiar with the matter. The Indian government this month gave emergency-use approval to a COVID-19 vaccine developed by Bharat Biotech International Ltd and state-run Indian Council of Medical Research, and another licensed from Oxford University and AstraZeneca PLC that is being manufactured by the Serum Institute of India.
The number of coronavirus cases in the United States crossed 25 million on Sunday, a Reuters tally showed, as states accelerate their vaccine distribution and more infectious strains are found globally. States including North Dakota and West Virginia have injected more than 83% of their allocated doses into residents’ arms, according to data from the Centers for Disease Control and Prevention released on Sunday. Virginia administered the fewest doses, with 42% of the vaccines received. The United States has administered at least 21.8 million doses of COVID vaccines, to about 6% of its population. The two vaccines currently approved also require a second dose. Alaska leads the vaccine administration tally, with about 13% of its population vaccinated, followed by West Virginia, with 11%.
President Joe Biden will announce he is re-imposing a Covid-19 travel ban on most non-US citizens who have been in Britain, Brazil, Ireland and much of Europe, a White House official said Sunday, as the new administration ramps up its pandemic response. Biden will also extend the ban to travelers who have recently been to South Africa amid warnings that new, more transmissible coronavirus variants are already establishing themselves in the United States, the official said, confirming US media reports.
Meanwhile, Israel on Sunday announced a week-long ban on most incoming and outgoing flights in a bid to slow the spread of new variants of the novel coronavirus. The measure will begin at midnight from Monday into Tuesday and remain in effect until Sunday, a statement from the prime minister’s office said. Exceptions will be made for cargo and firefighting flights, as well as trips for medical treatments, funerals and legal procedures. A panel of health and interior ministry officials will be able to issue exemptions on request “for humanitarian or personal needs”, the statement said.
The decision came with the country in its third national coronavirus lockdown, initiated late December and extended on Tuesday until the end of the month due to a surge in Covid-19 deaths. Earlier Sunday, Prime Minister Benjamin Netanyahu had announced his government’s intention to close the airport, as variants of the coronavirus have been detected in rising numbers.
“We’re closing the skies hermetically, except for rare exceptions, to prevent the entry of virus mutations, and to ensure that we make swift progress with our vaccination campaign,” he said ahead of a cabinet meeting.
Later Sunday, the health ministry announced it had identified cases of a coronavirus variant originating in Los Angeles. “In the health ministry’s central virus laboratory, a variant from Los Angeles has been located using a sequencing process,” the ministry said in a statement. “The person confirmed to have this variant has infected four other people.”
Variants from South Africa and Britain have also been found in Israel. Since the rollout of vaccinations last month, more than 2.5 million of Israel’s nine-million-strong population have been vaccinated, according to the health ministry. On Saturday, Israel began vaccinating teens aged 16-18, who need to sit final high school exams.
]]>President Joe Biden will announce he is re-imposing a Covid-19 travel ban on most non-US citizens who have been in Britain, Brazil, Ireland and much of Europe, a White House official said Sunday, as the new administration ramps up its pandemic response.WhatsApp Responds to Indian Govt's Letter to Withdraw Privacy Policyhttps://mistrysiddh.com/2021/01/21/WhatsApp-responds-to-Indian-govts-letter-to-withdraw-privacy-policy/2021-01-21T09:24:38.000Z2026-07-24T14:33:54.391Z
On Tuesday, the Ministry of Electronics and Information Technology (MeitY) sent a letter to WhatsApp CEO Will Cathcart stating that the new privacy policy “raise grave concerns regarding the implications for the choice and autonomy of Indian citizens.” MeitY also asked the messaging platform to withdraw the changes and “reconsider its approach to information privacy, freedom of choice and data security.”
Facebook-owned messaging platform has finally responded to the Indian government. A WhatsApp spokesperson said in an email statement to BGR.in, “We wish to reinforce that this update does not expand our ability to share data with Facebook. Our aim is to provide transparency and new options available to engage with businesses so they can serve their customers and grow.”
The spokesperson further added that, “WhatsApp will always protect personal messages with end-to-end encryption so that neither WhatsApp nor Facebook can see them. We are working to address misinformation and remain available to answer any questions.”
WhatsApp privacy policy latest update
Amid the WhatsApp privacy policy controversy, Signal and Telegram messaging apps also gained wide popularity. Signal has become the top free app on both Google Play store as well as Apple App store.
The messaging platform claims that all messages or chat exchanged on the platform are end-to-end encrypted and can’t be read or seen by WhatsApp or Facebook.
Cathcart took to Twitter last week and further clarified, “I want to share how committed everyone @WhatsApp is to providing private communication for two billion people around the world. At our core, that’s the ability to message or call loved ones freely protected by end-to-end encryption and that’s not changing. With end-to-end encryption, we cannot see your private chats or calls and neither can Facebook. We’re committed to this technology and committed to defending it globally.”
The messaging platform previously set the deadline for accepting the updated privacy policy as February 8. The deadline of accepting the policy has been extended further to May 15. This means if you are unable to accept the updated WhatsApp privacy policy by this time you will lose access to your account.
]]>WhatsApp privacy policy: MeitY on Tuesday suggested WhatsApp to withdraw the latest privacy policy. The Facebook-owned messaging platform has responded.



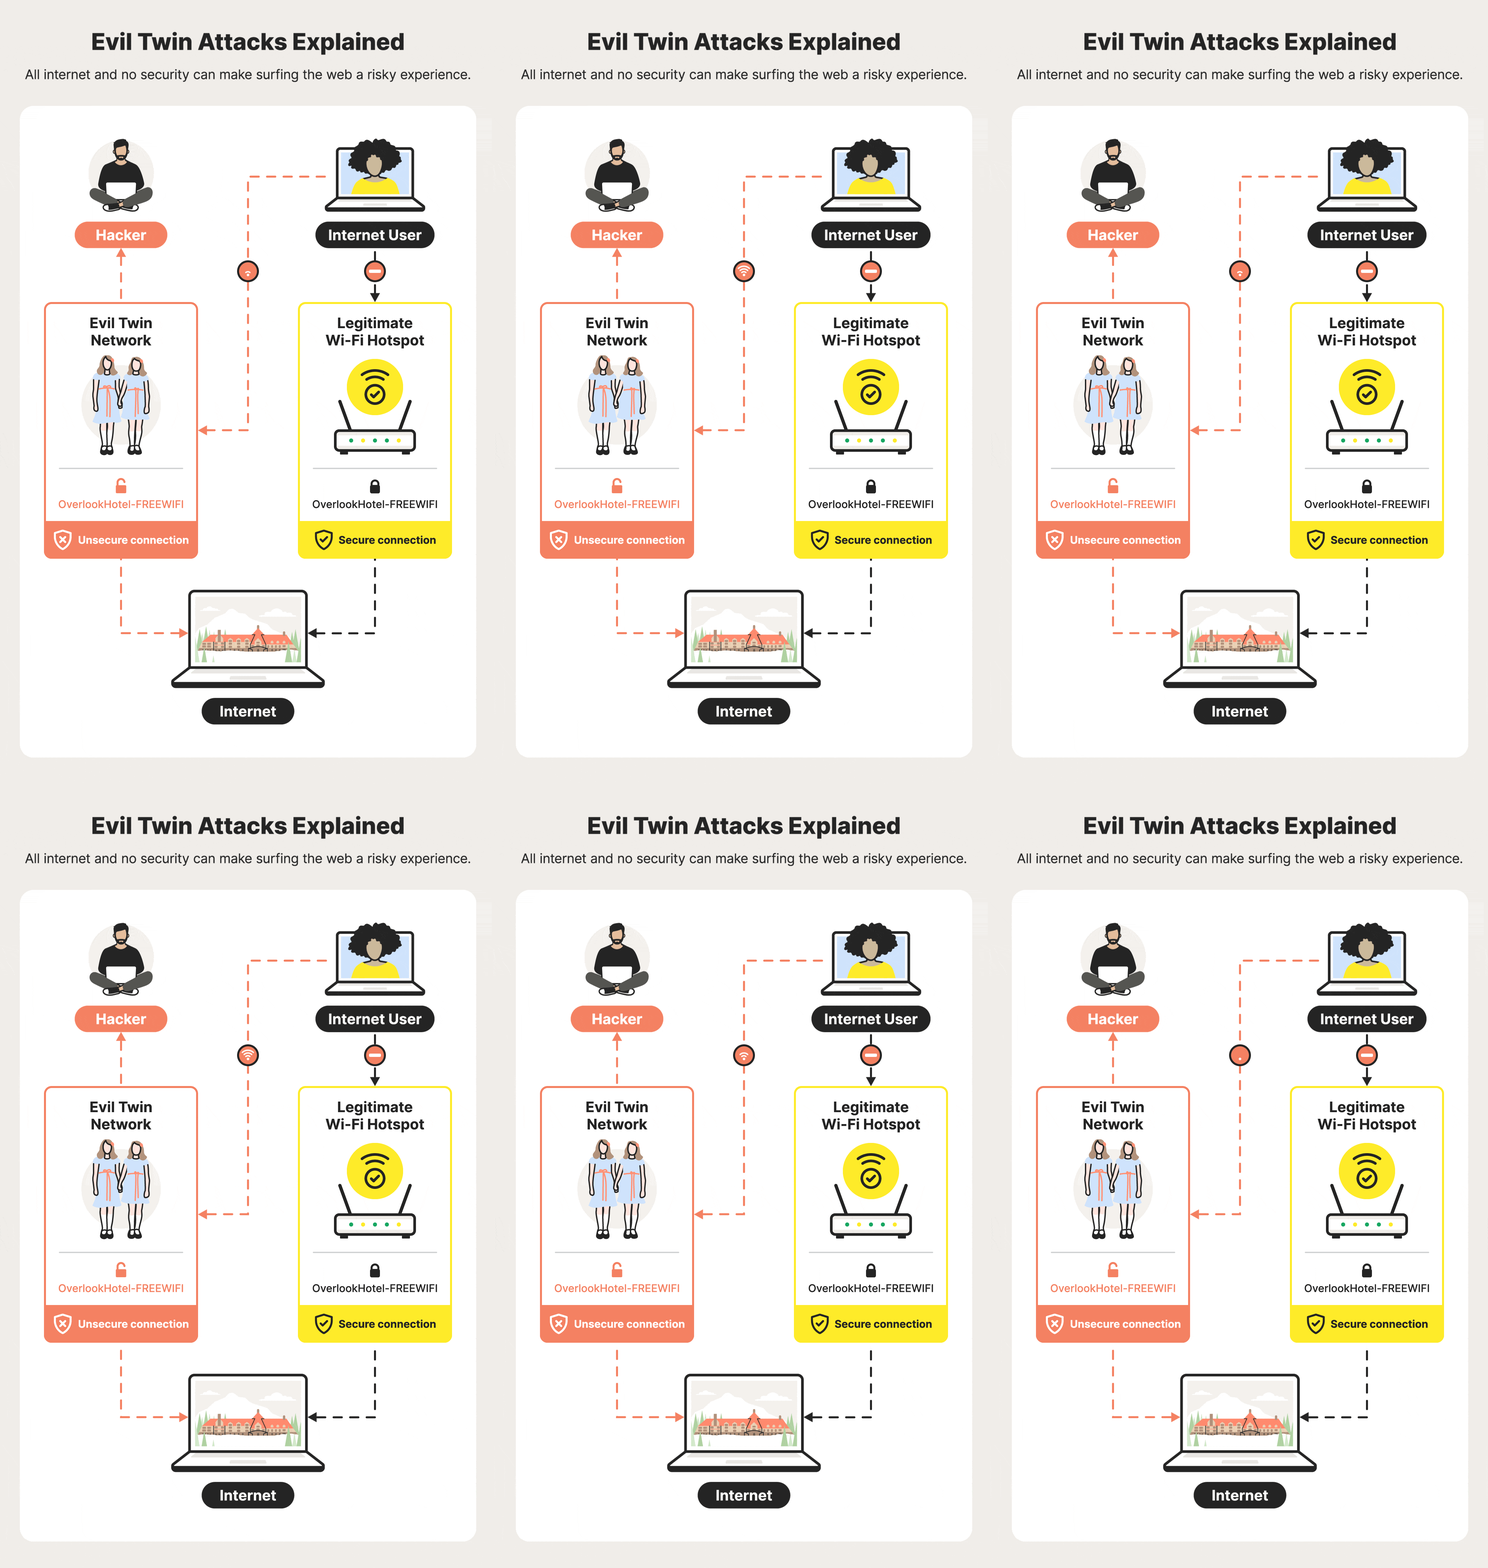
/GettyImages-962574588-d07e325236e84e23971c5f6d5079775e.jpg)






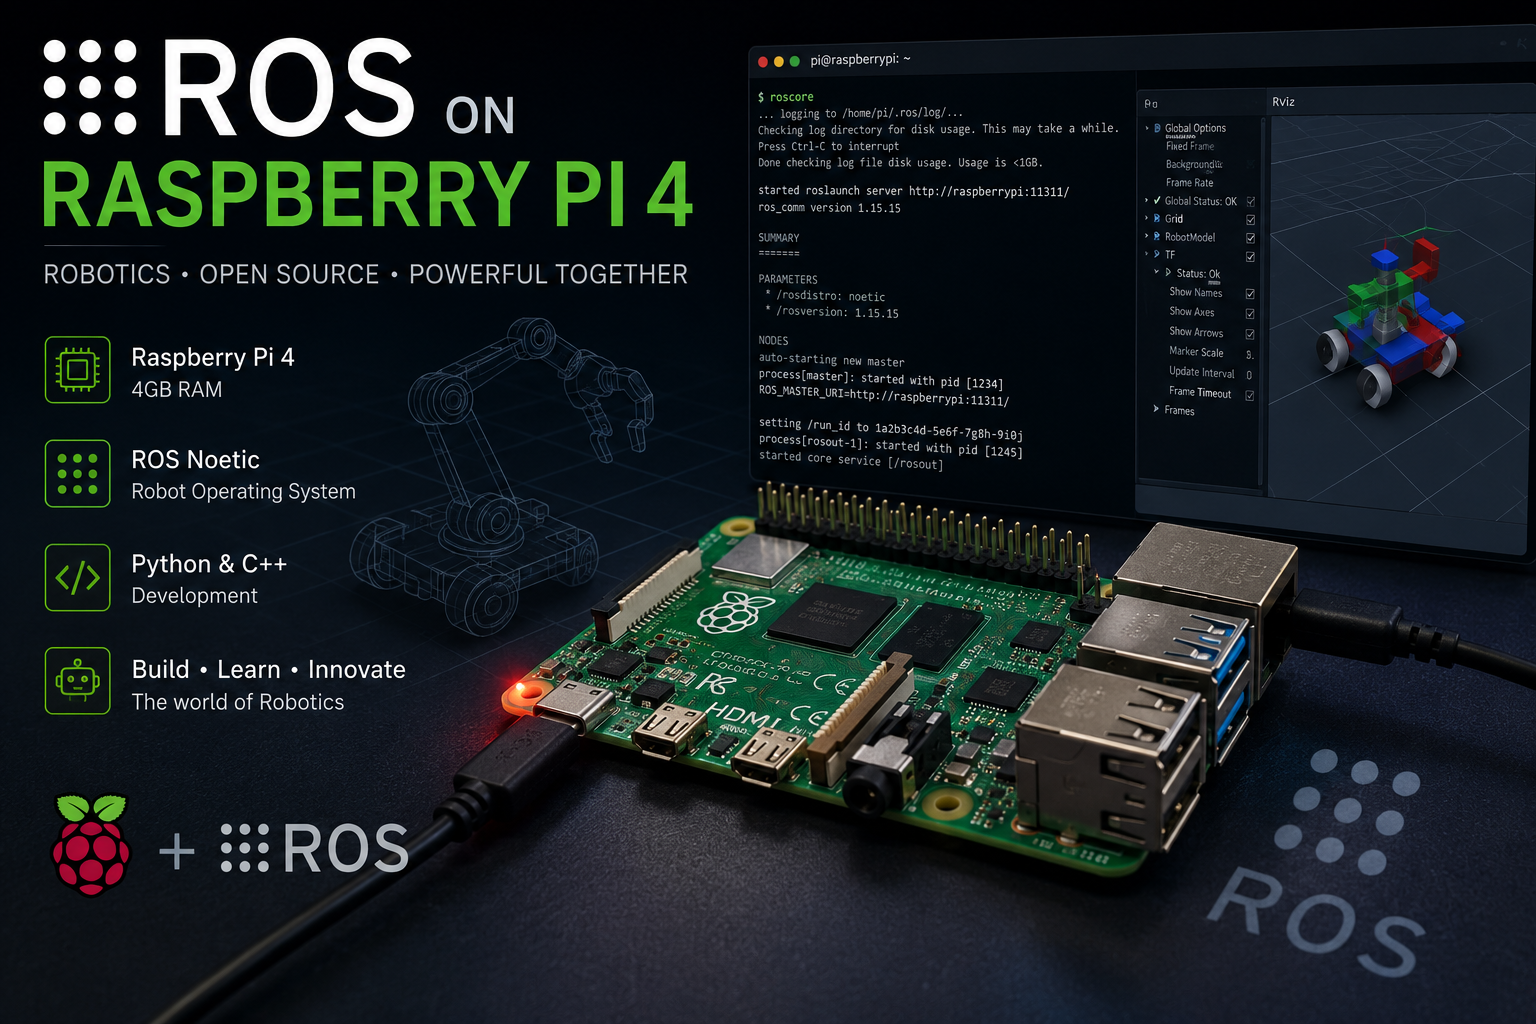
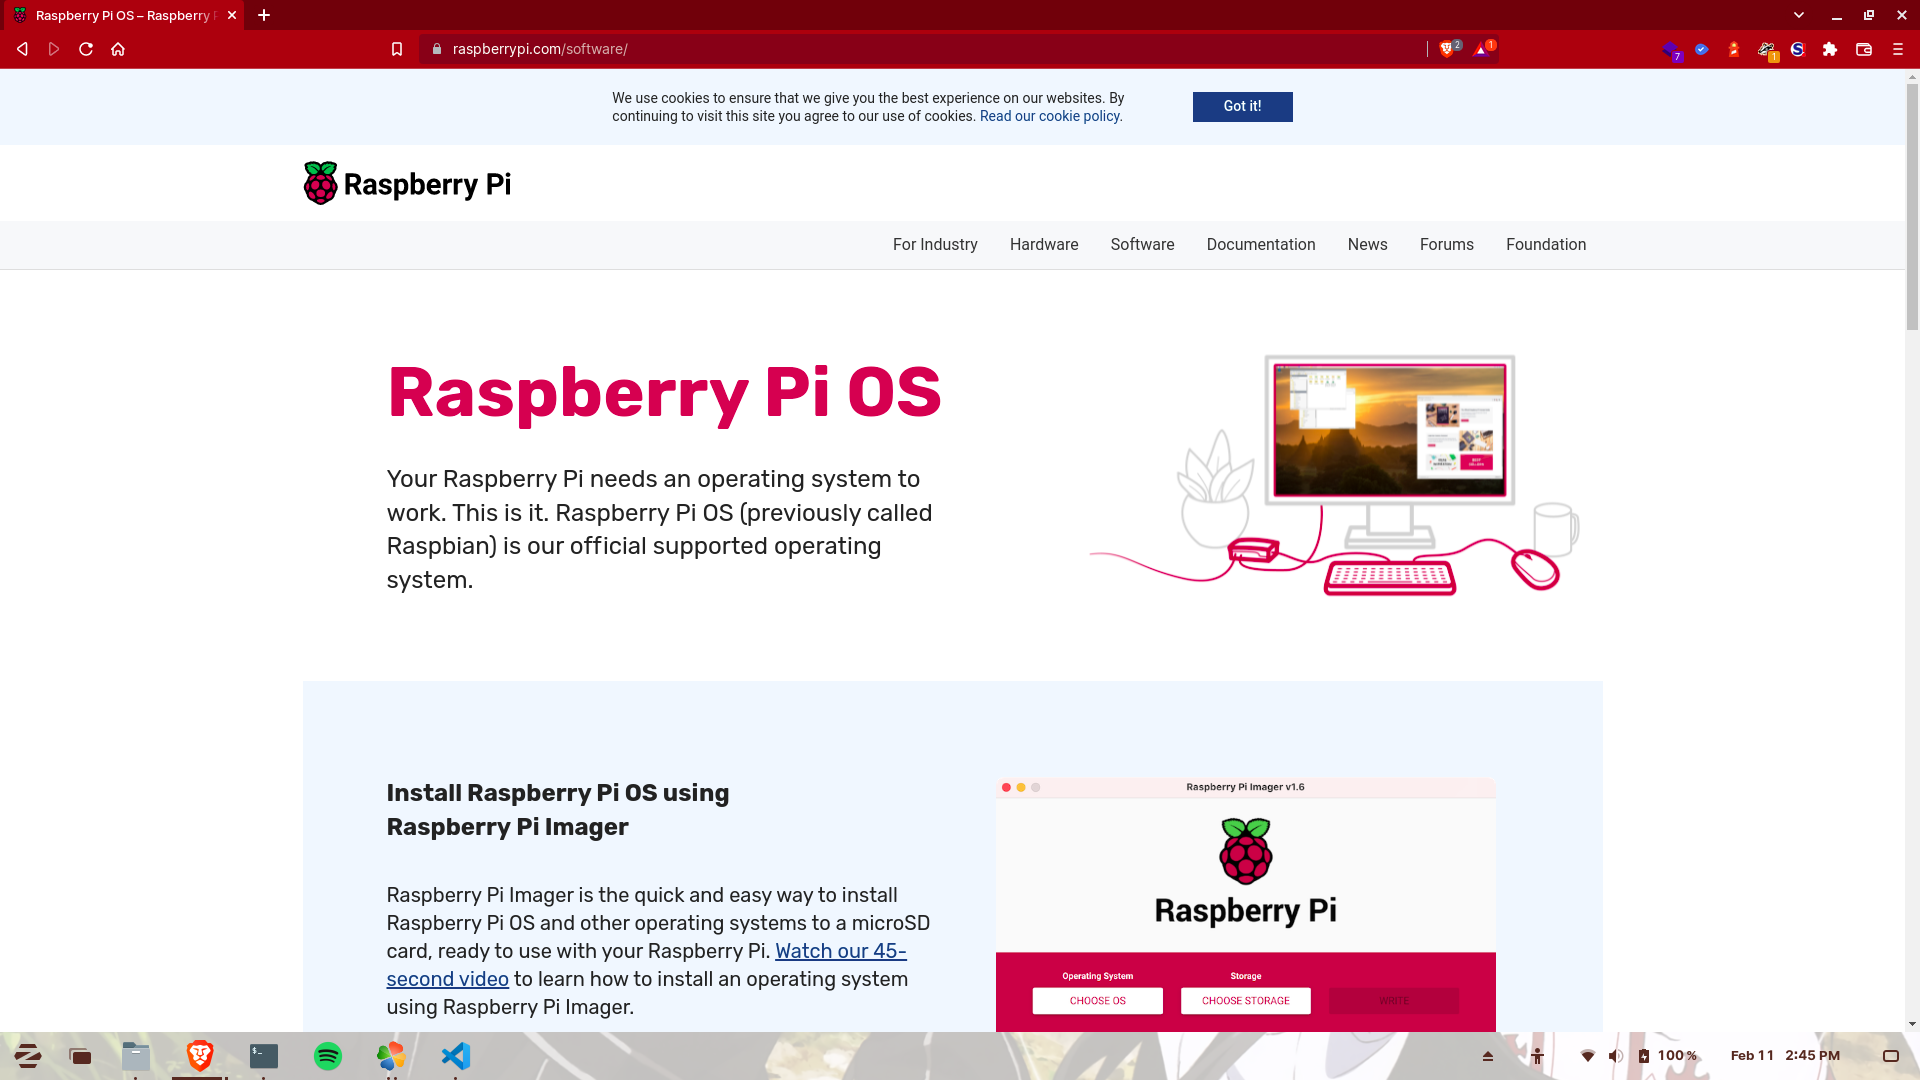
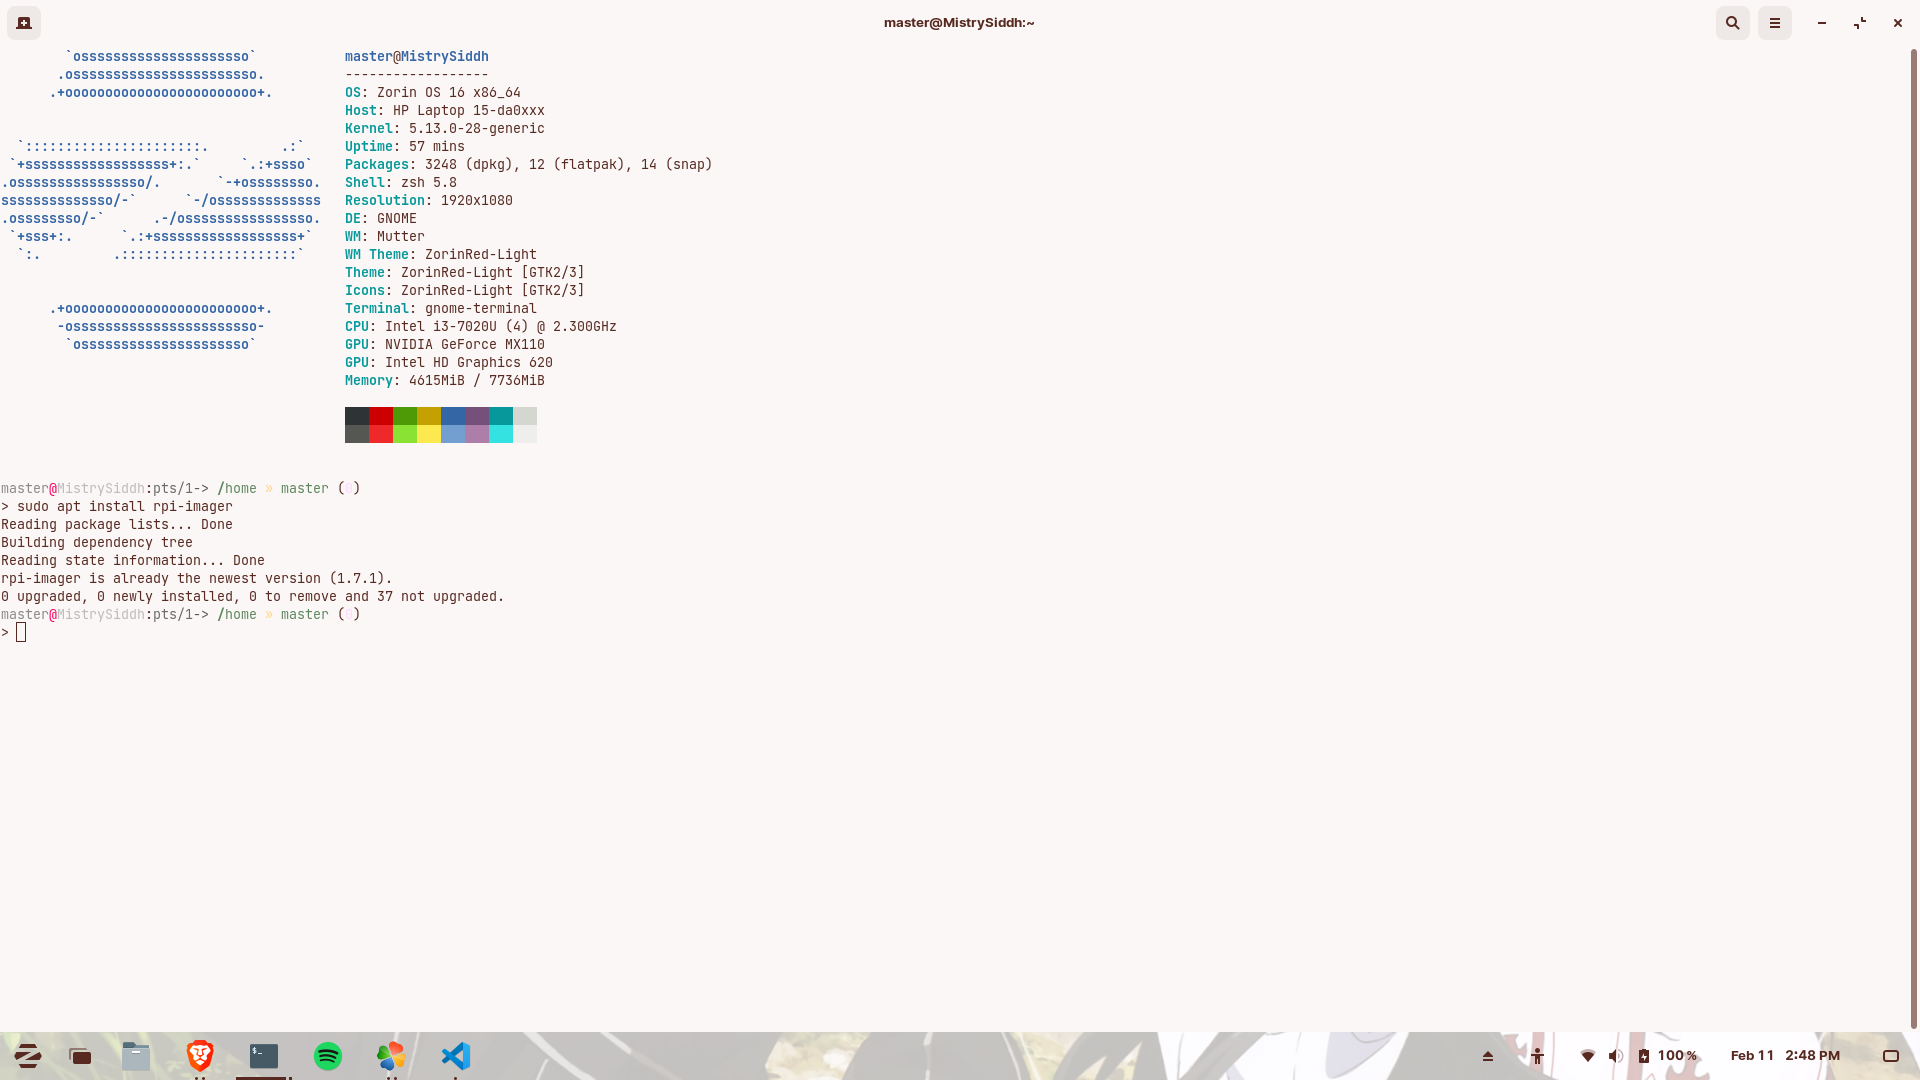
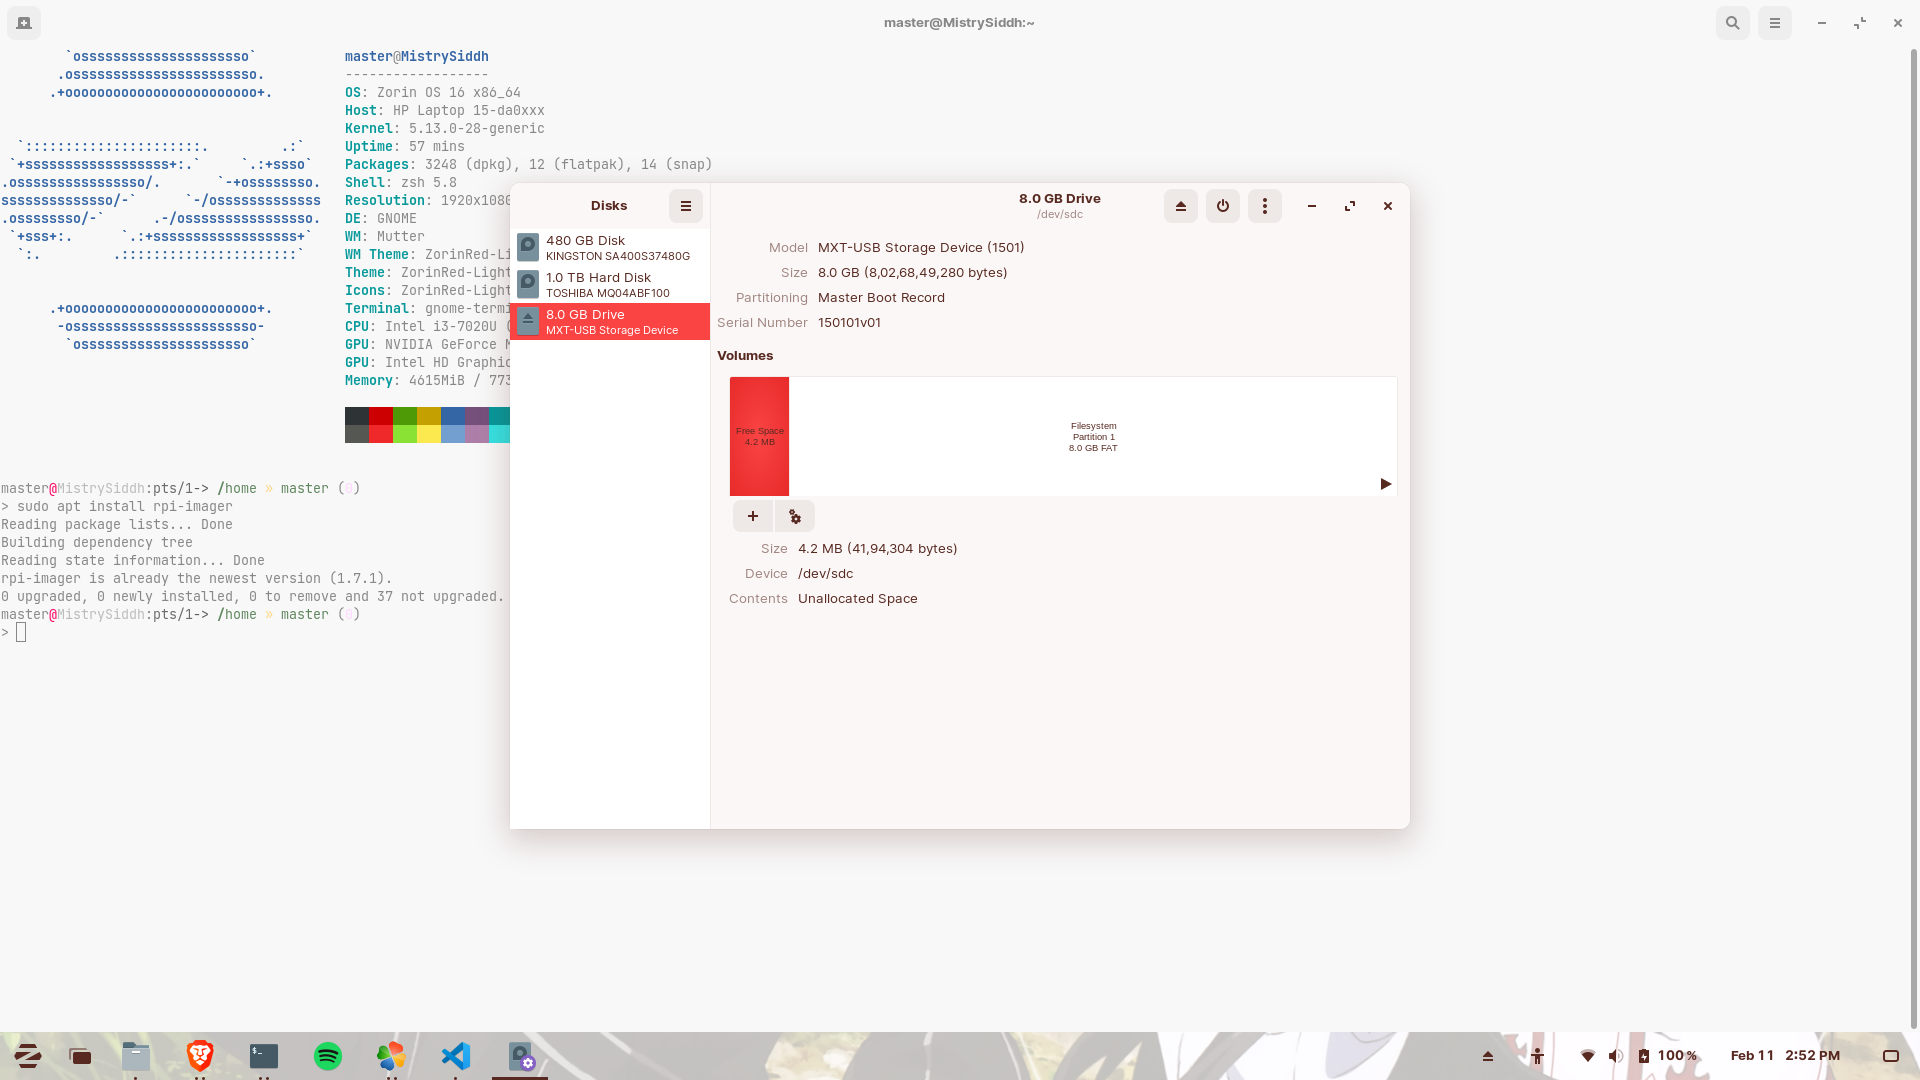
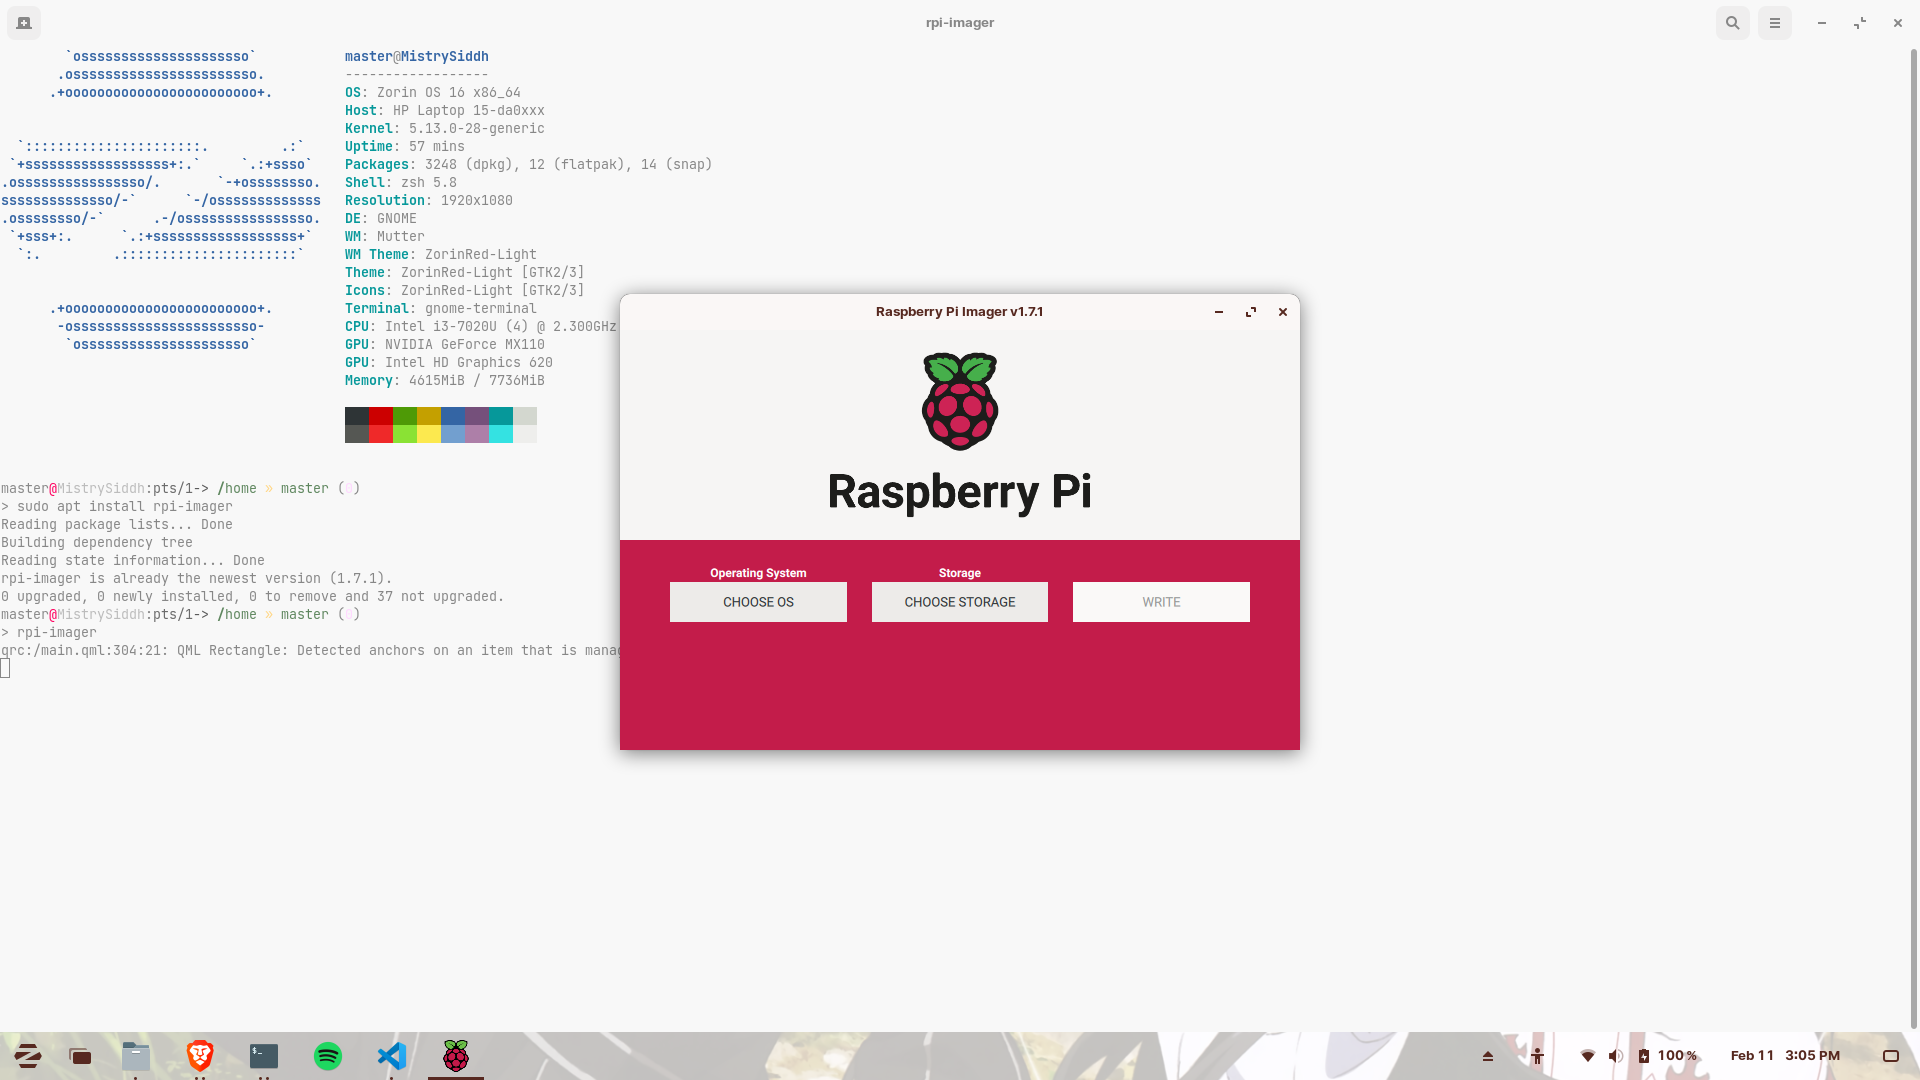
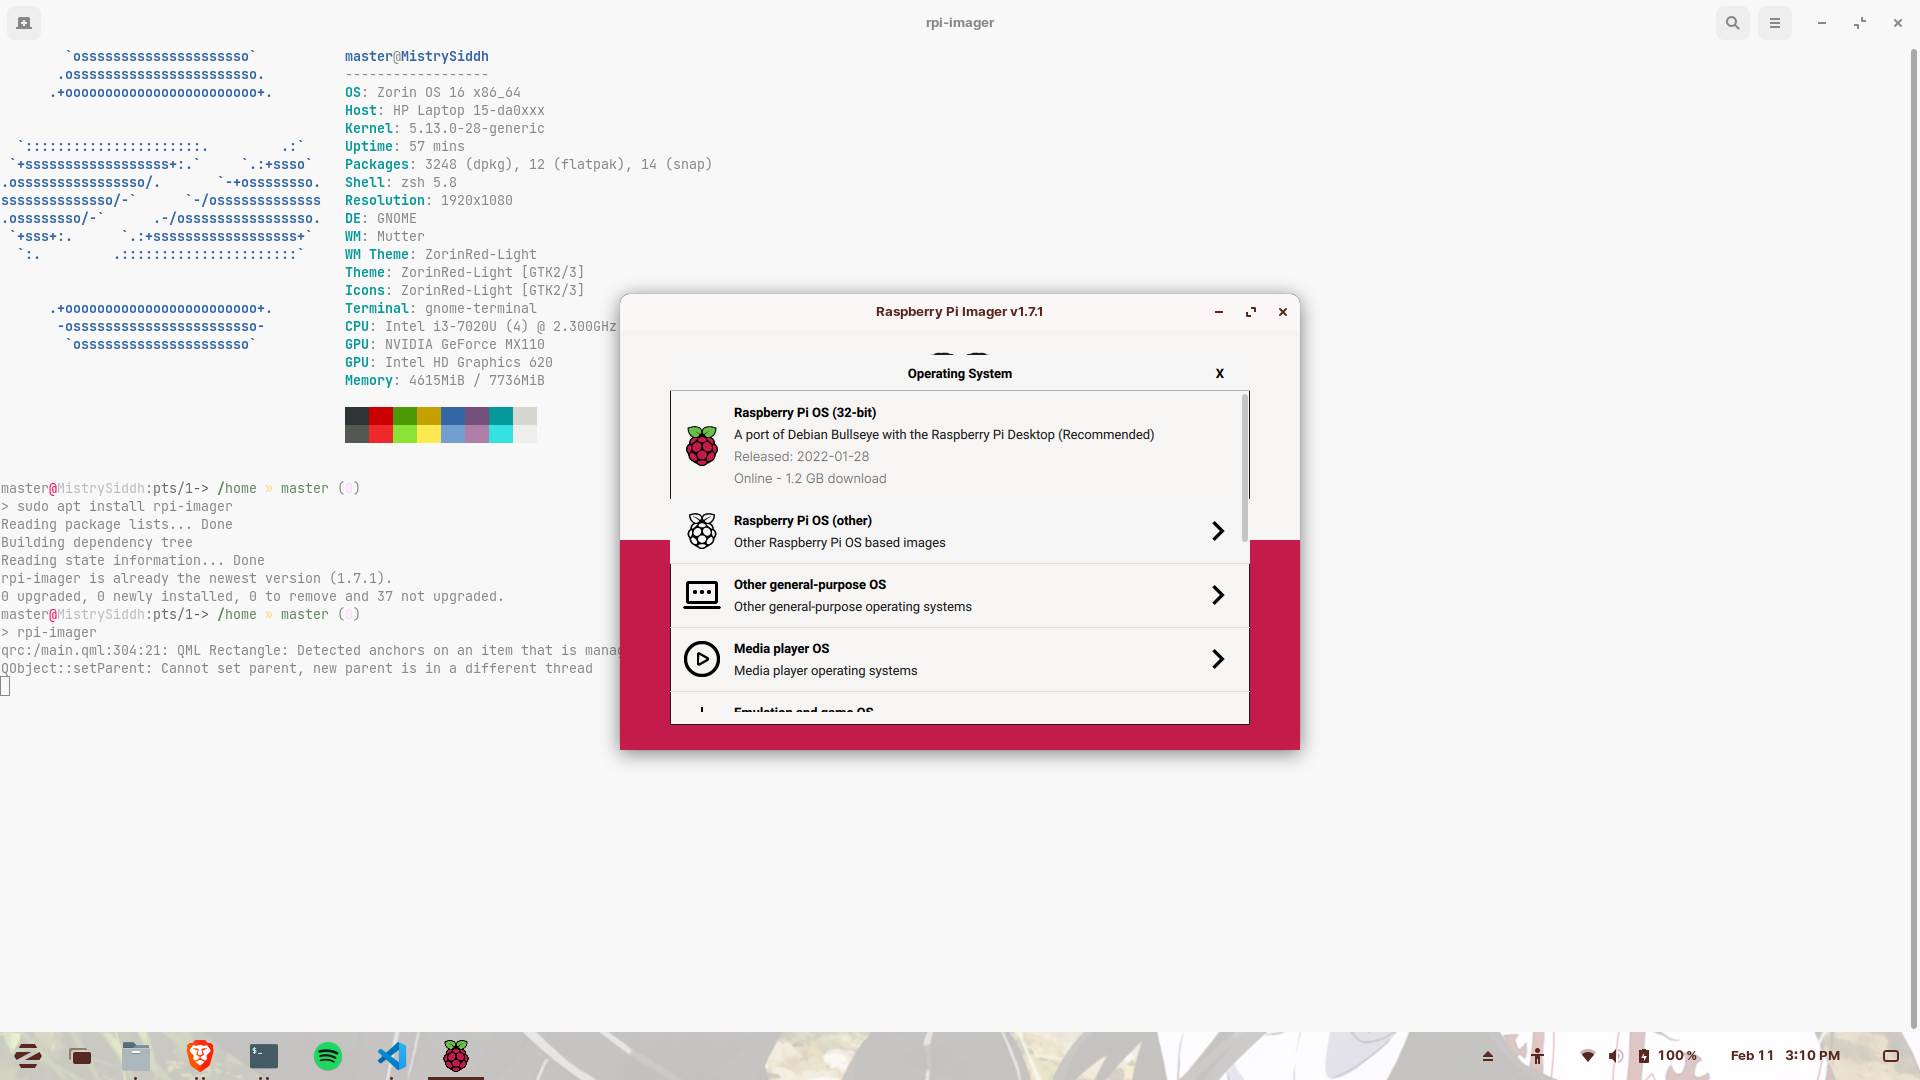
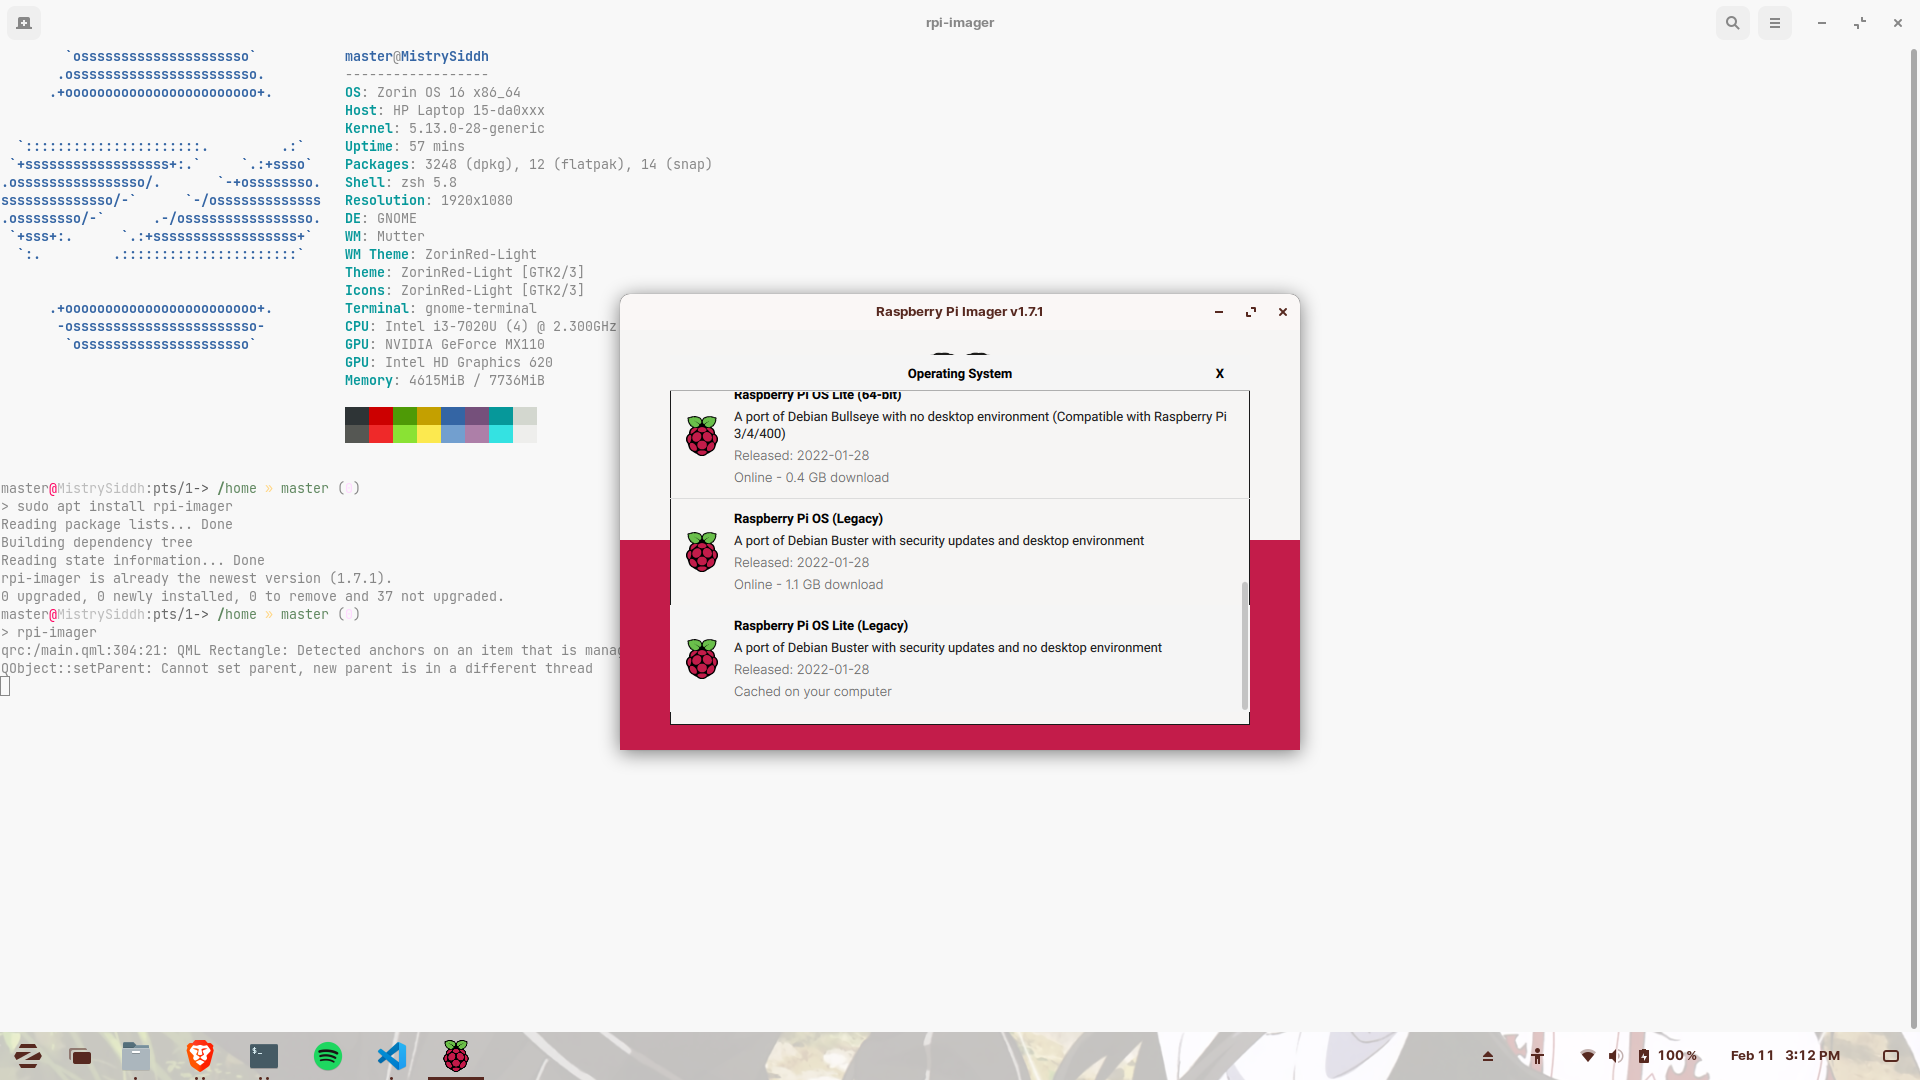
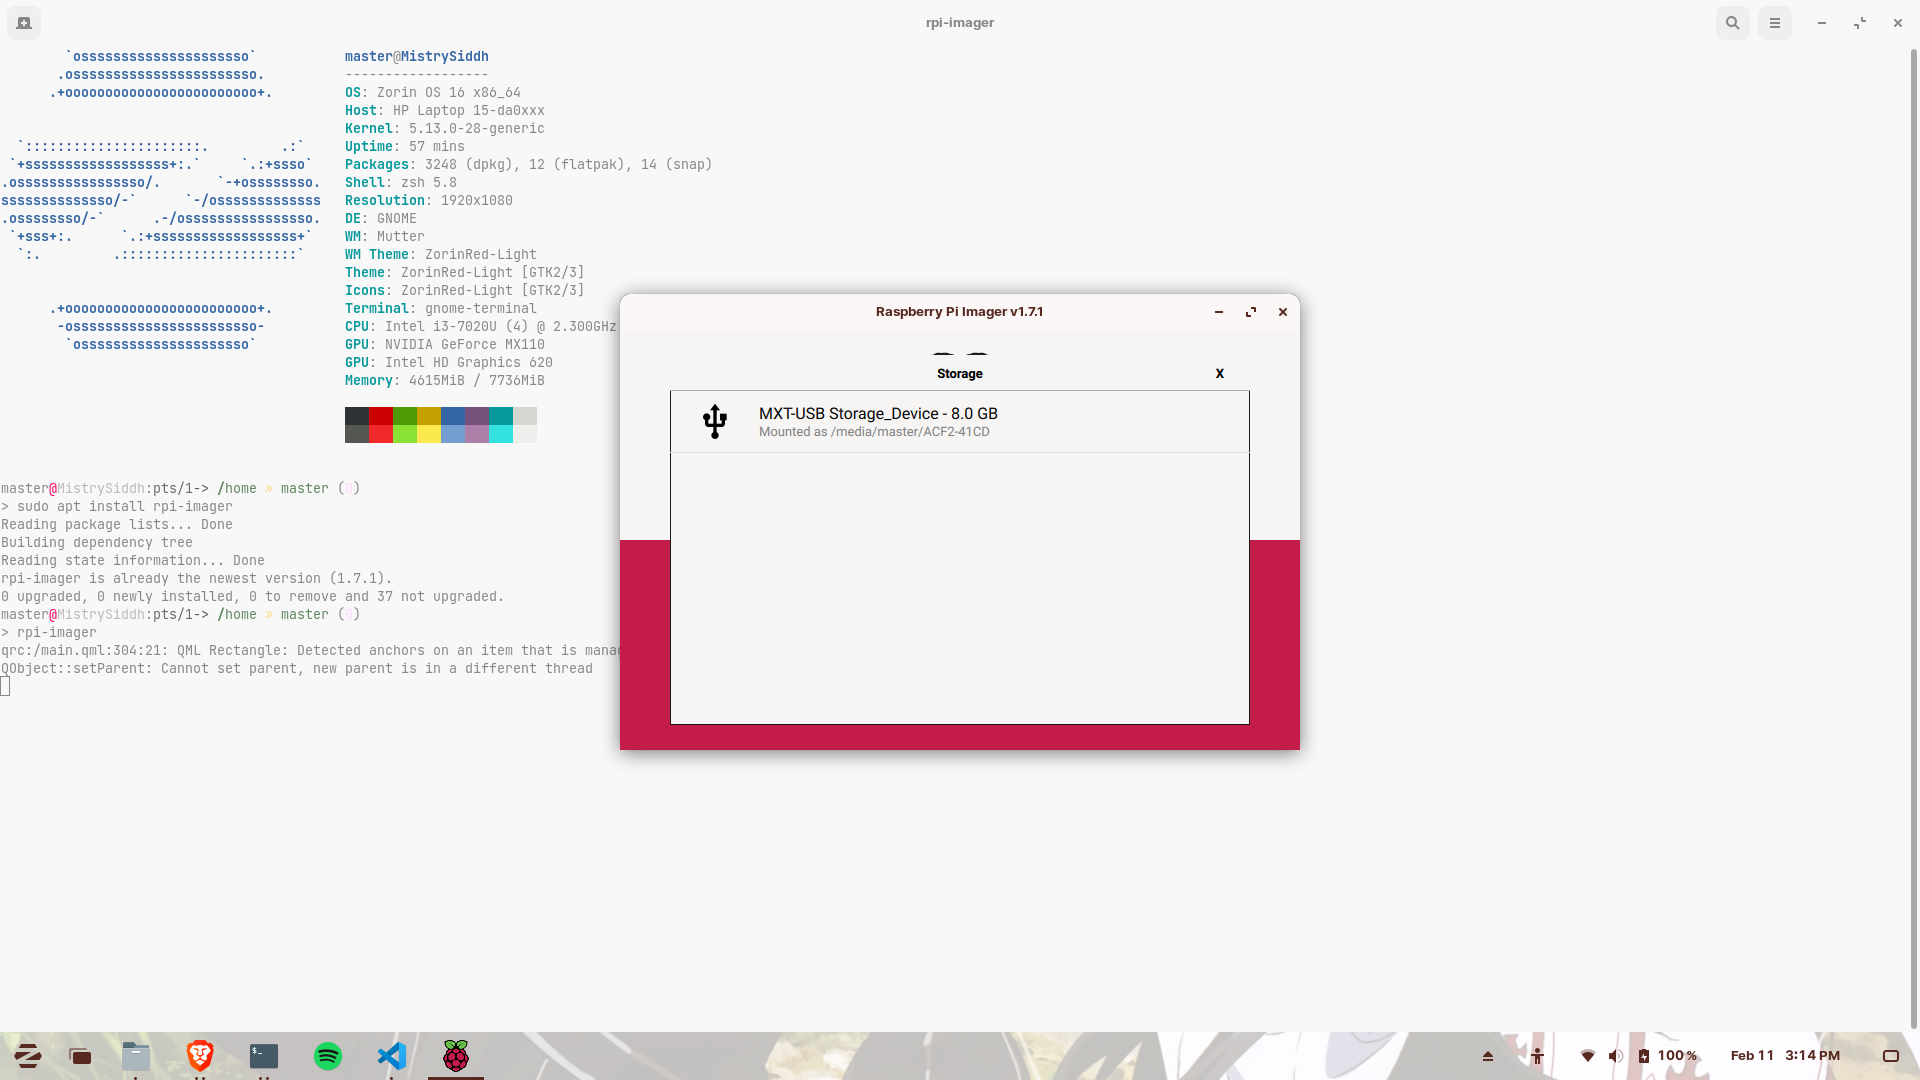
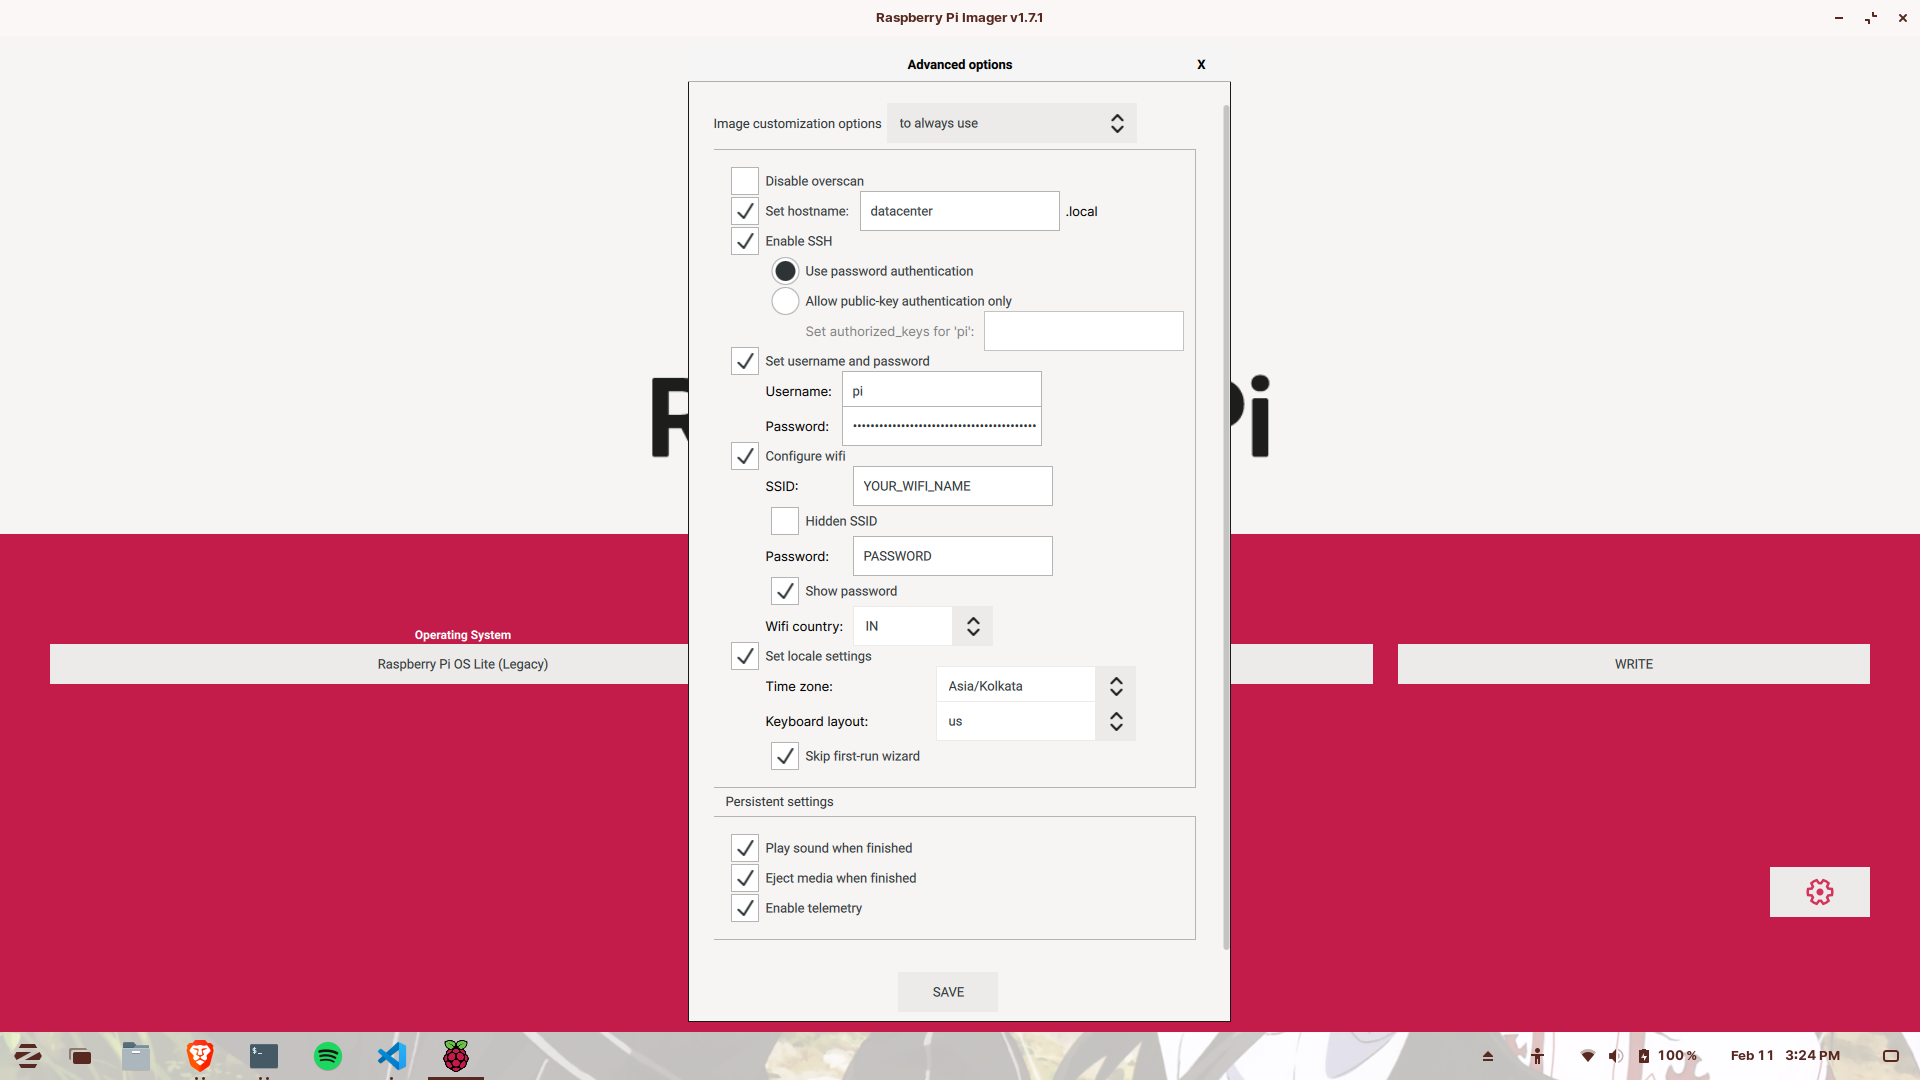
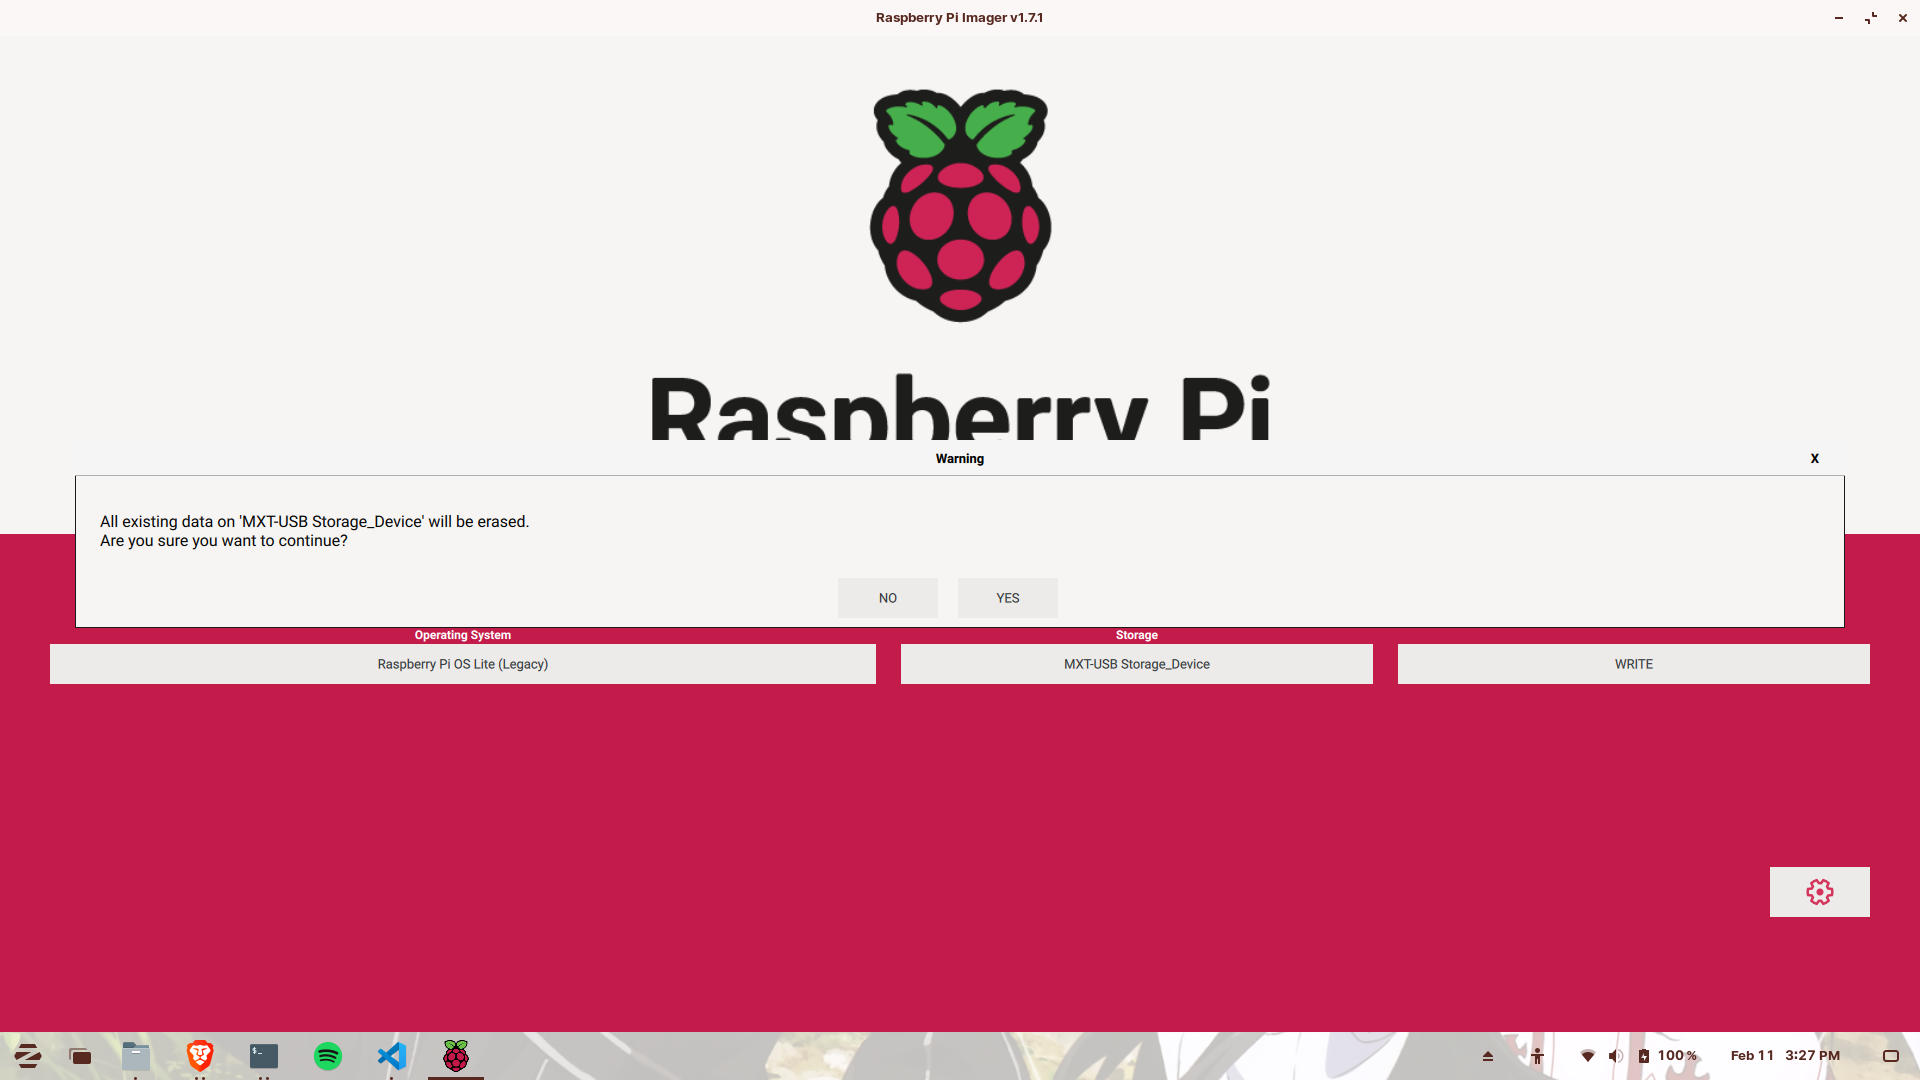
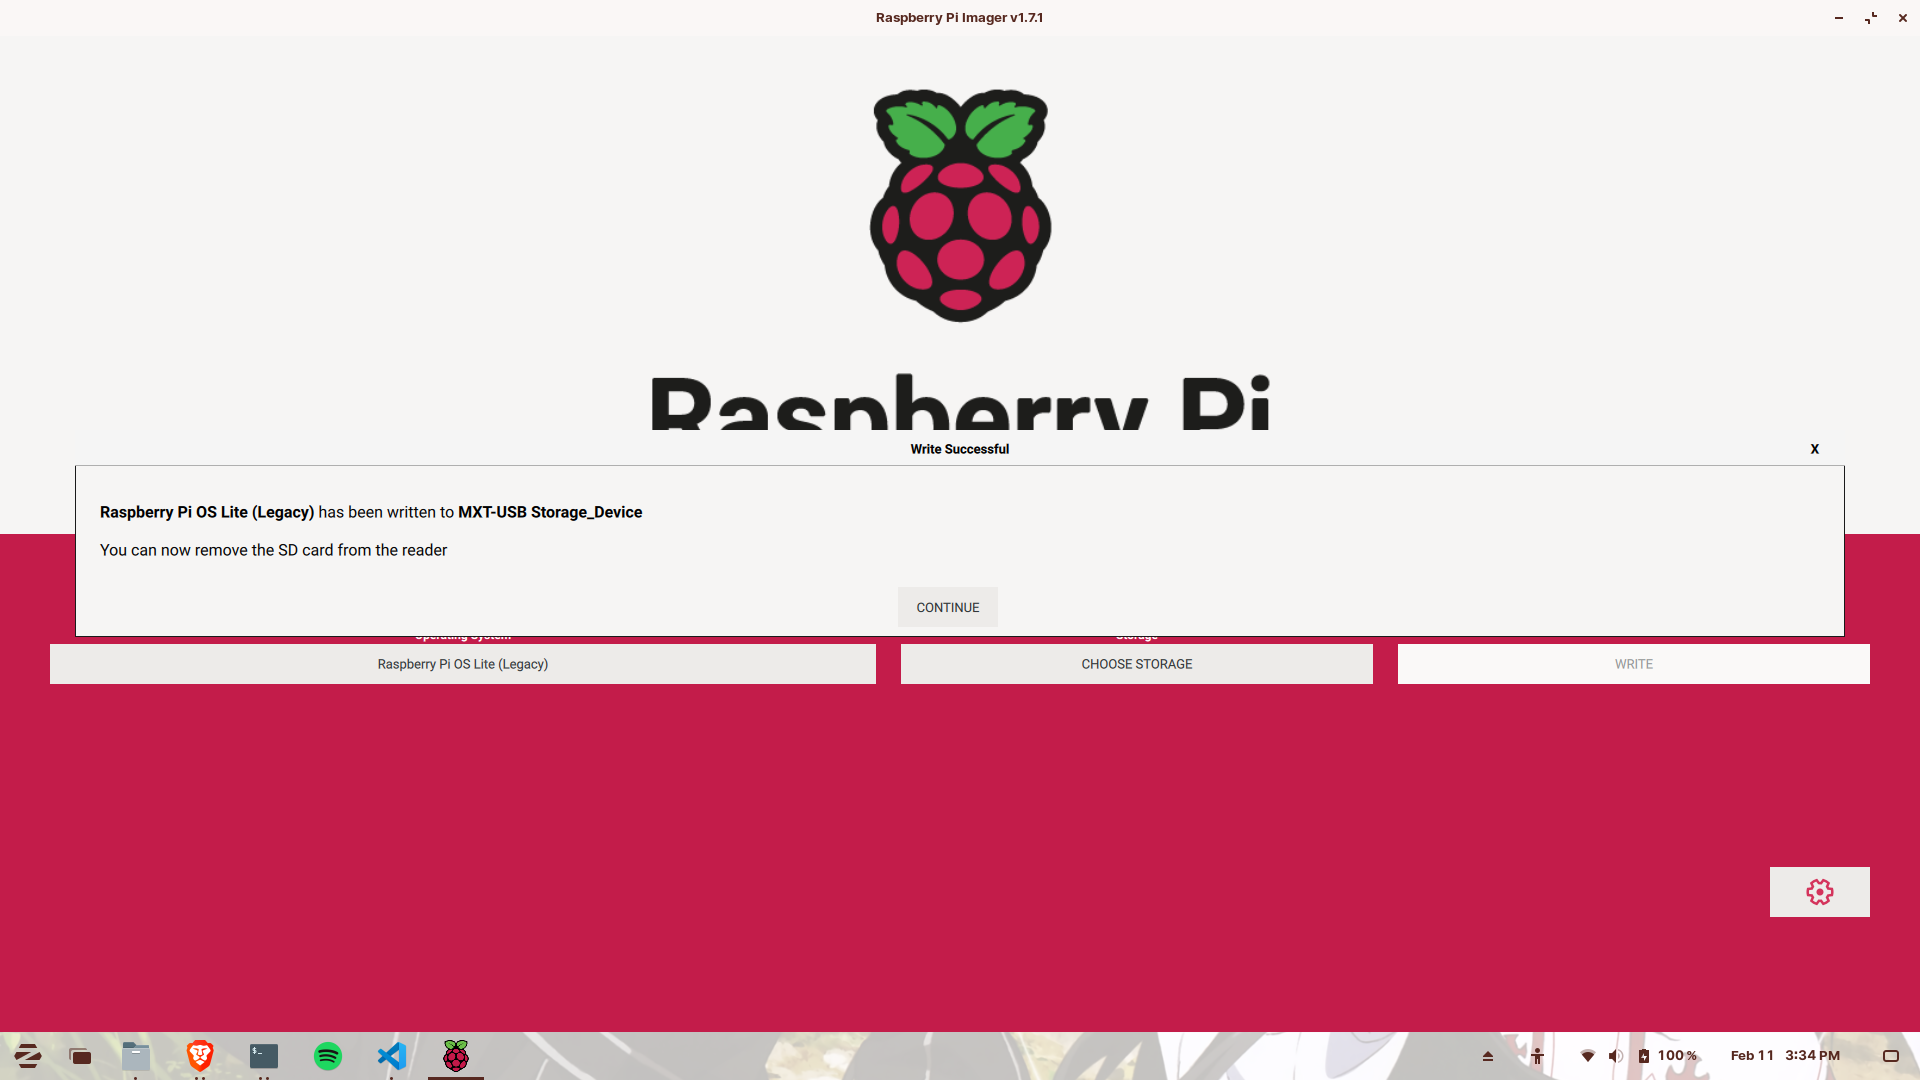

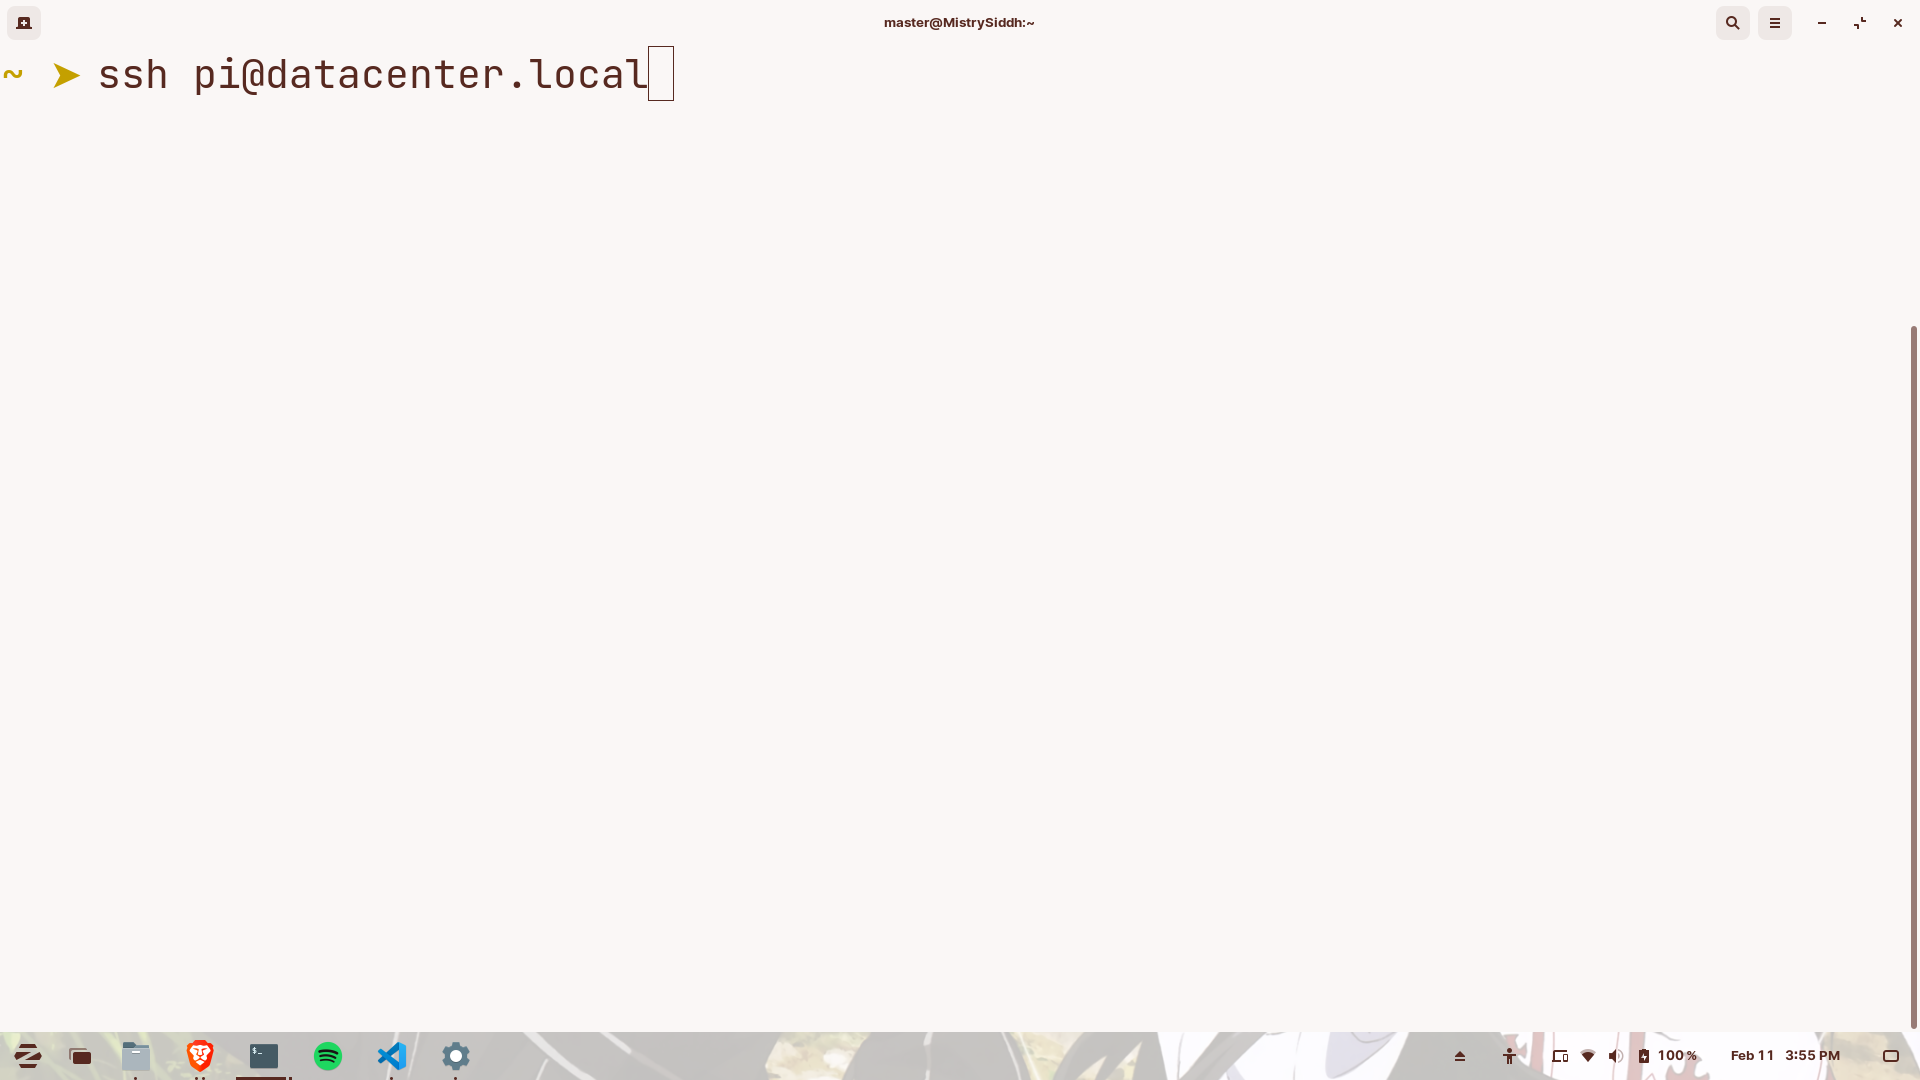
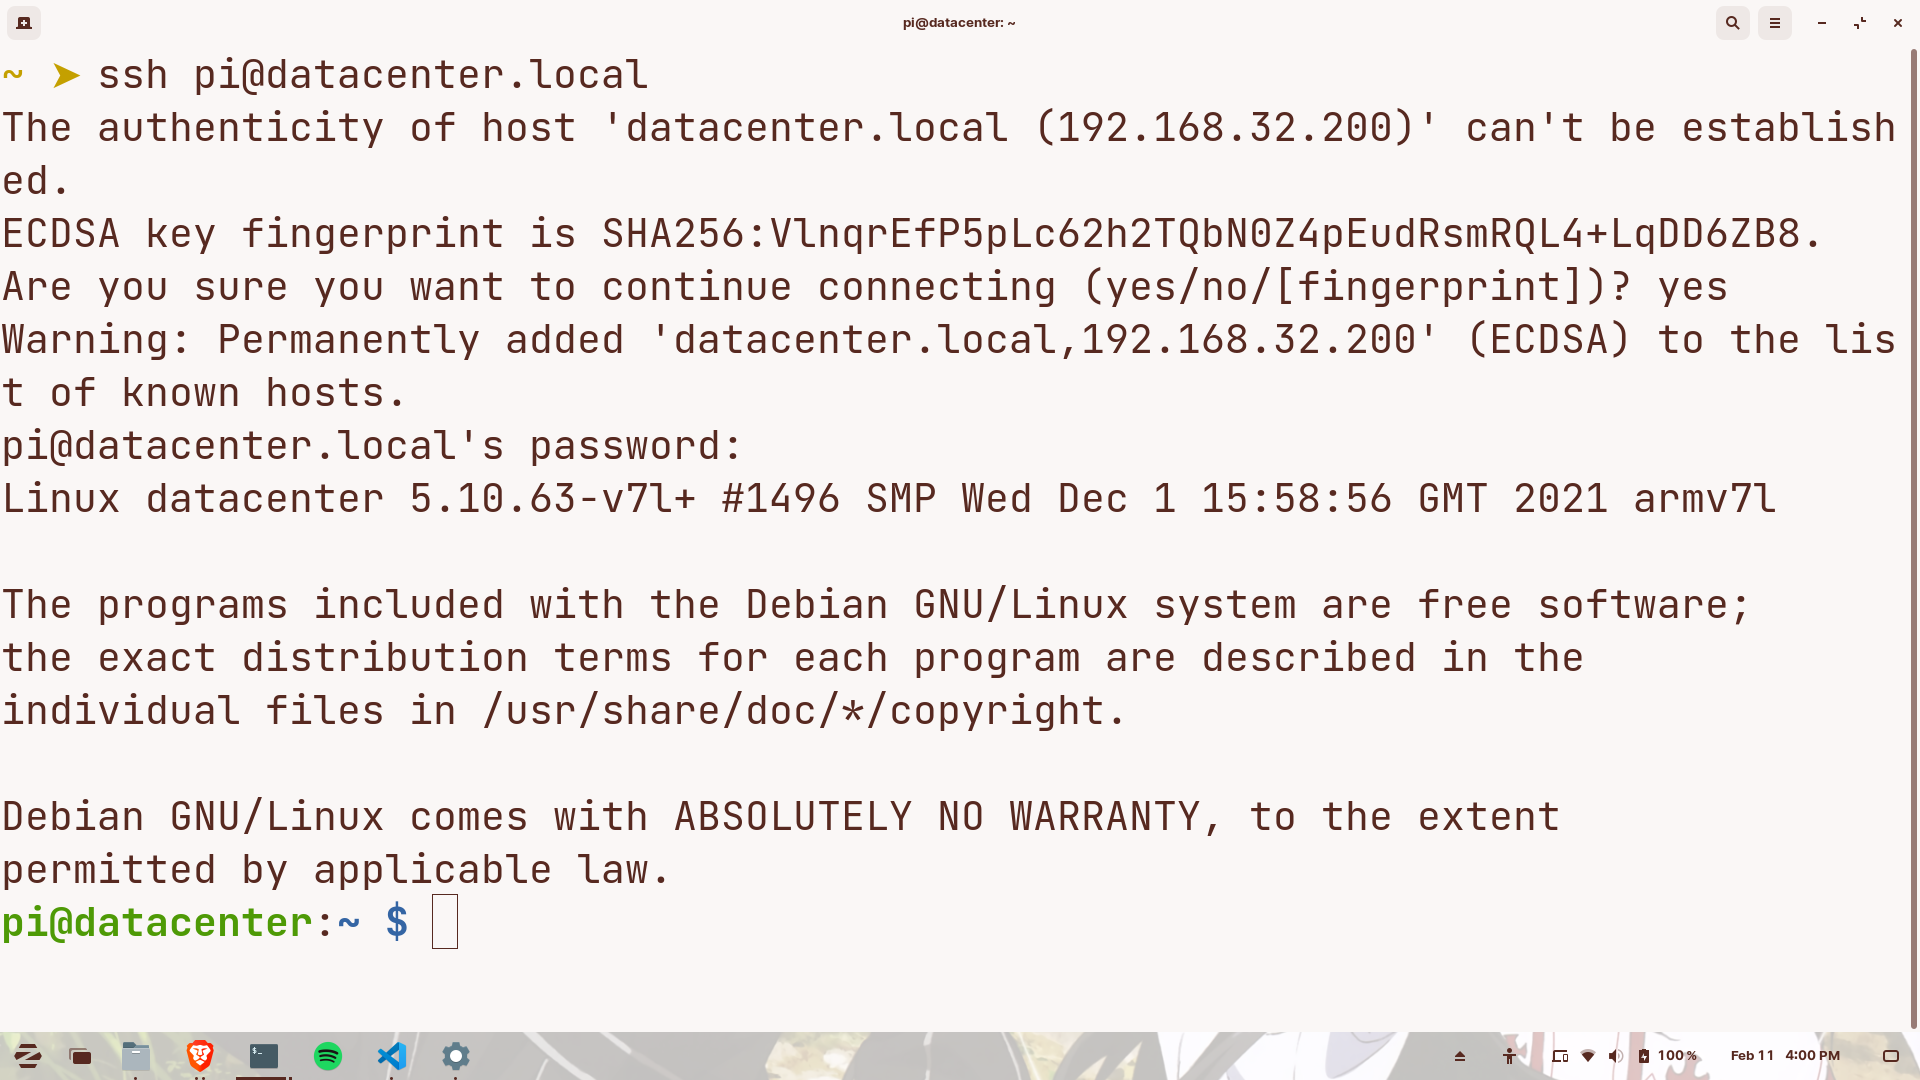
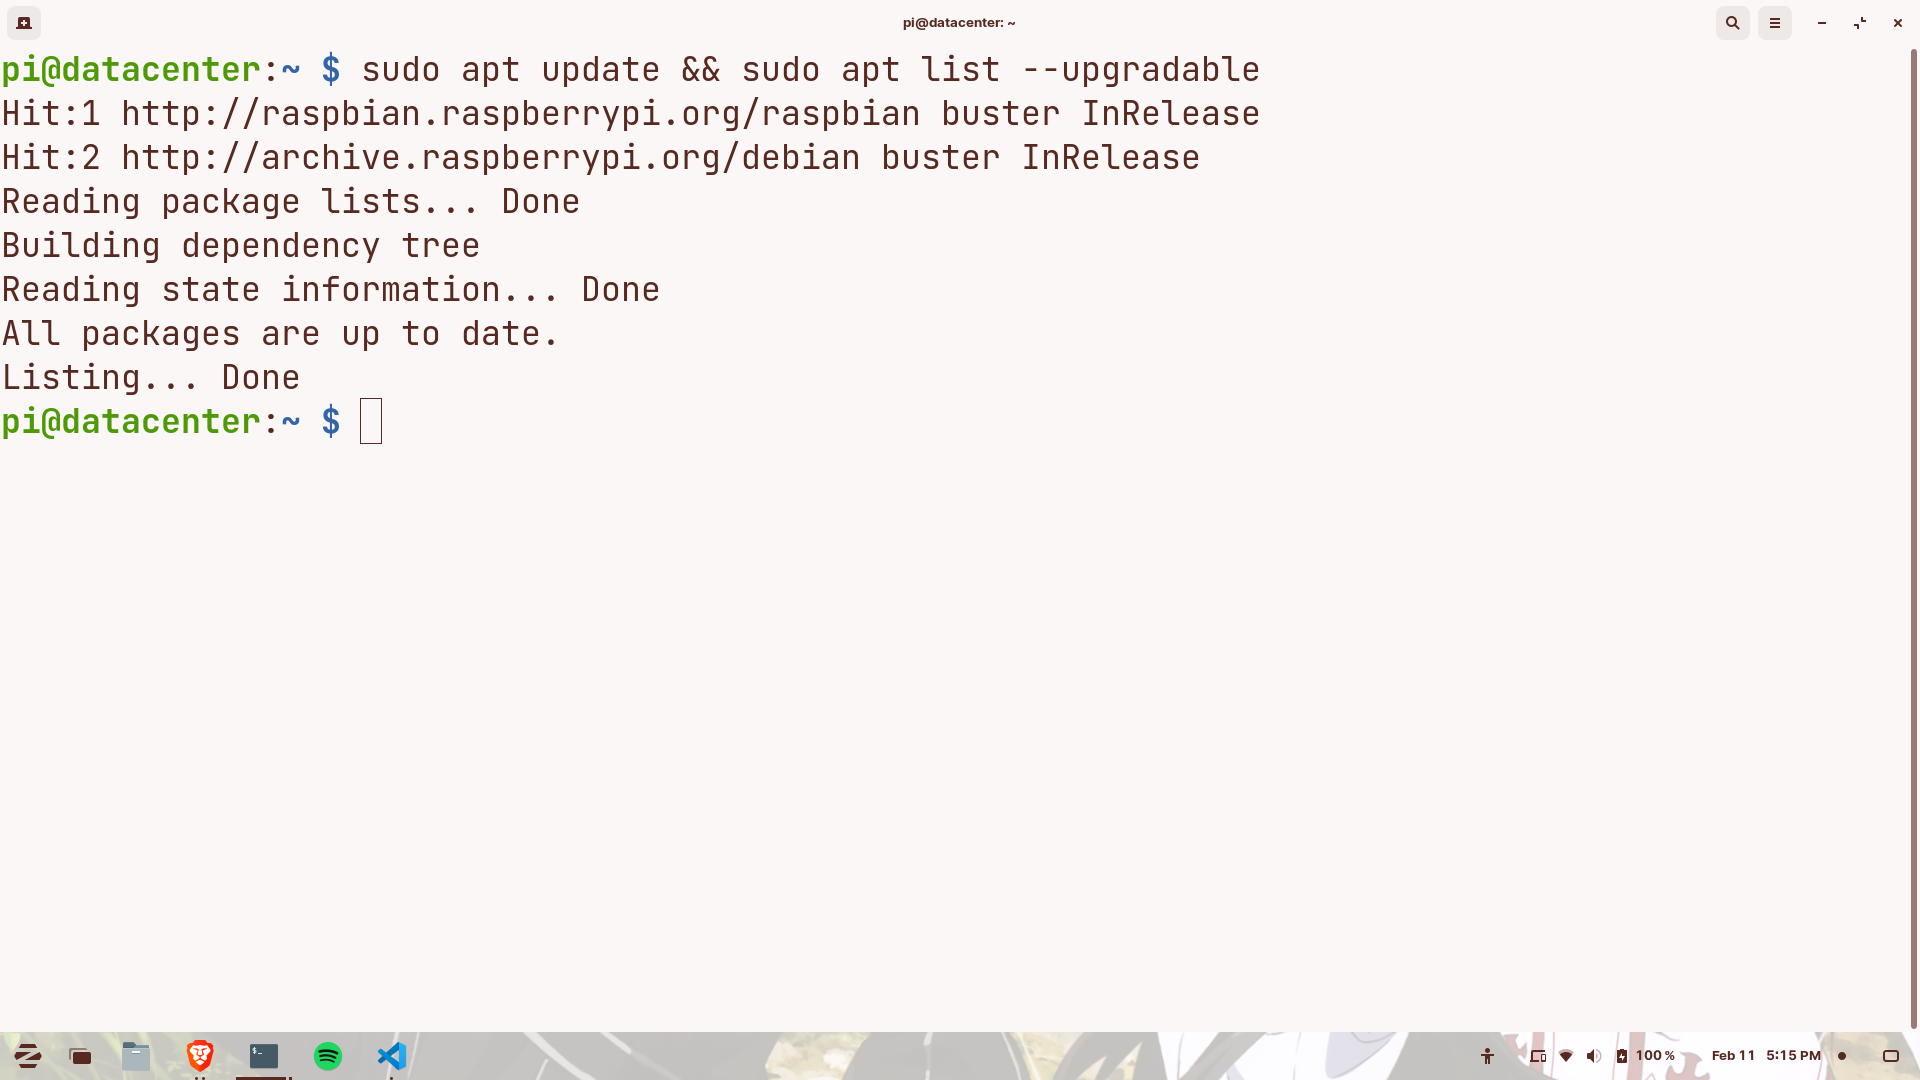
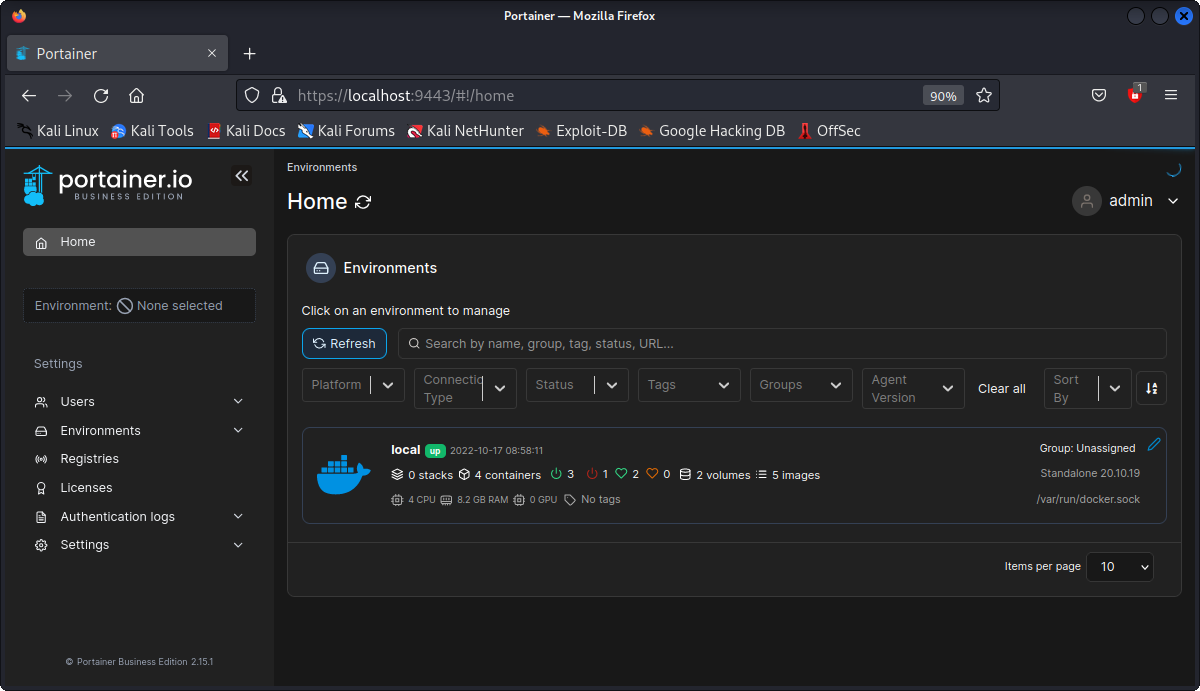
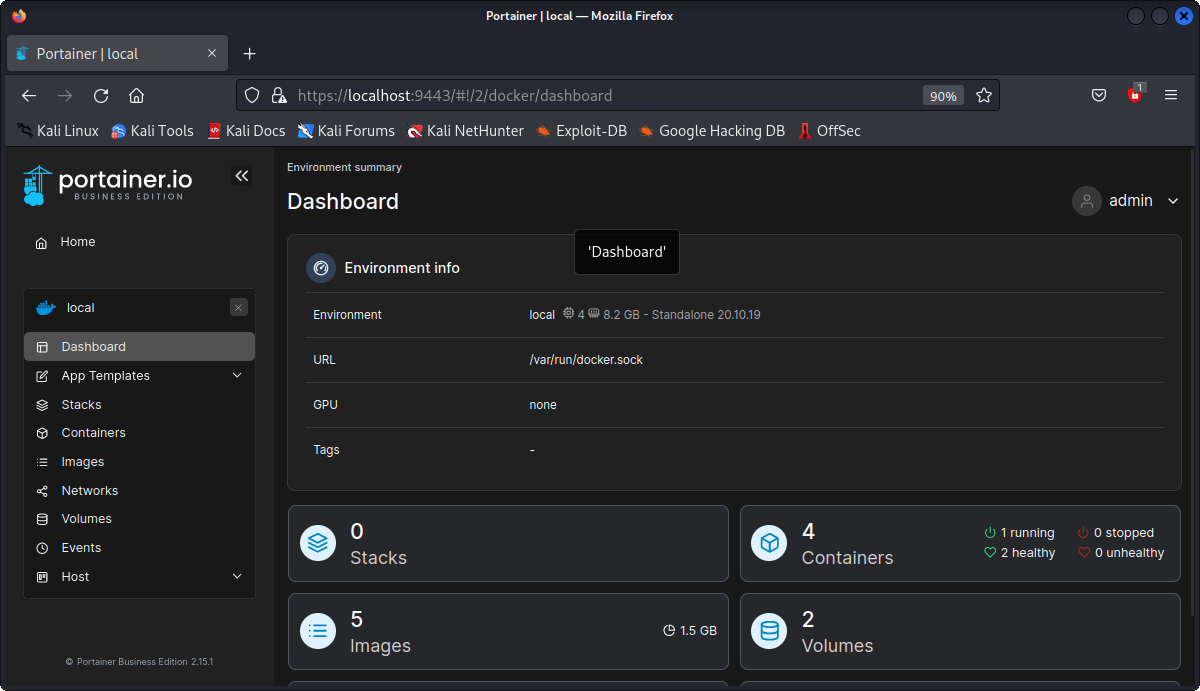
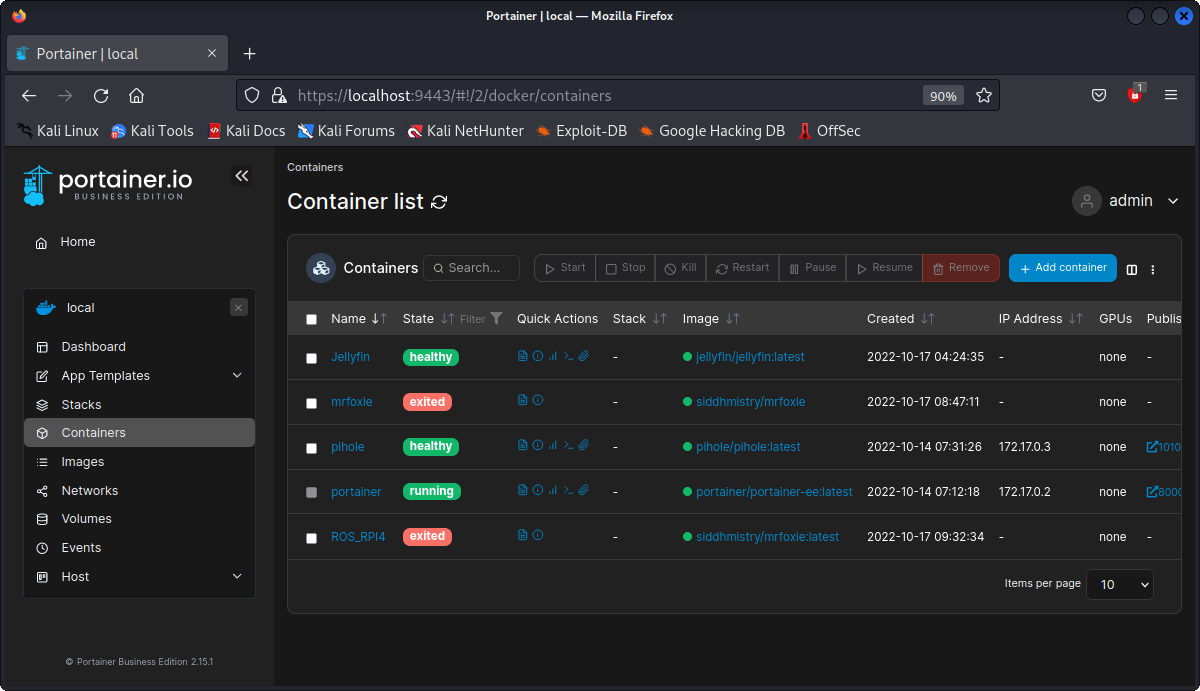

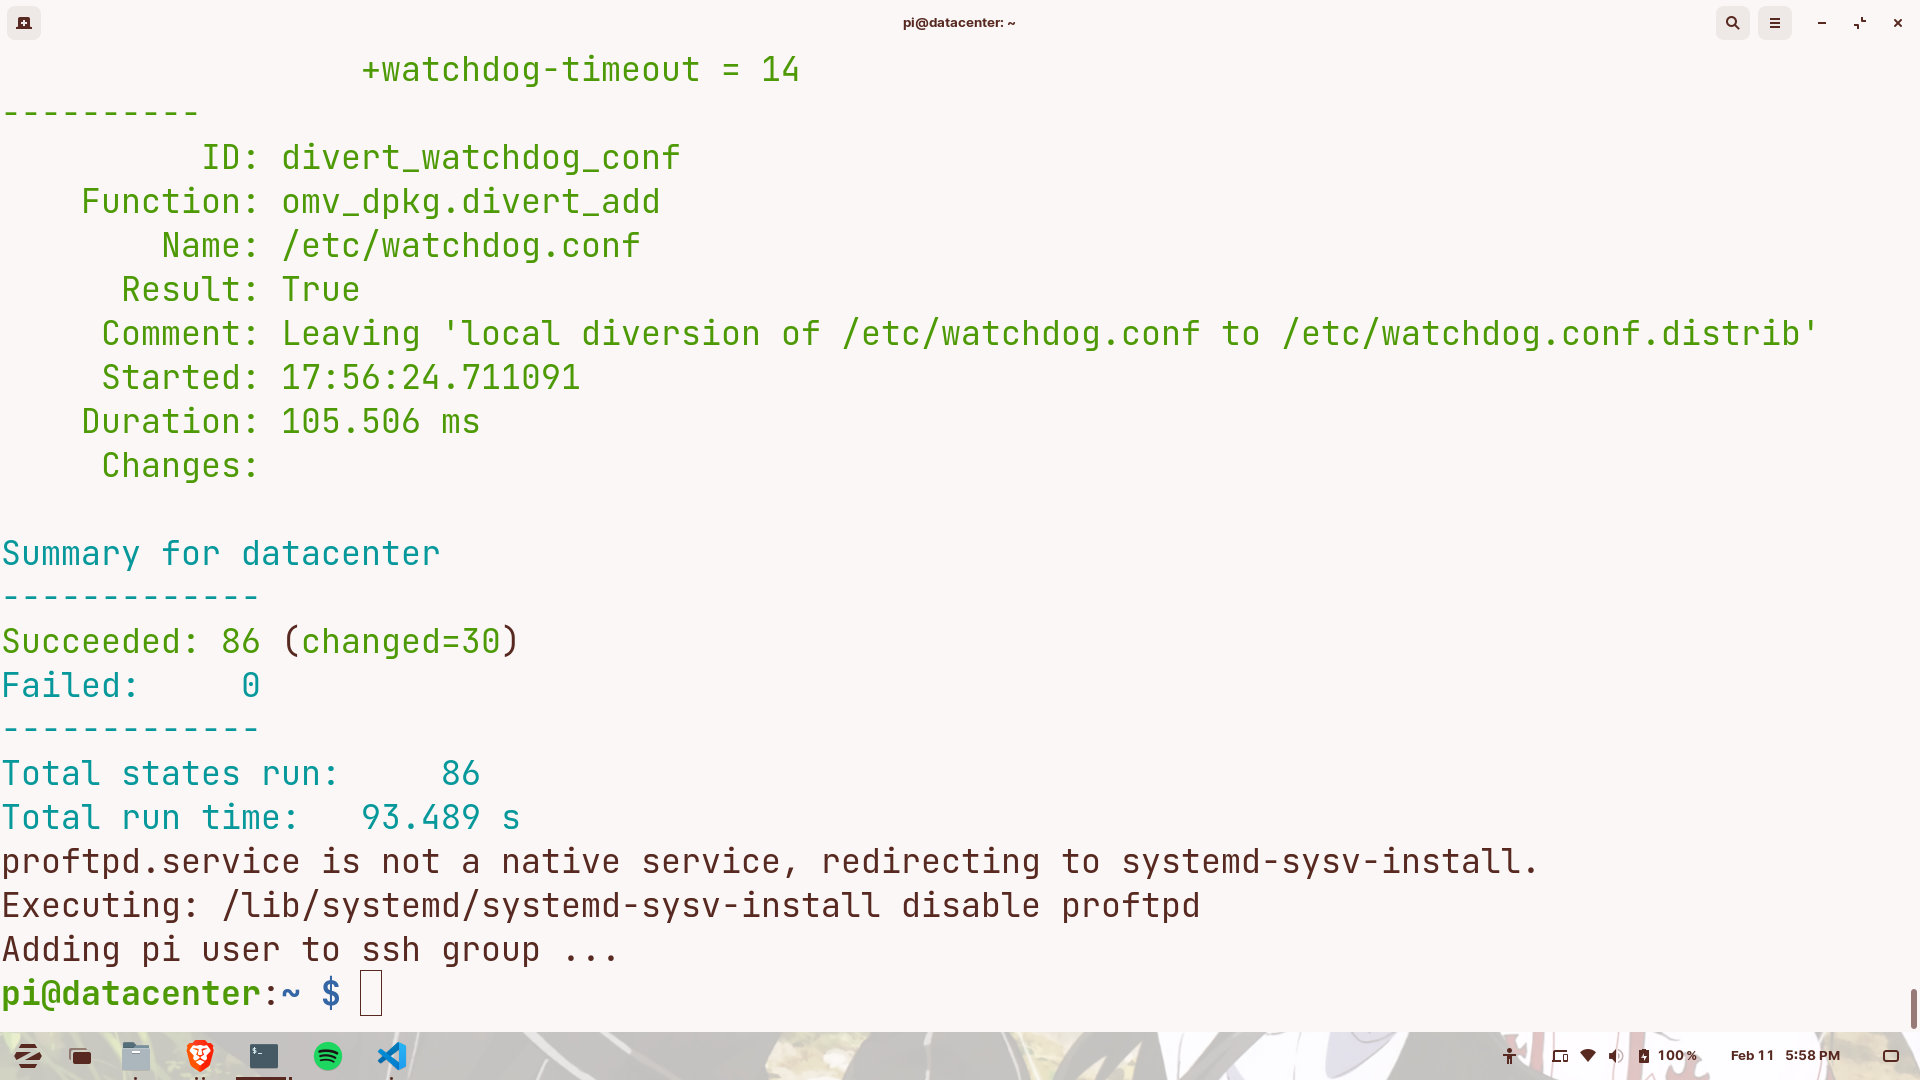
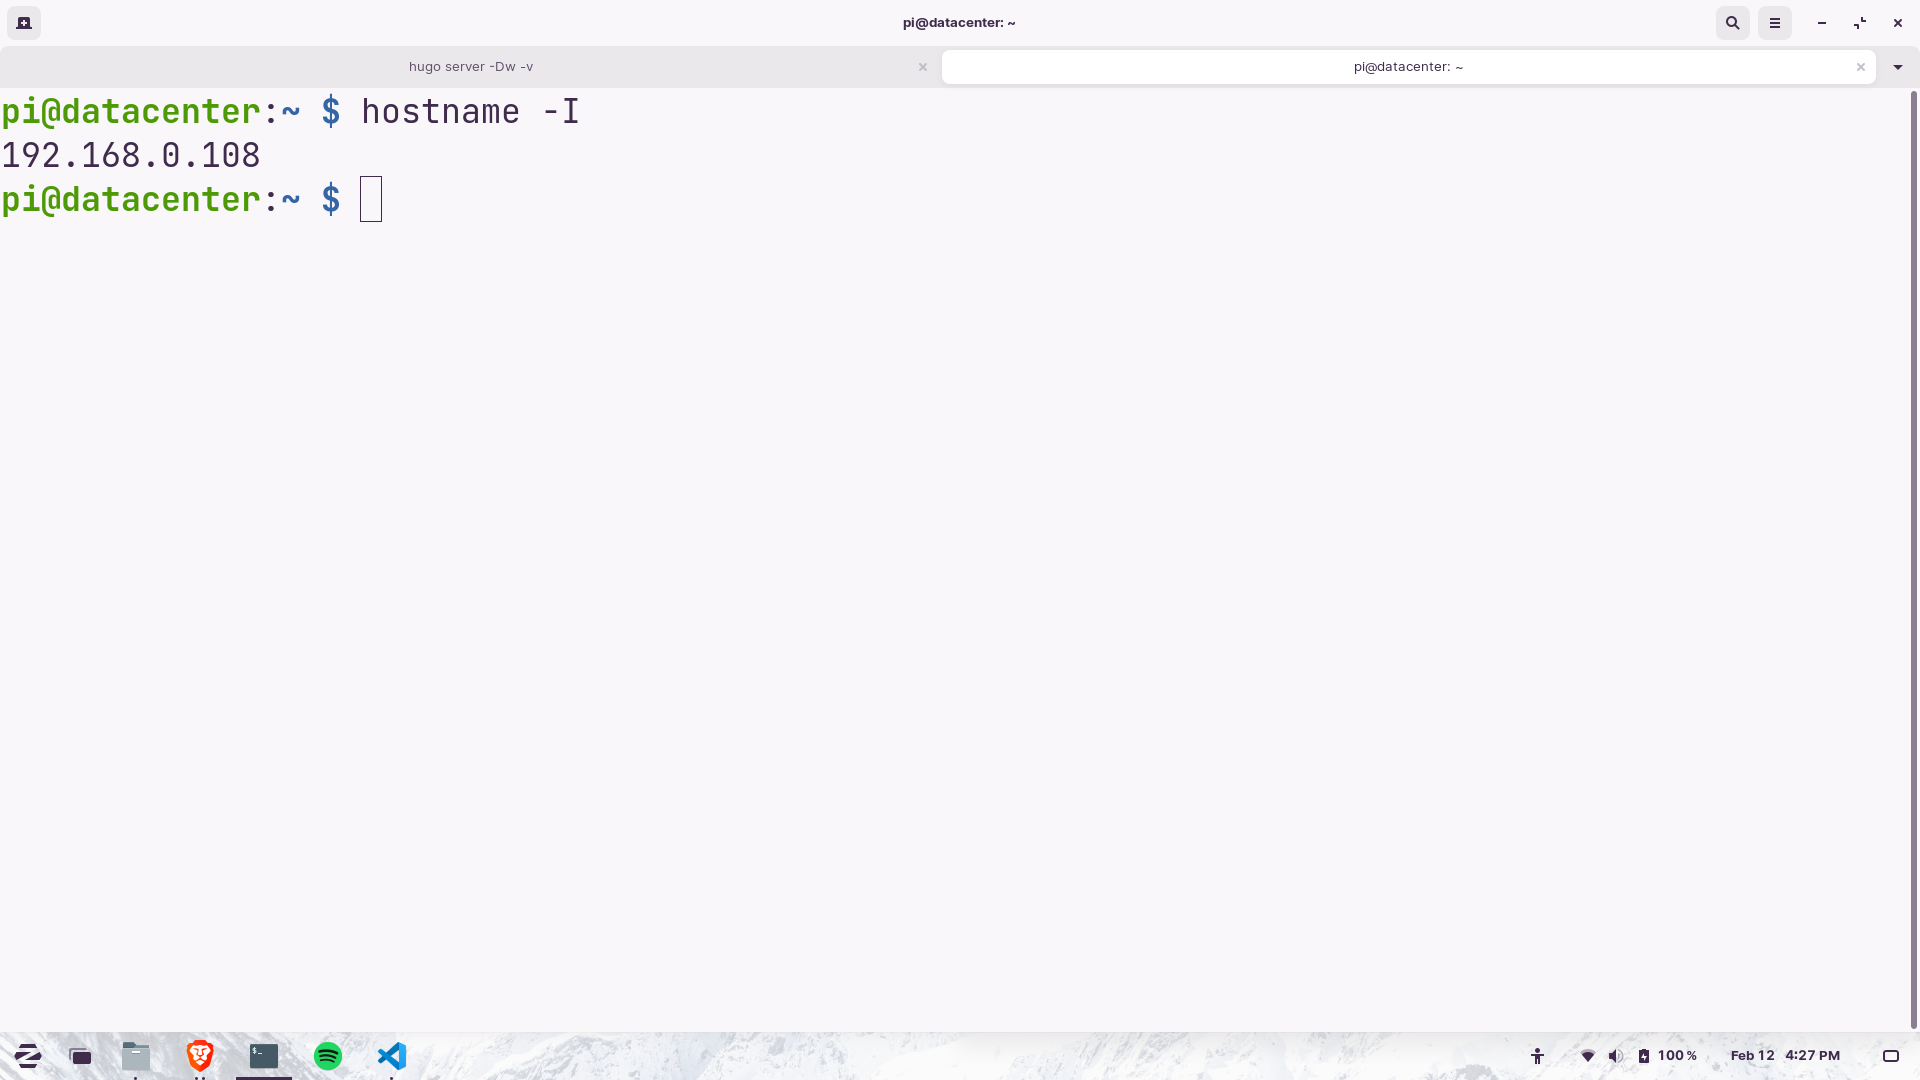
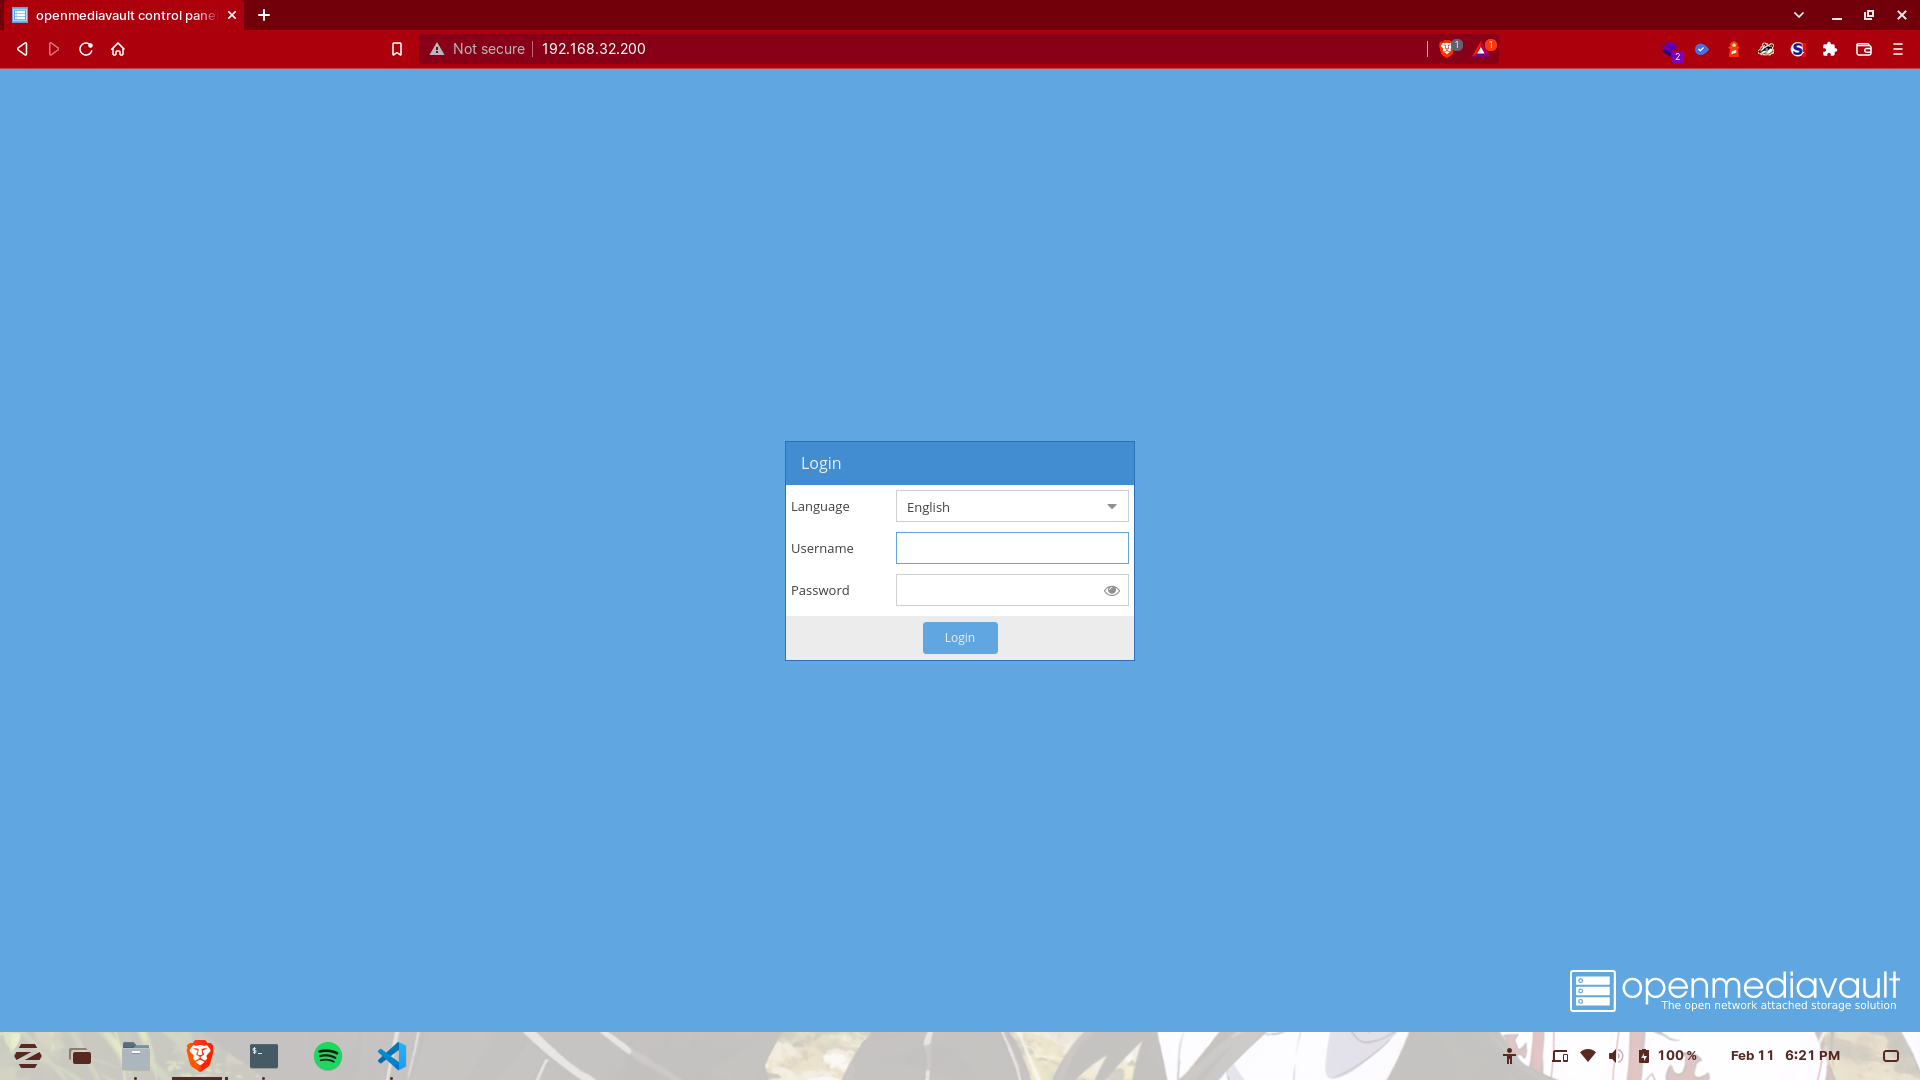
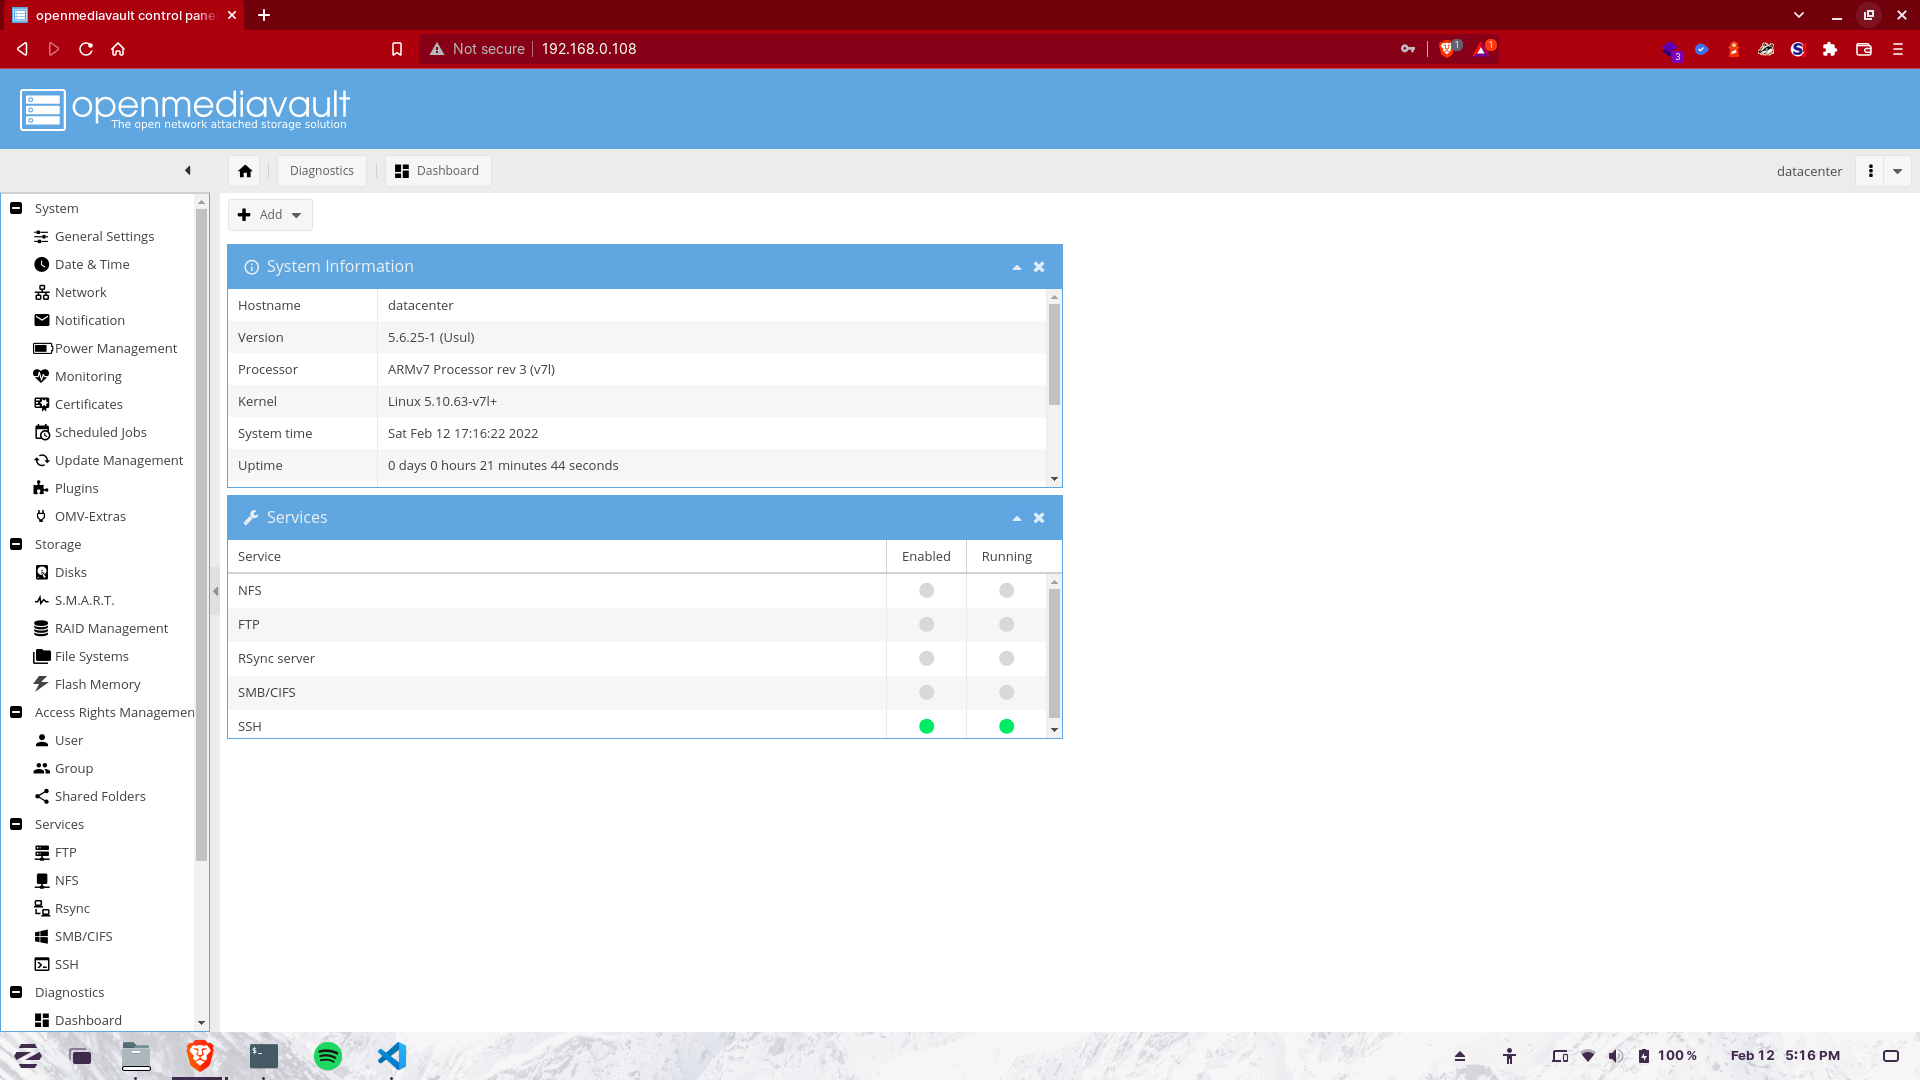
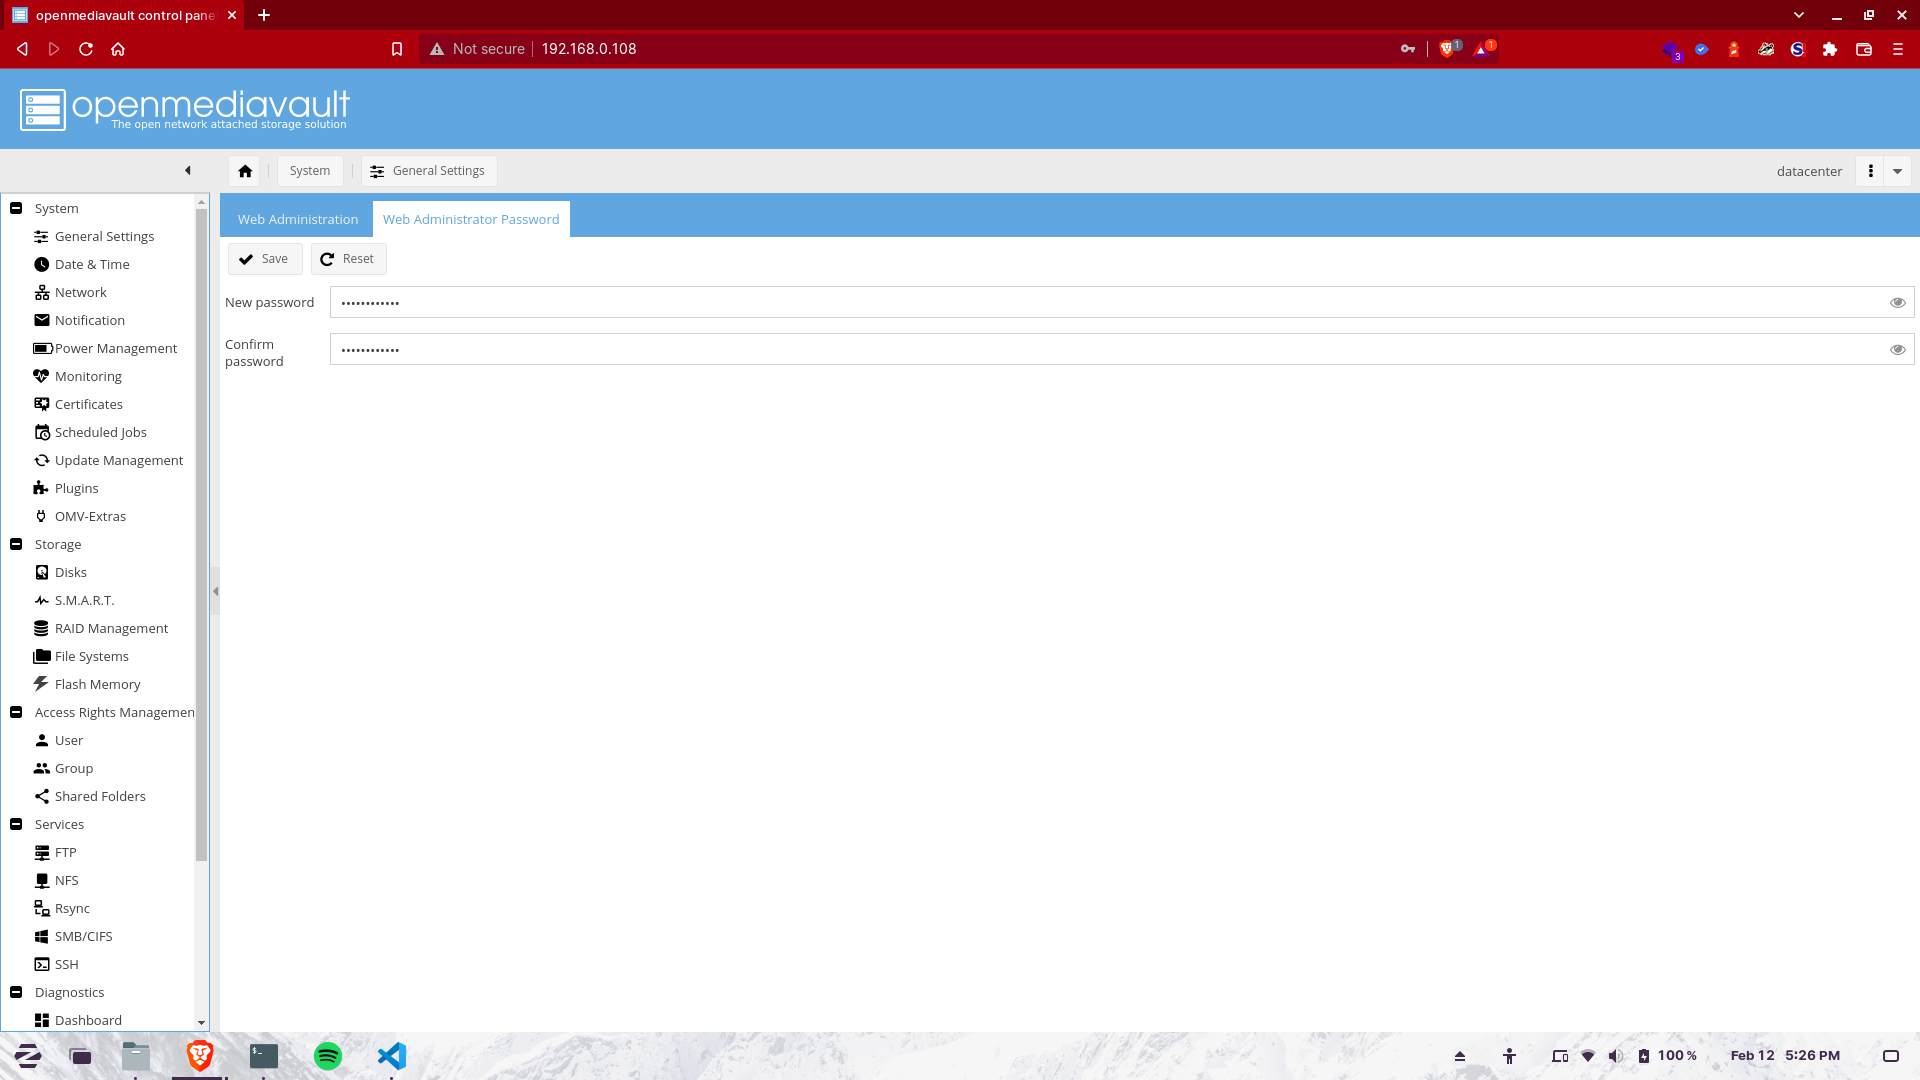
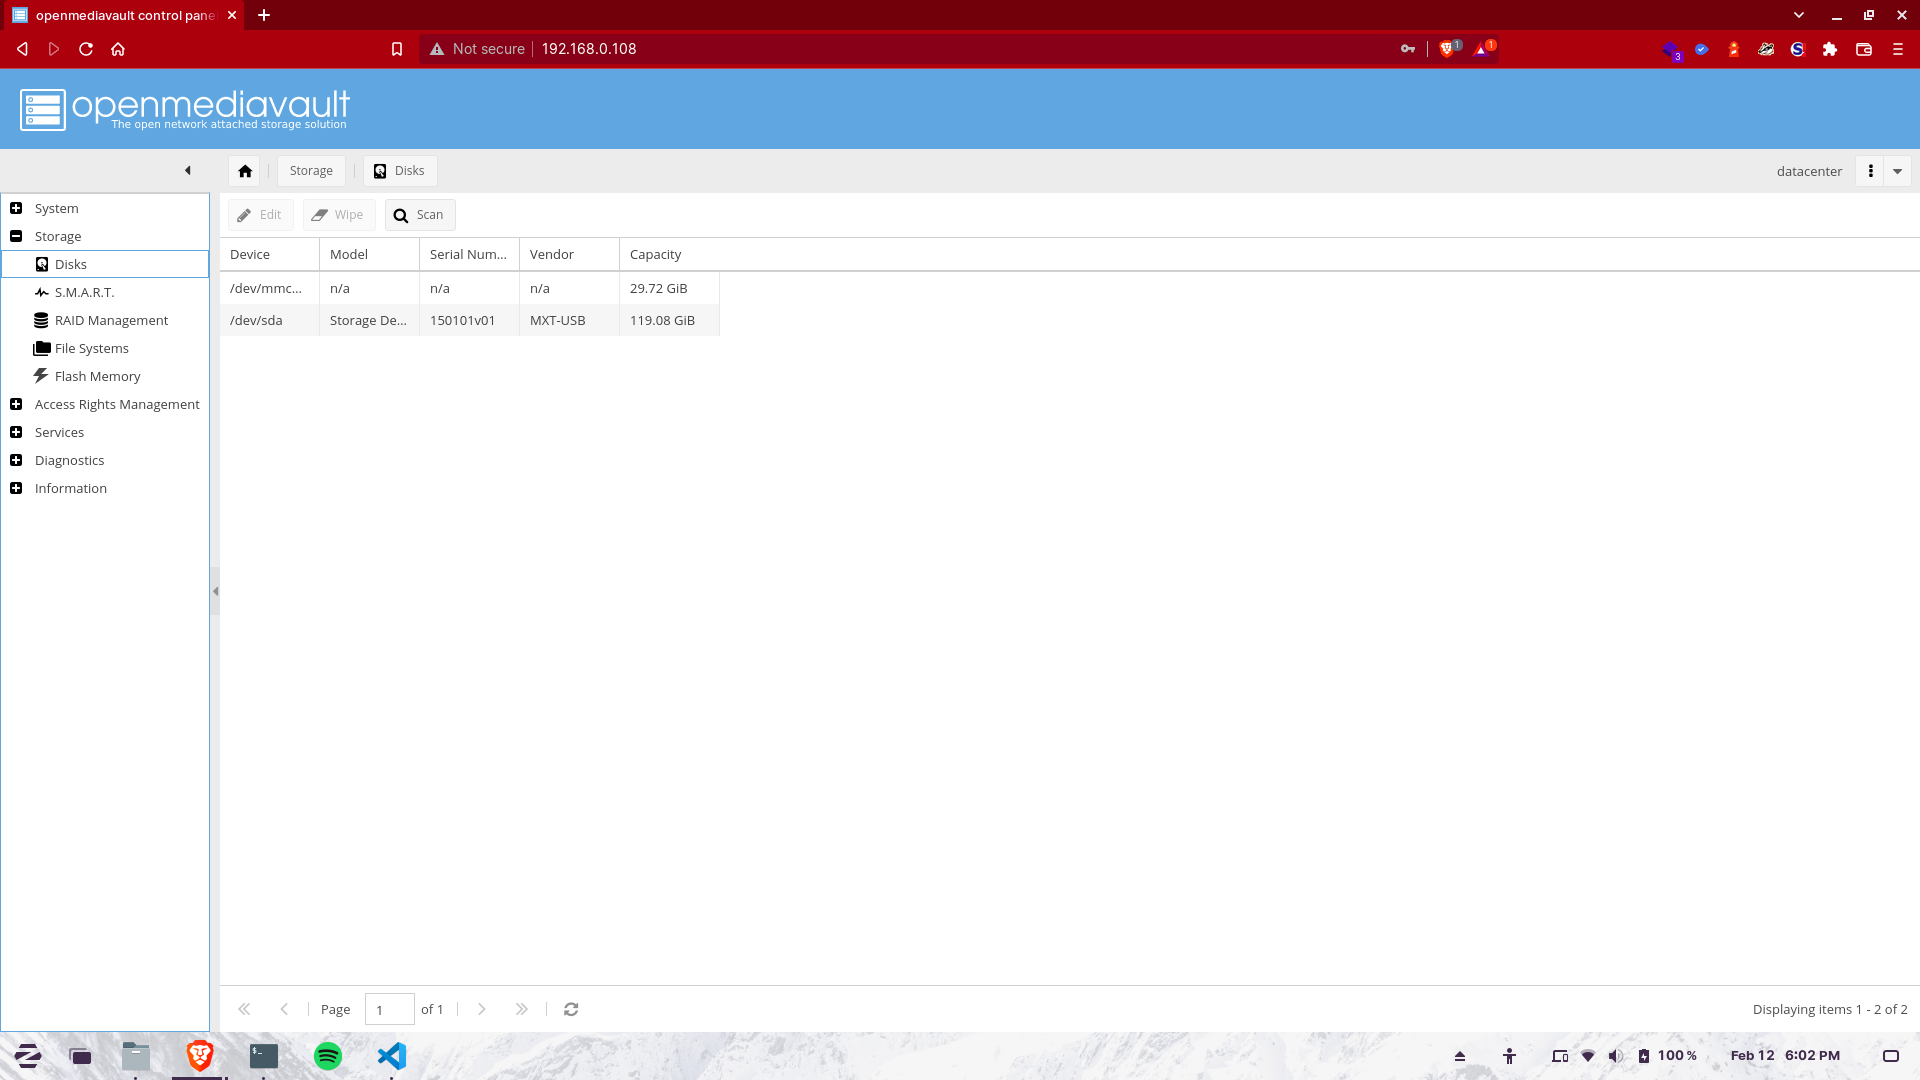
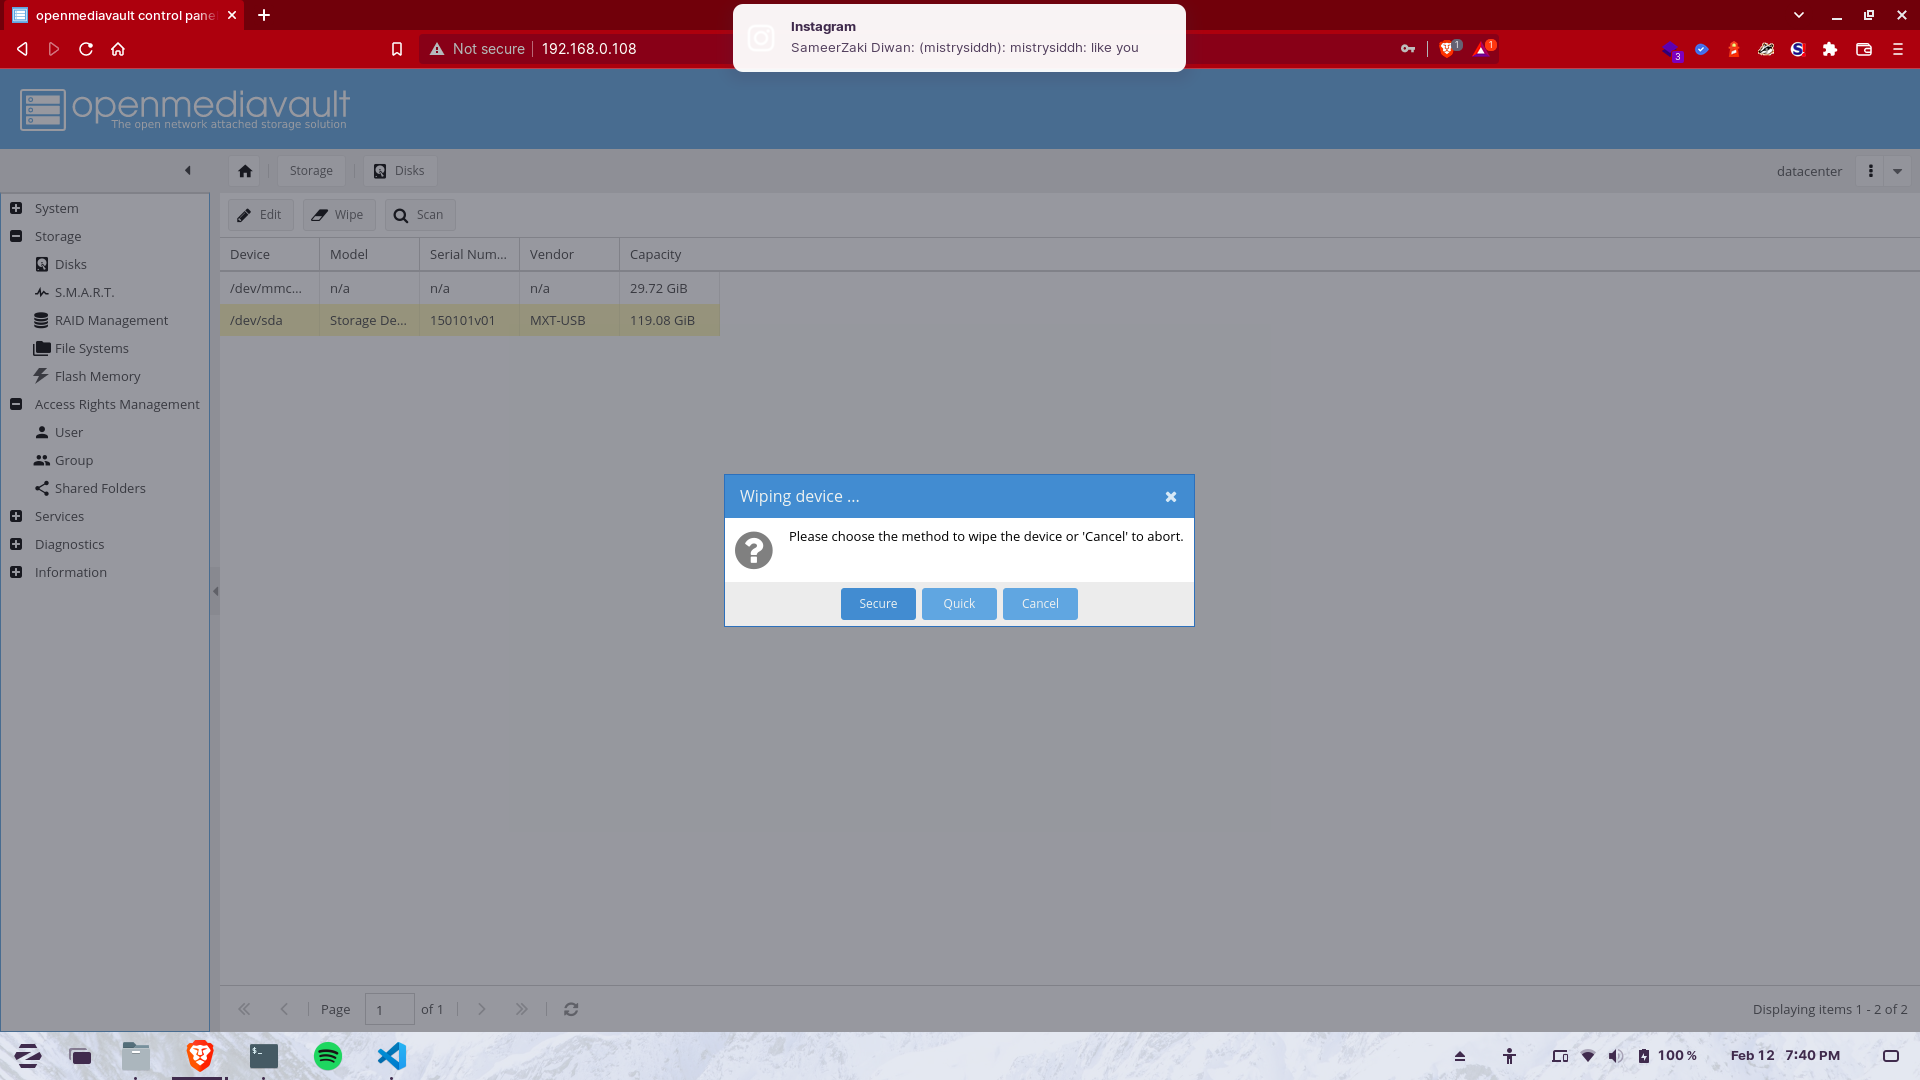
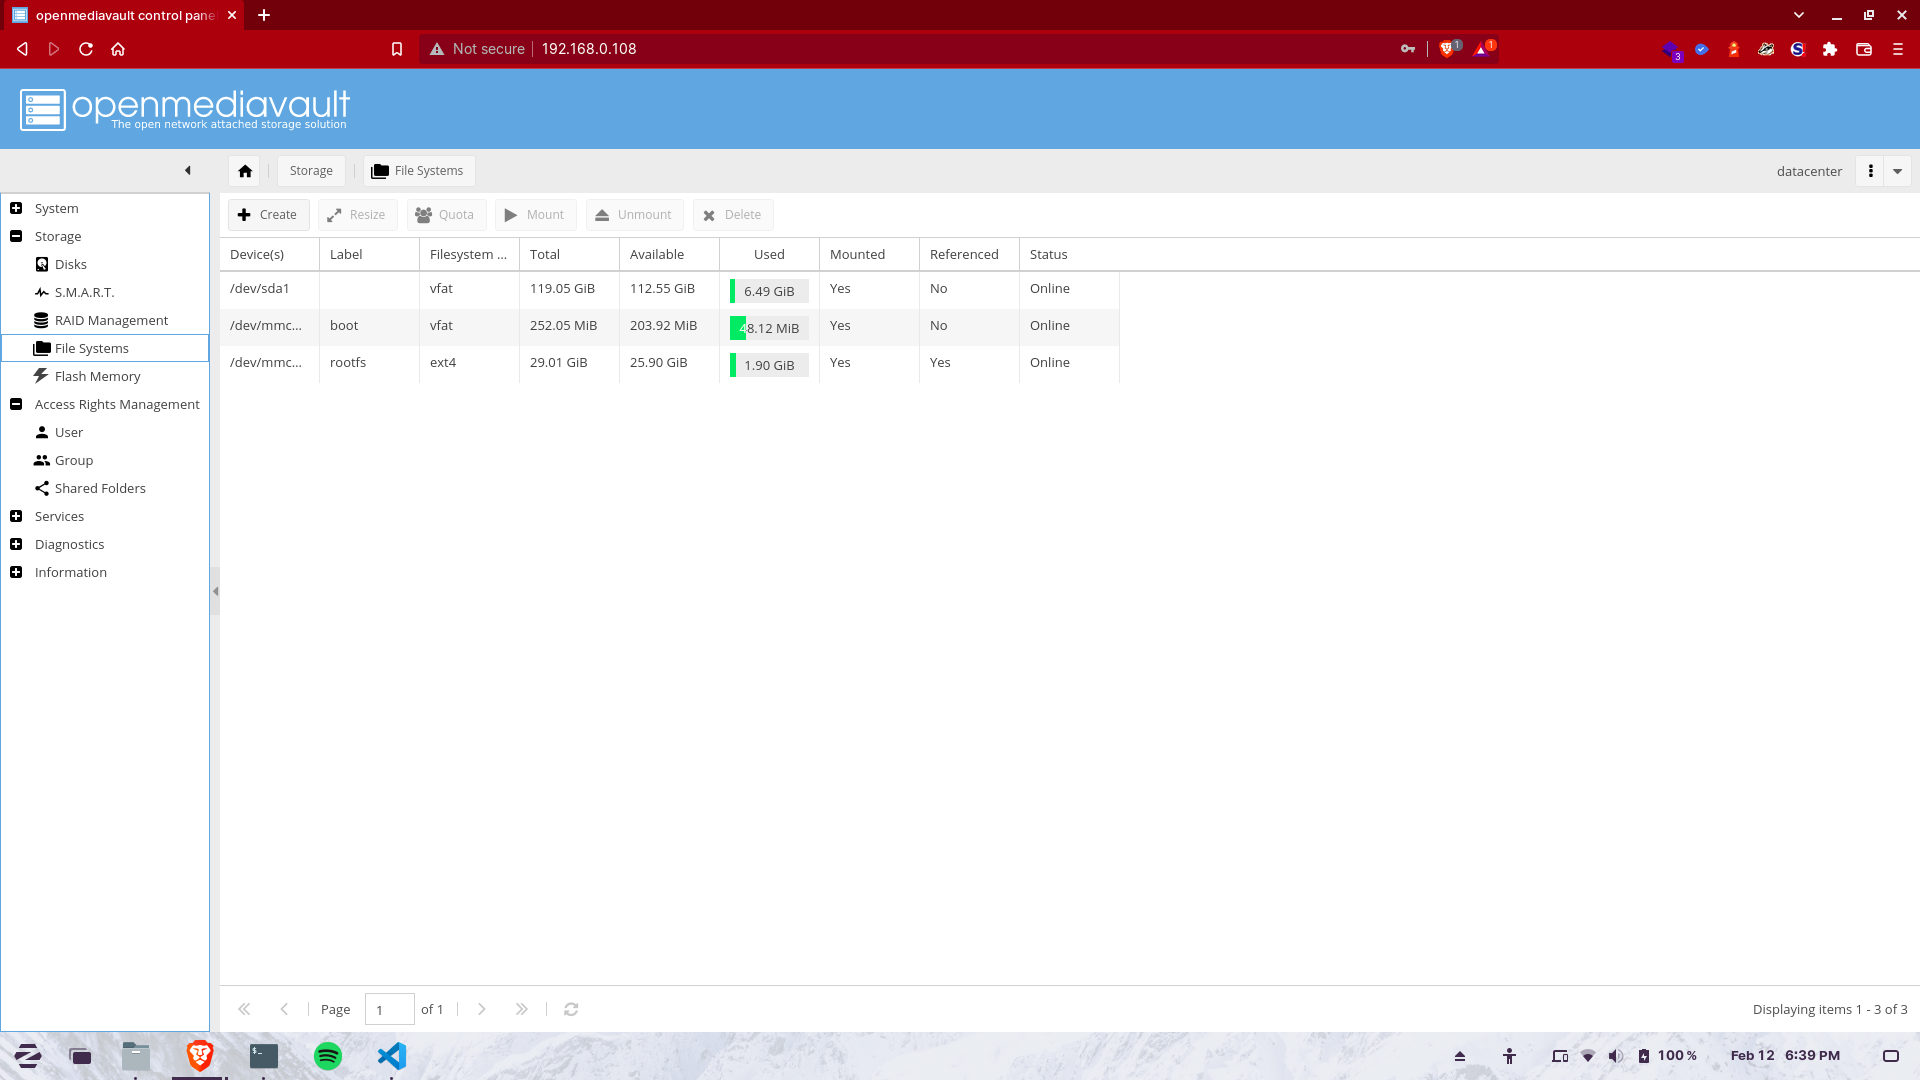
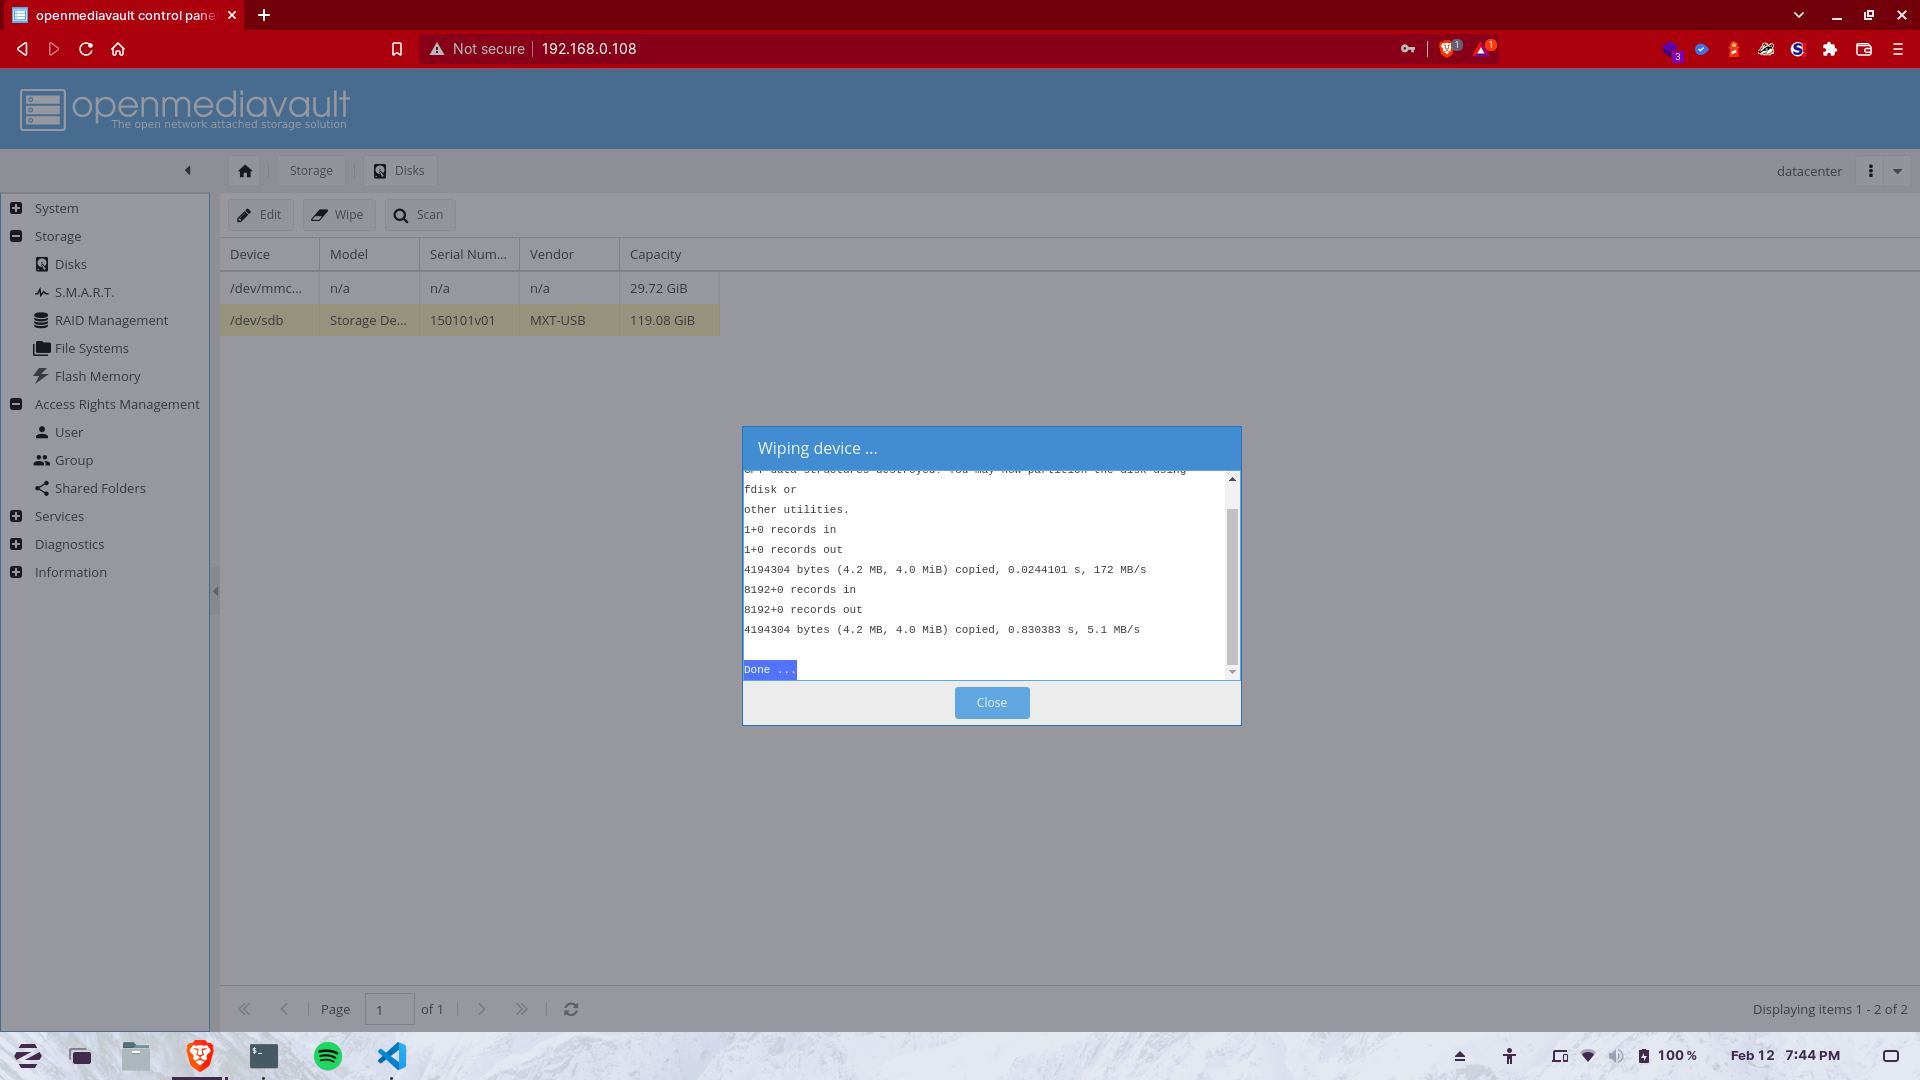
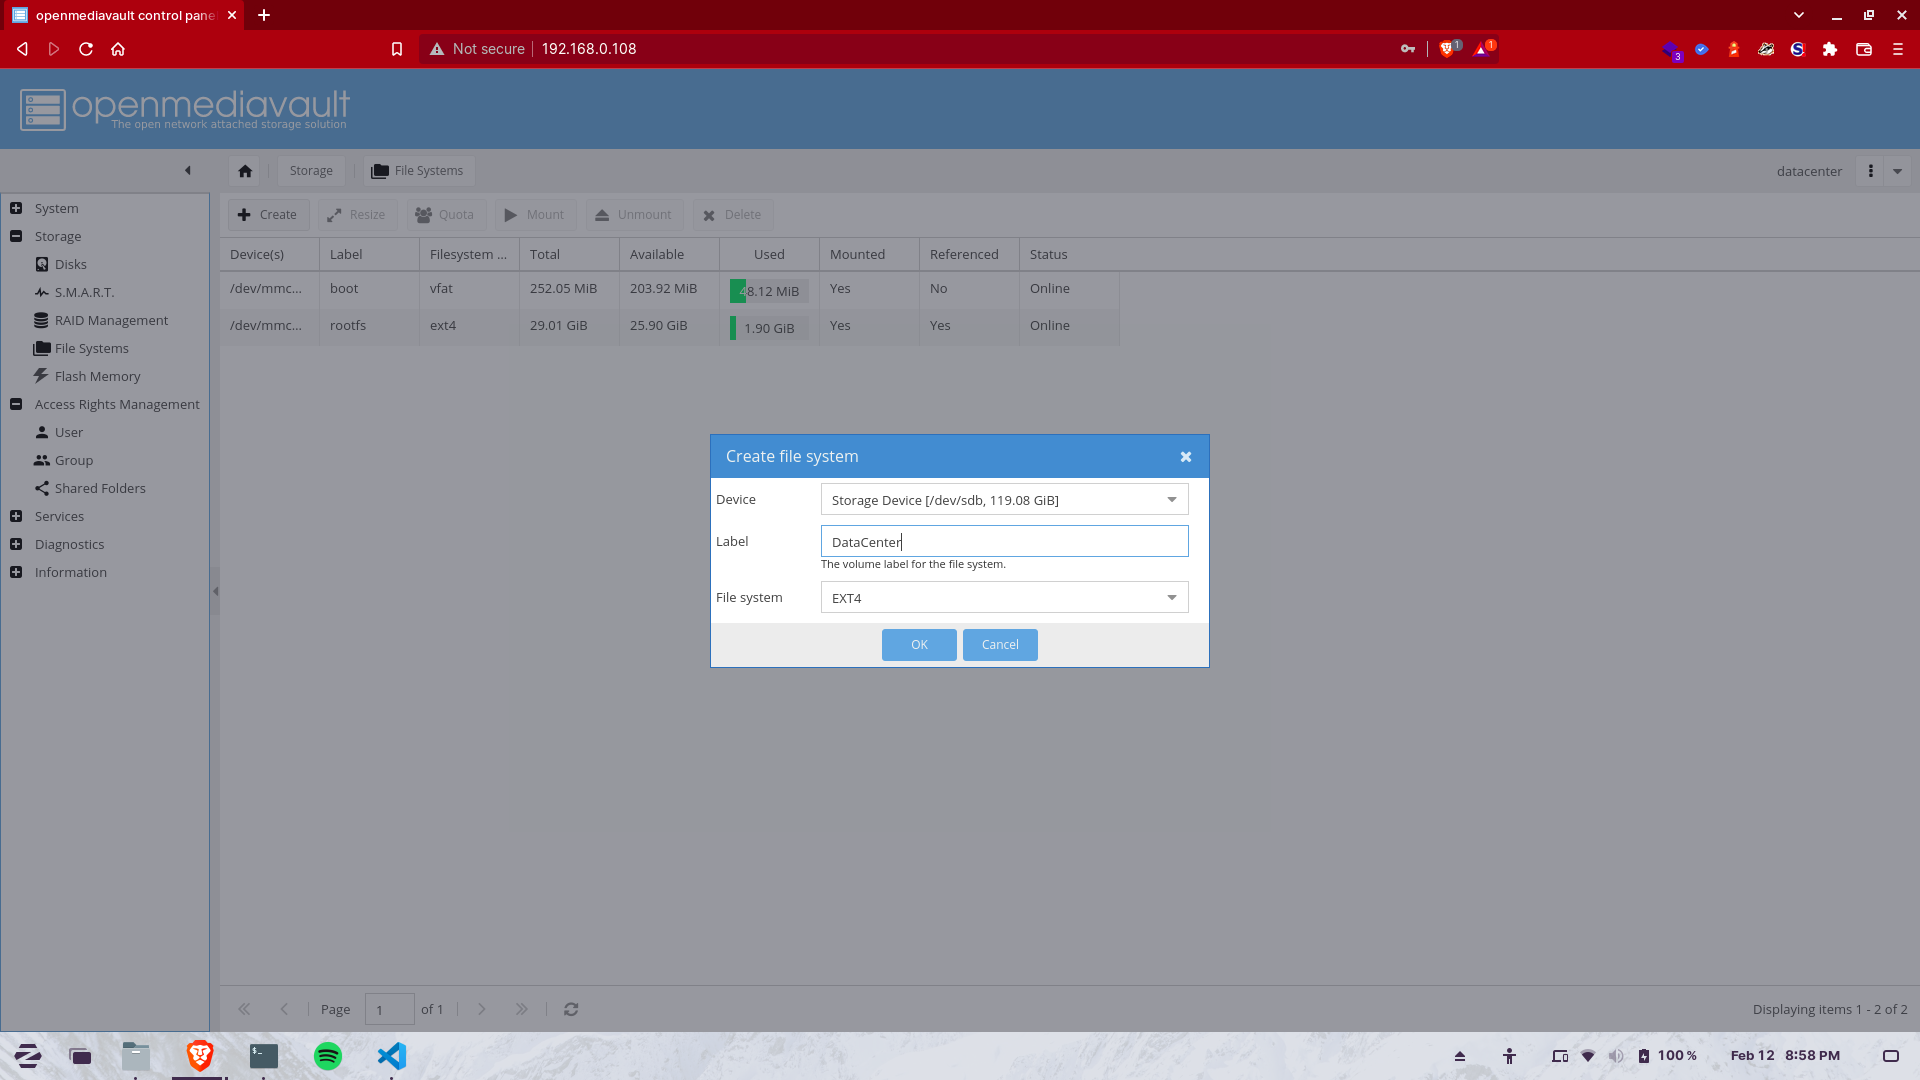
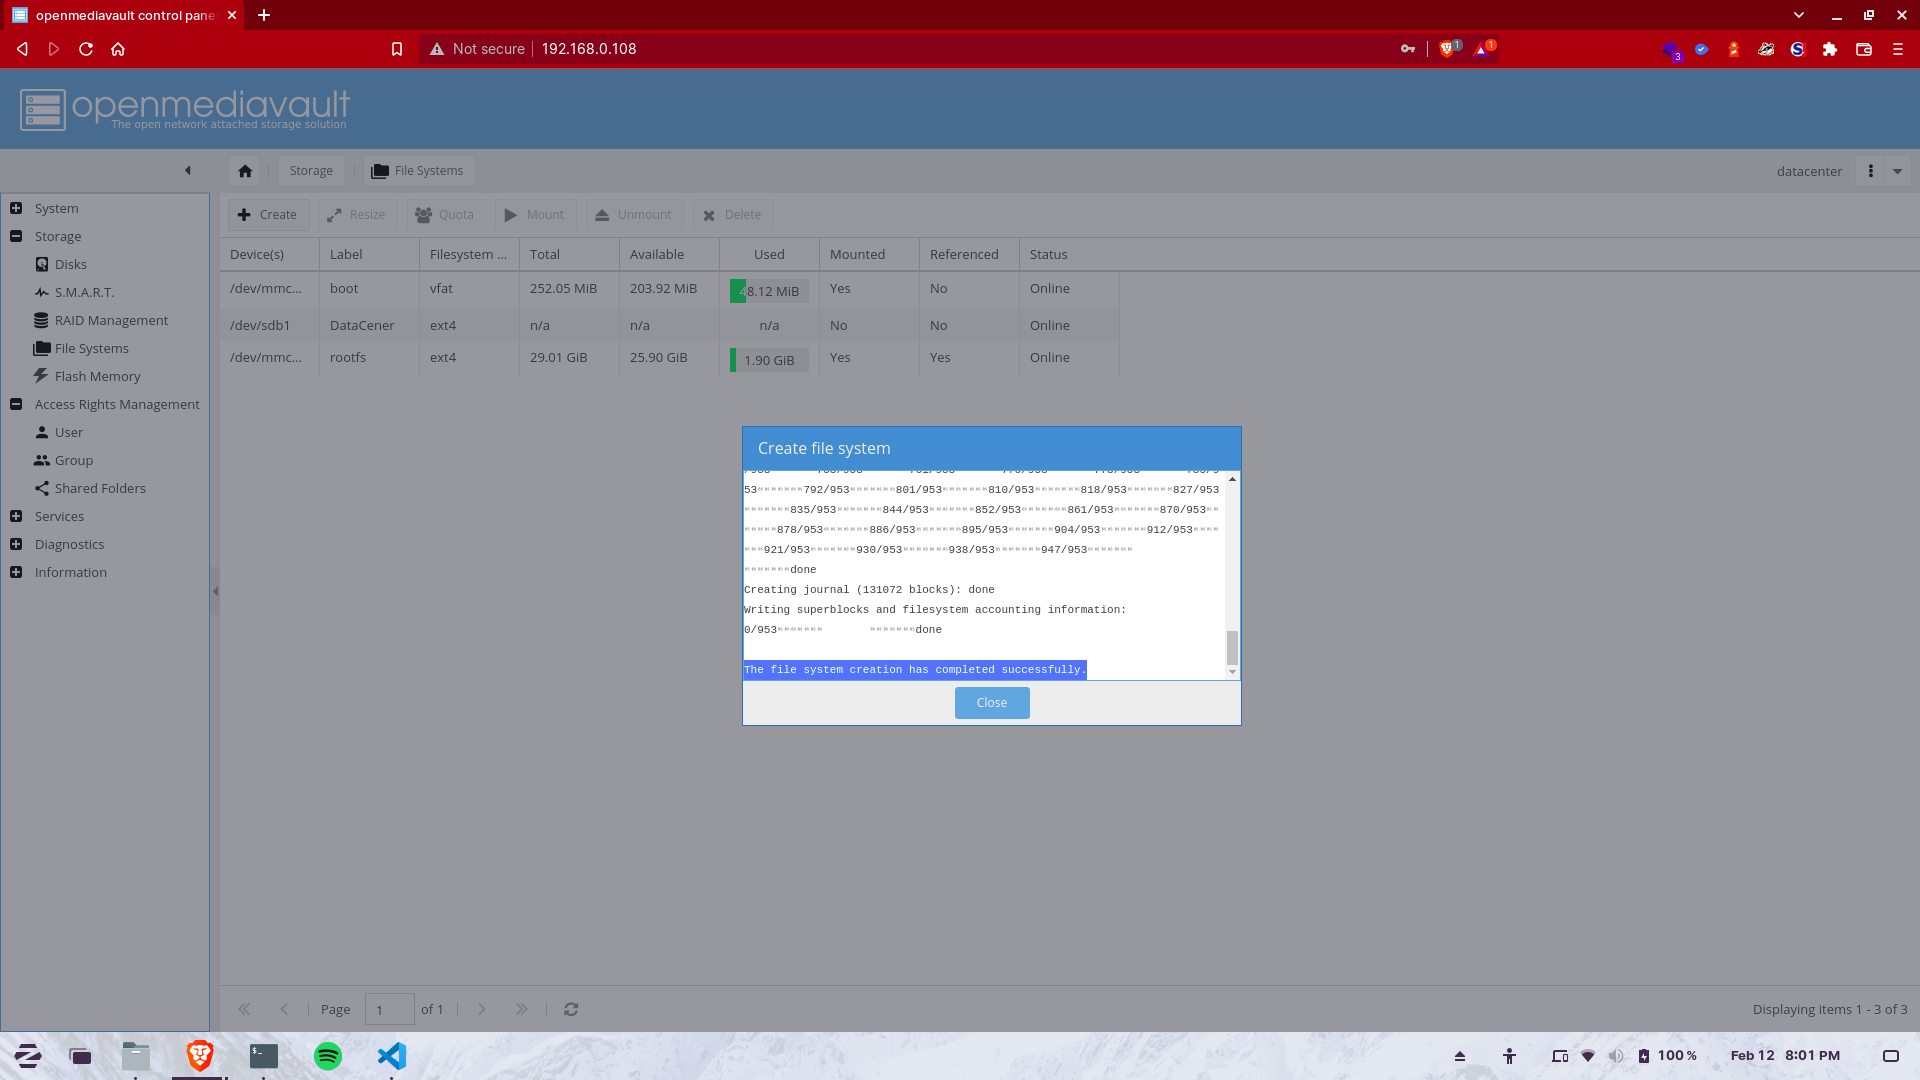
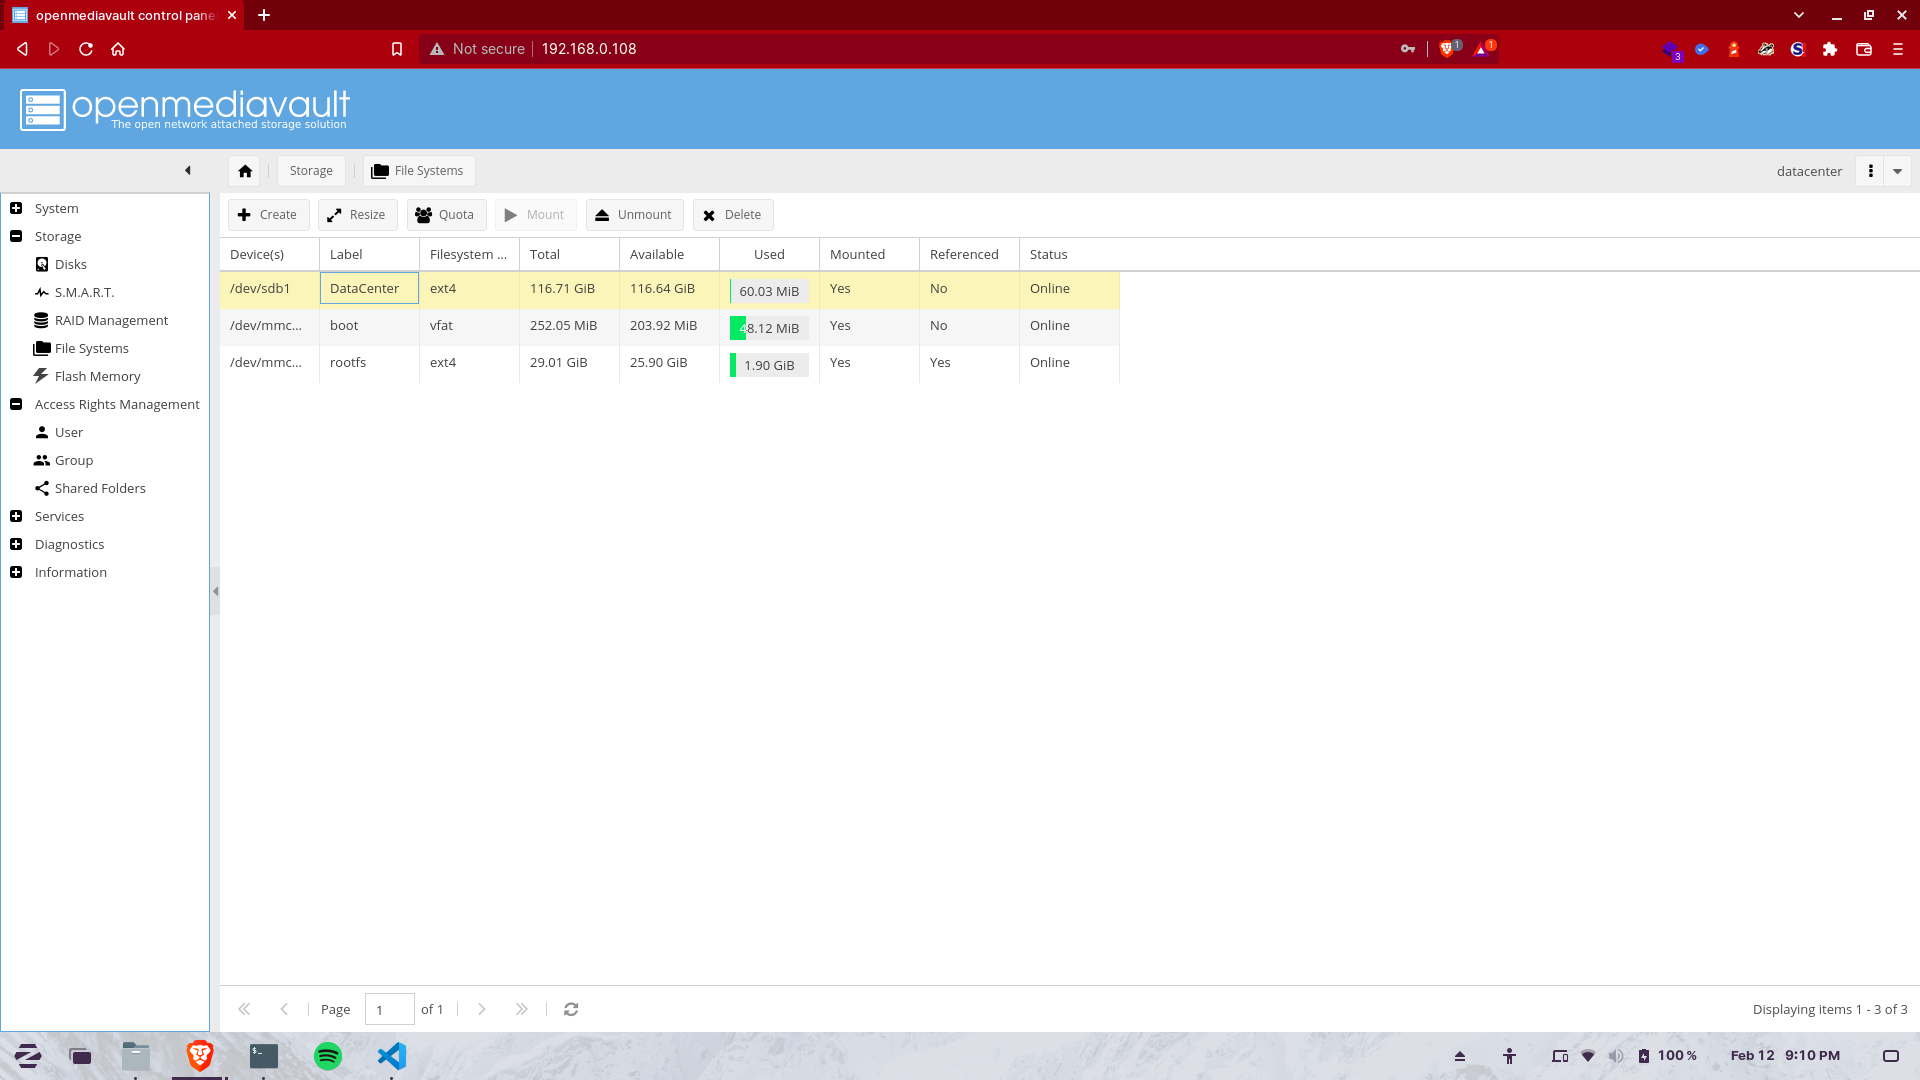
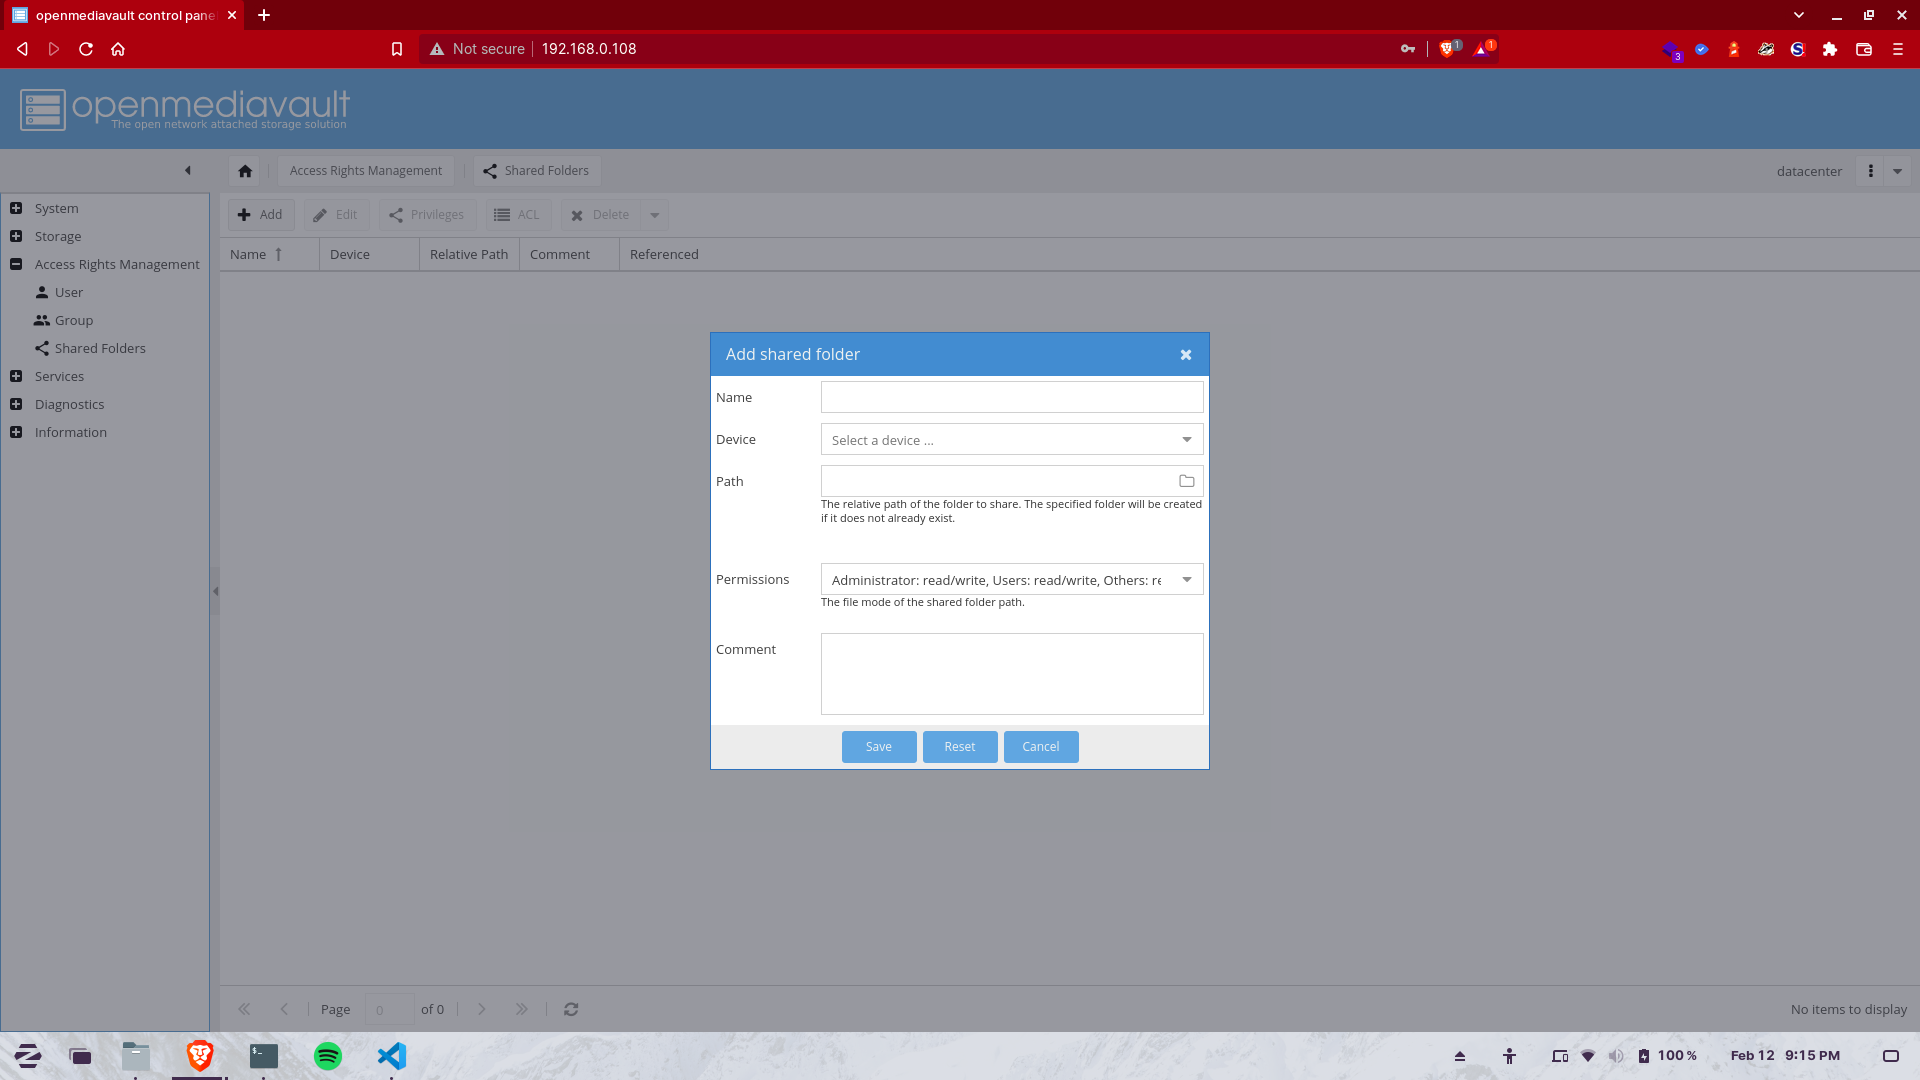
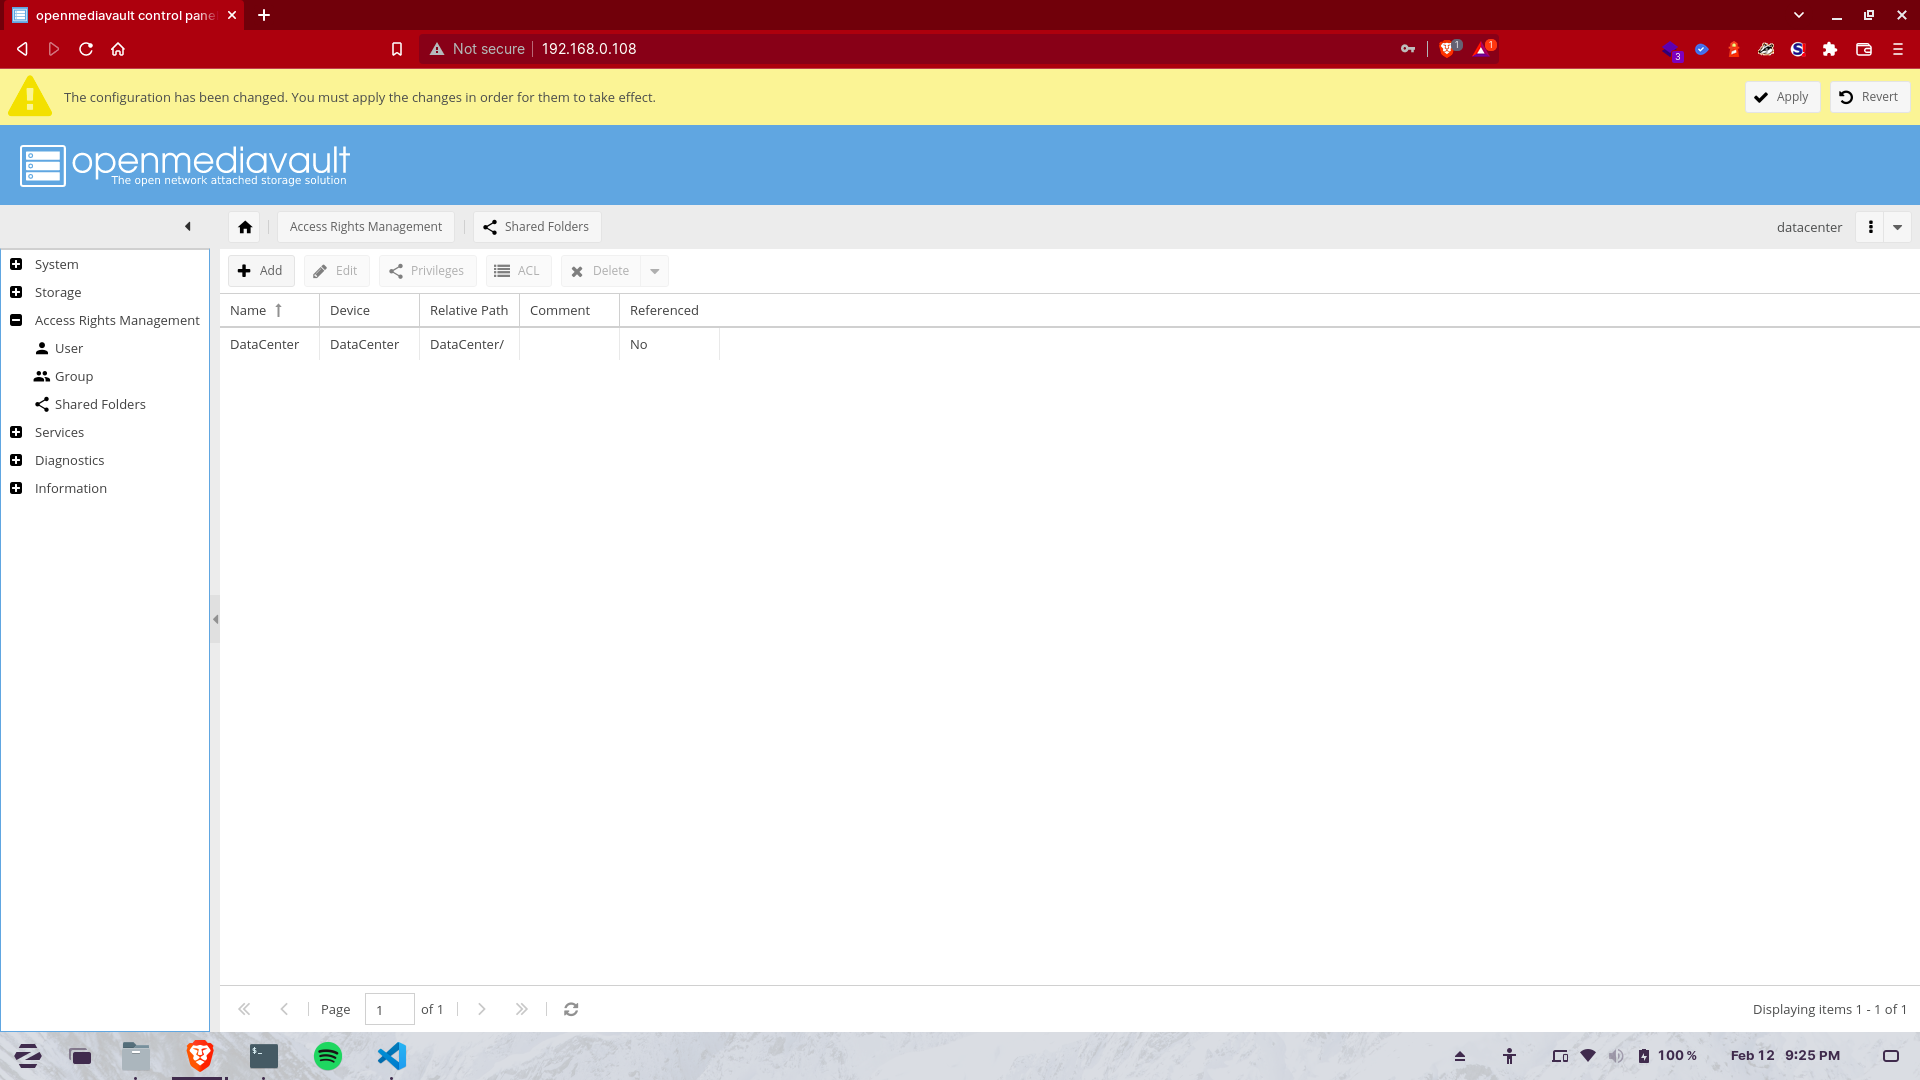
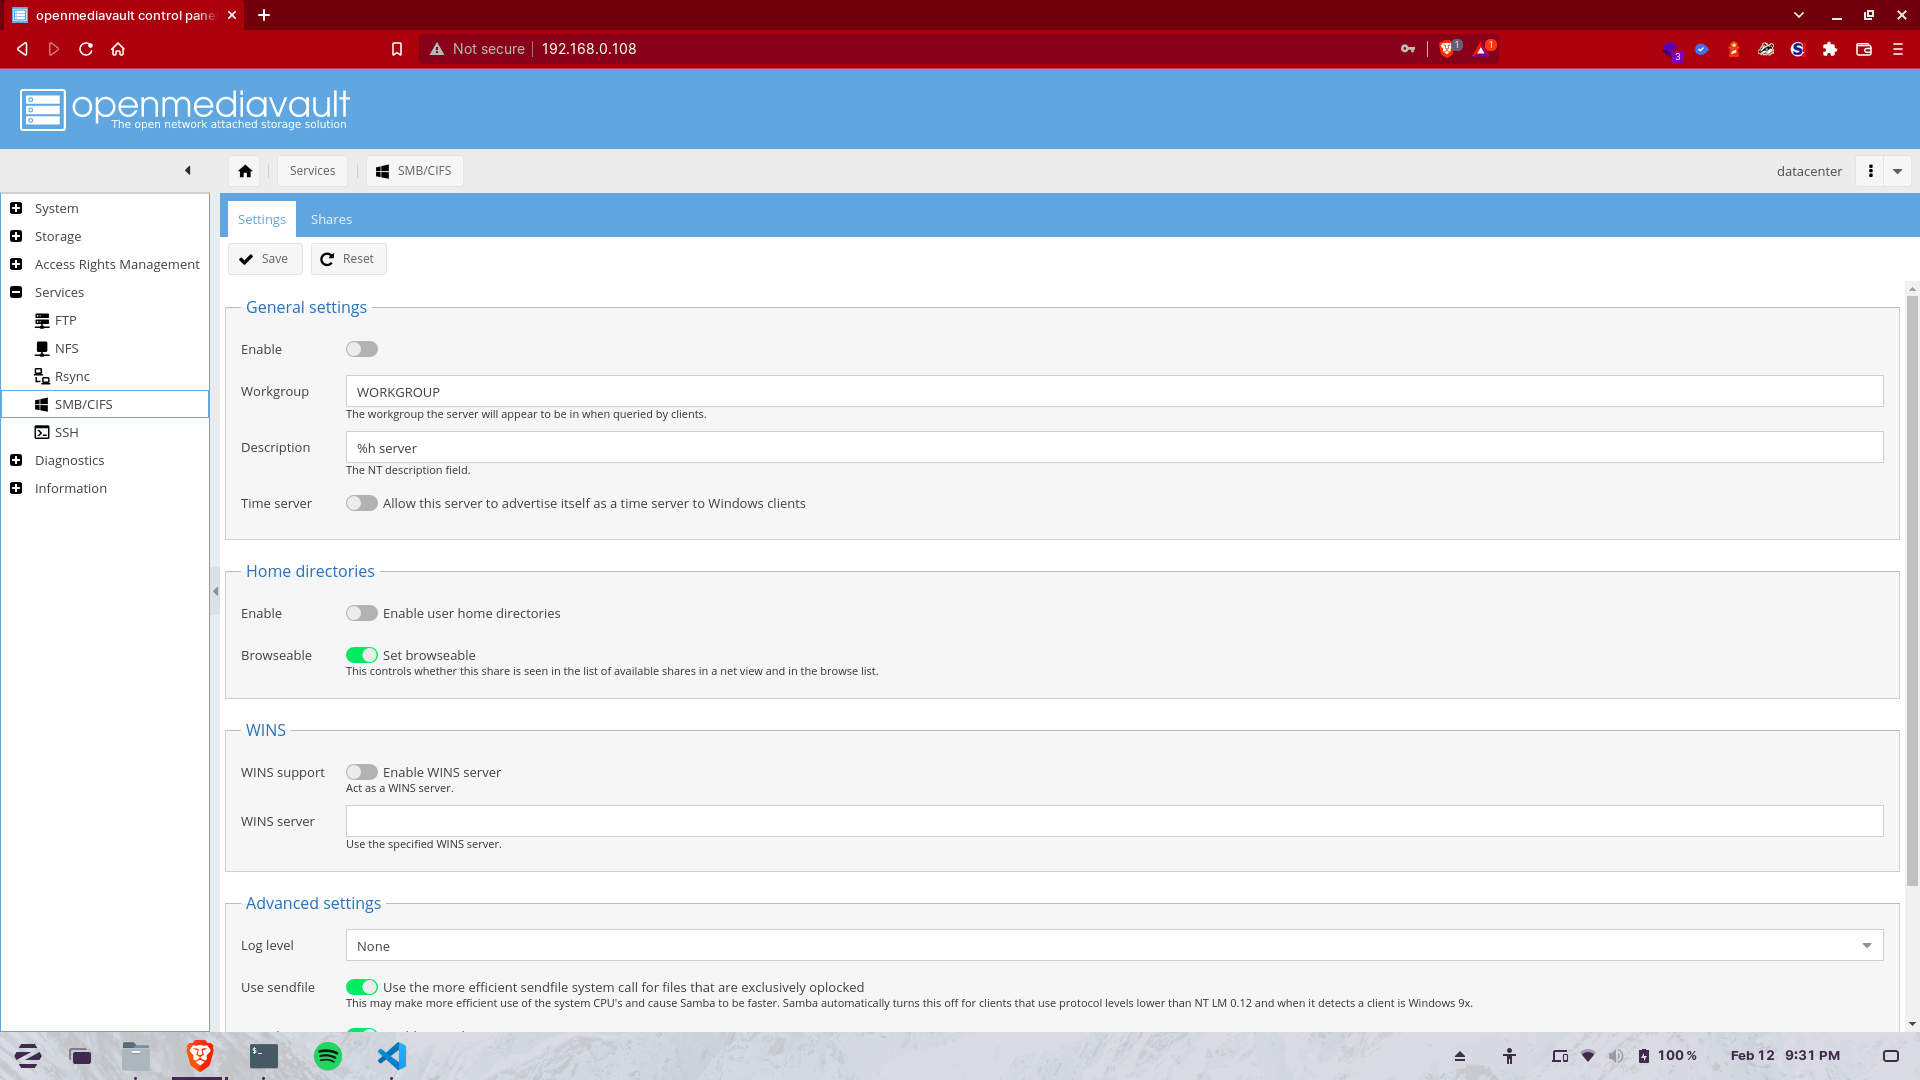
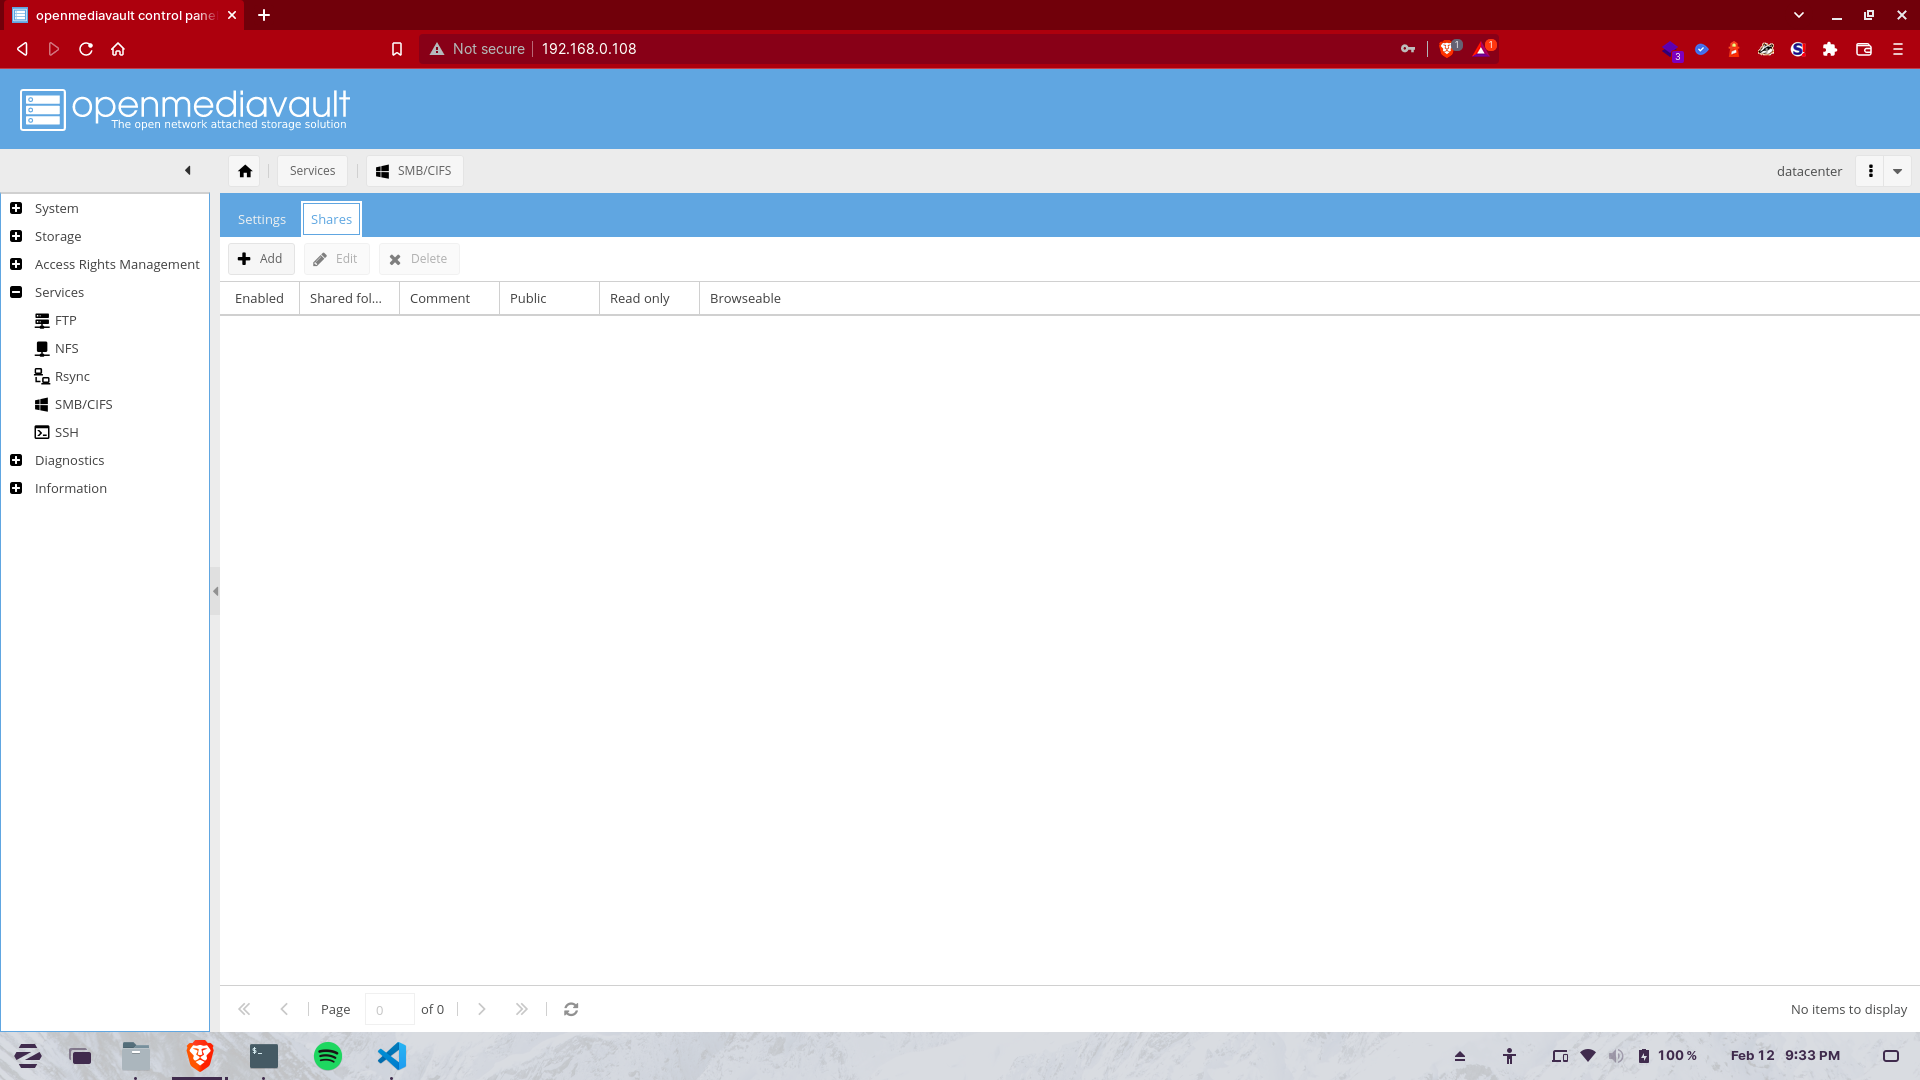
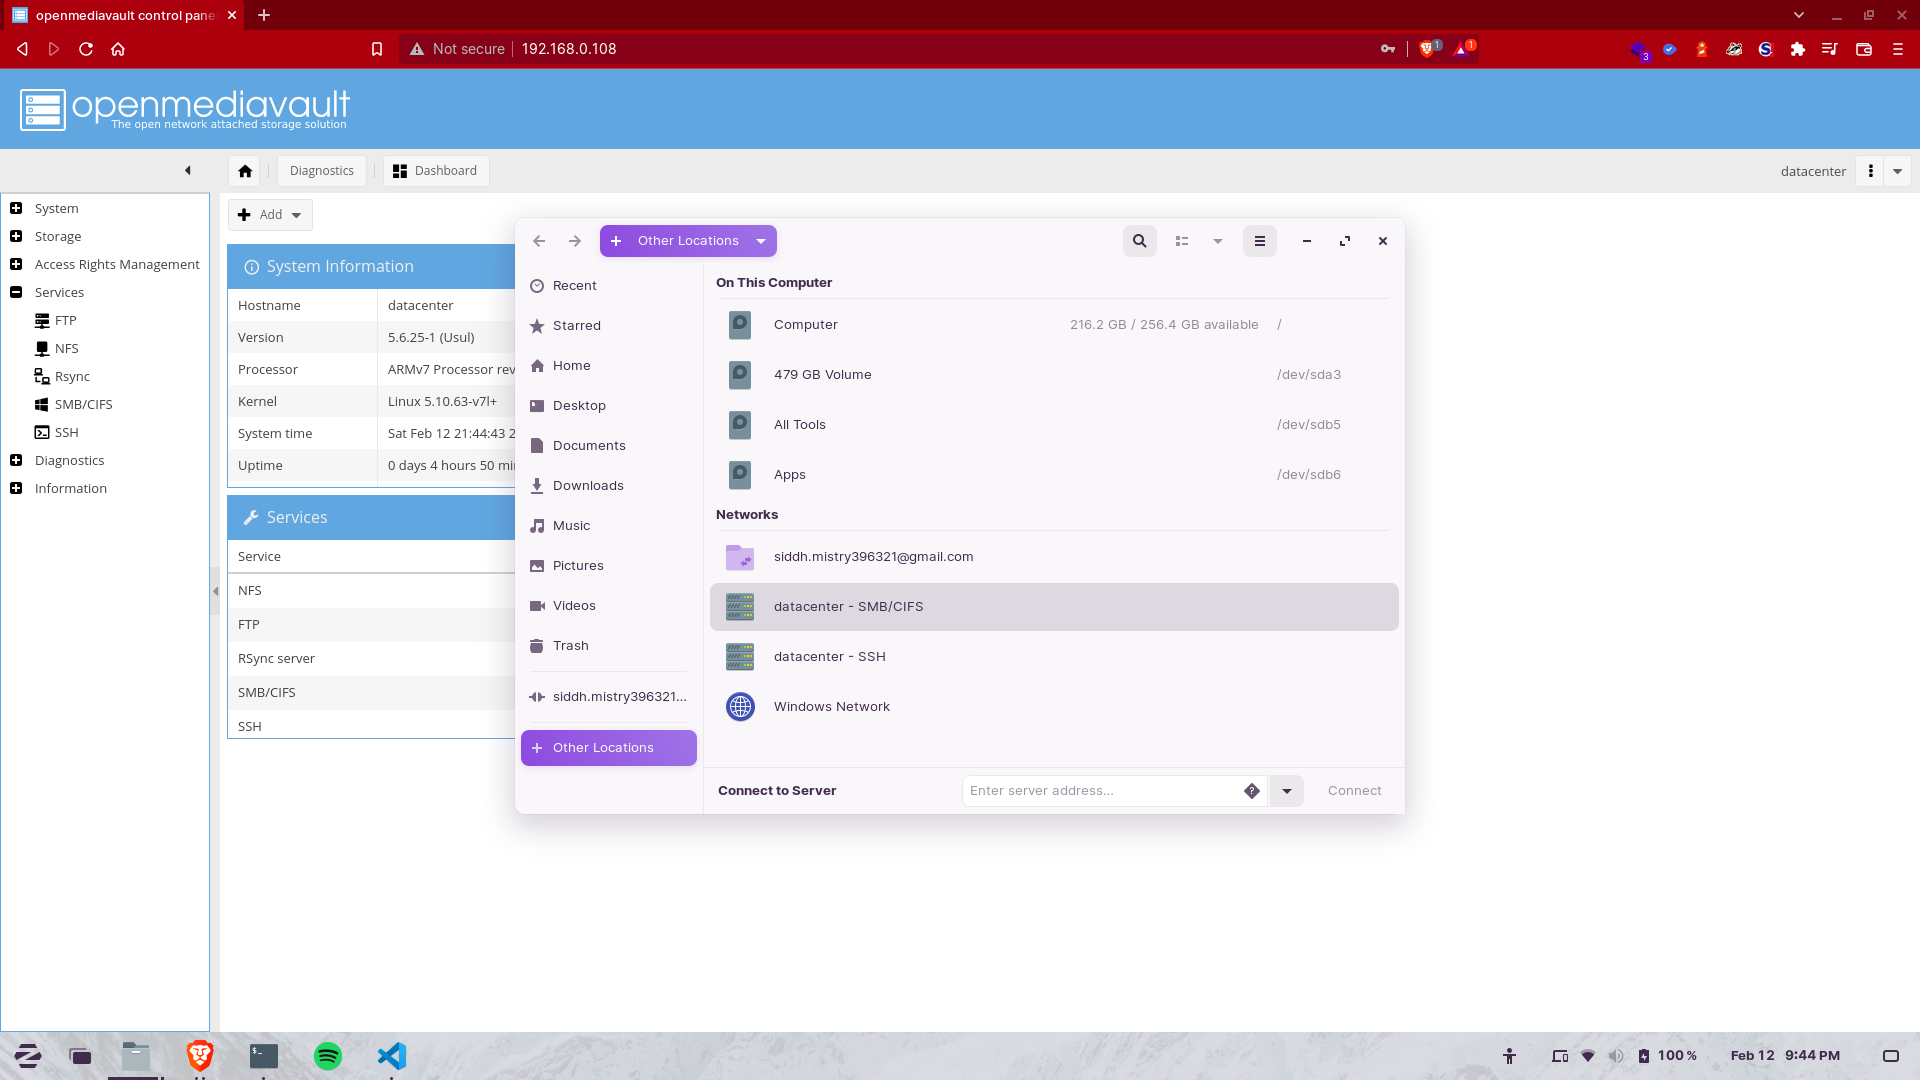
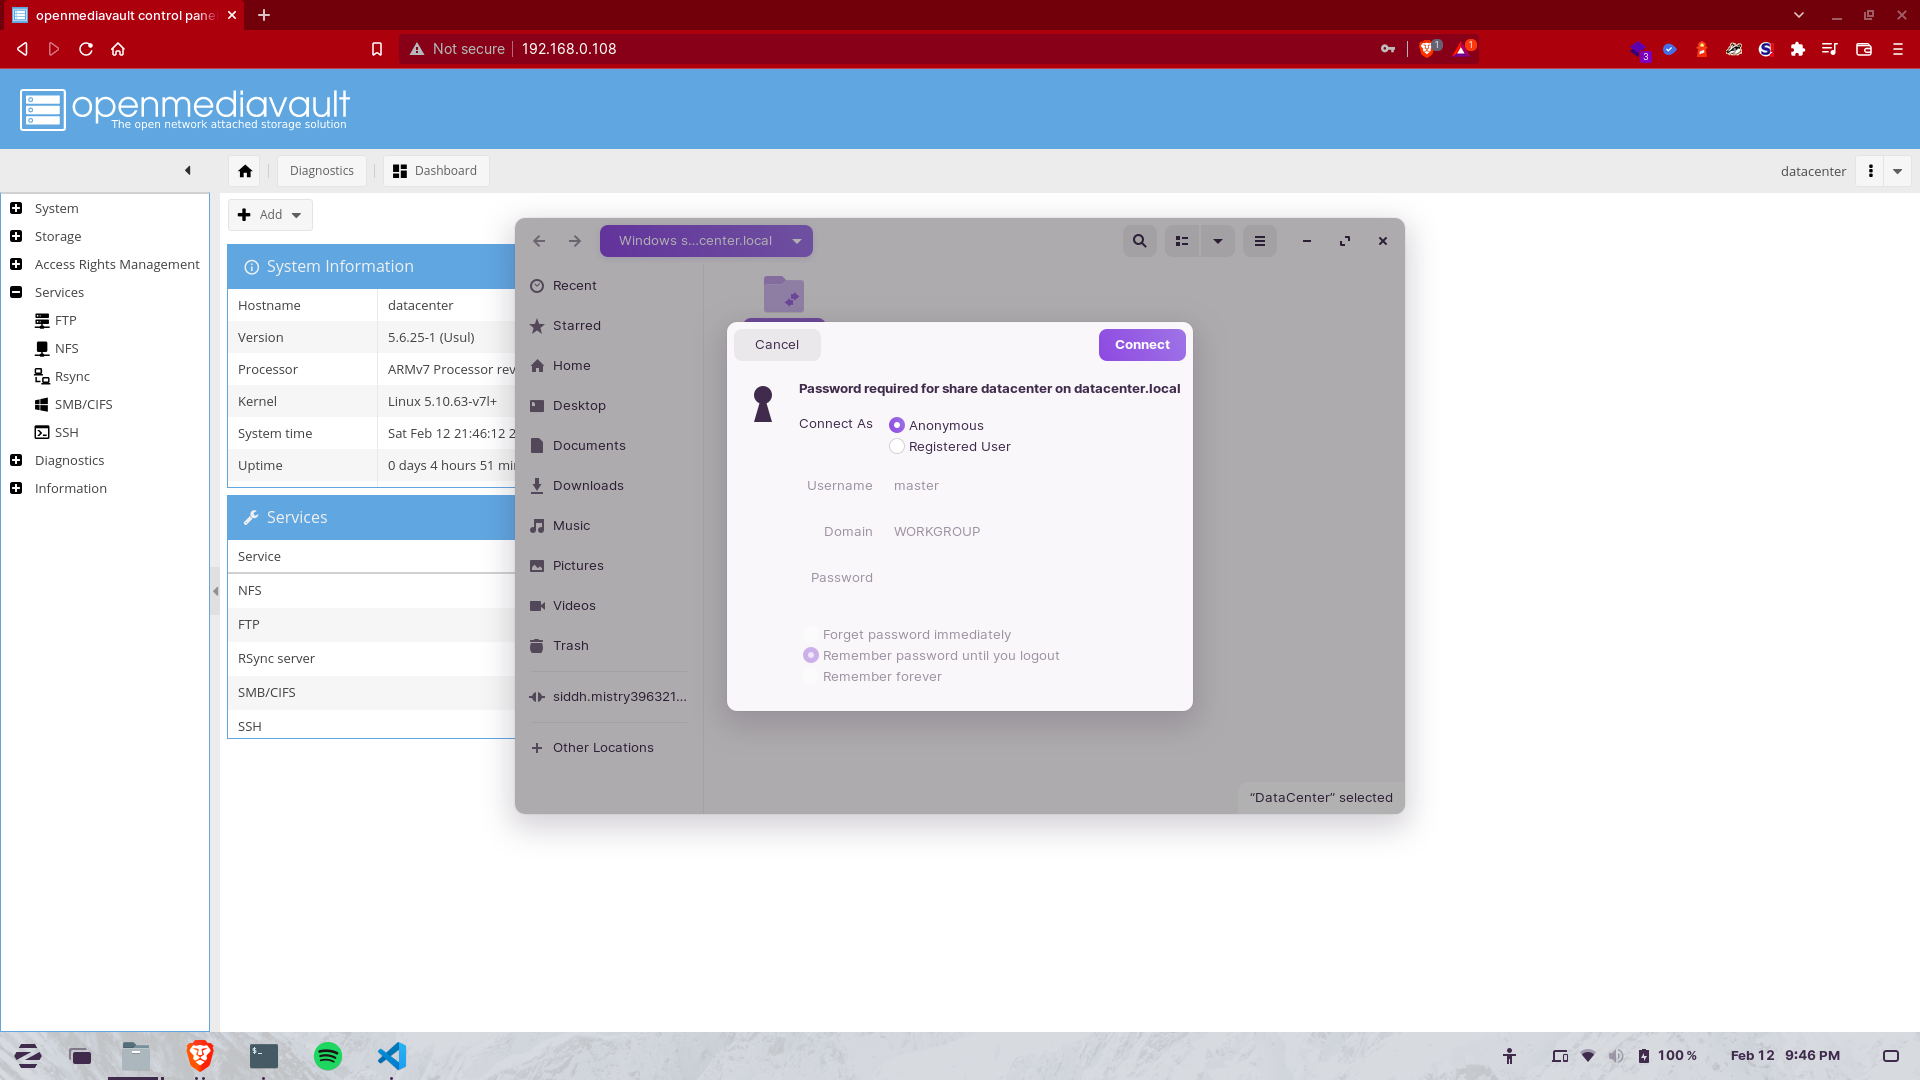
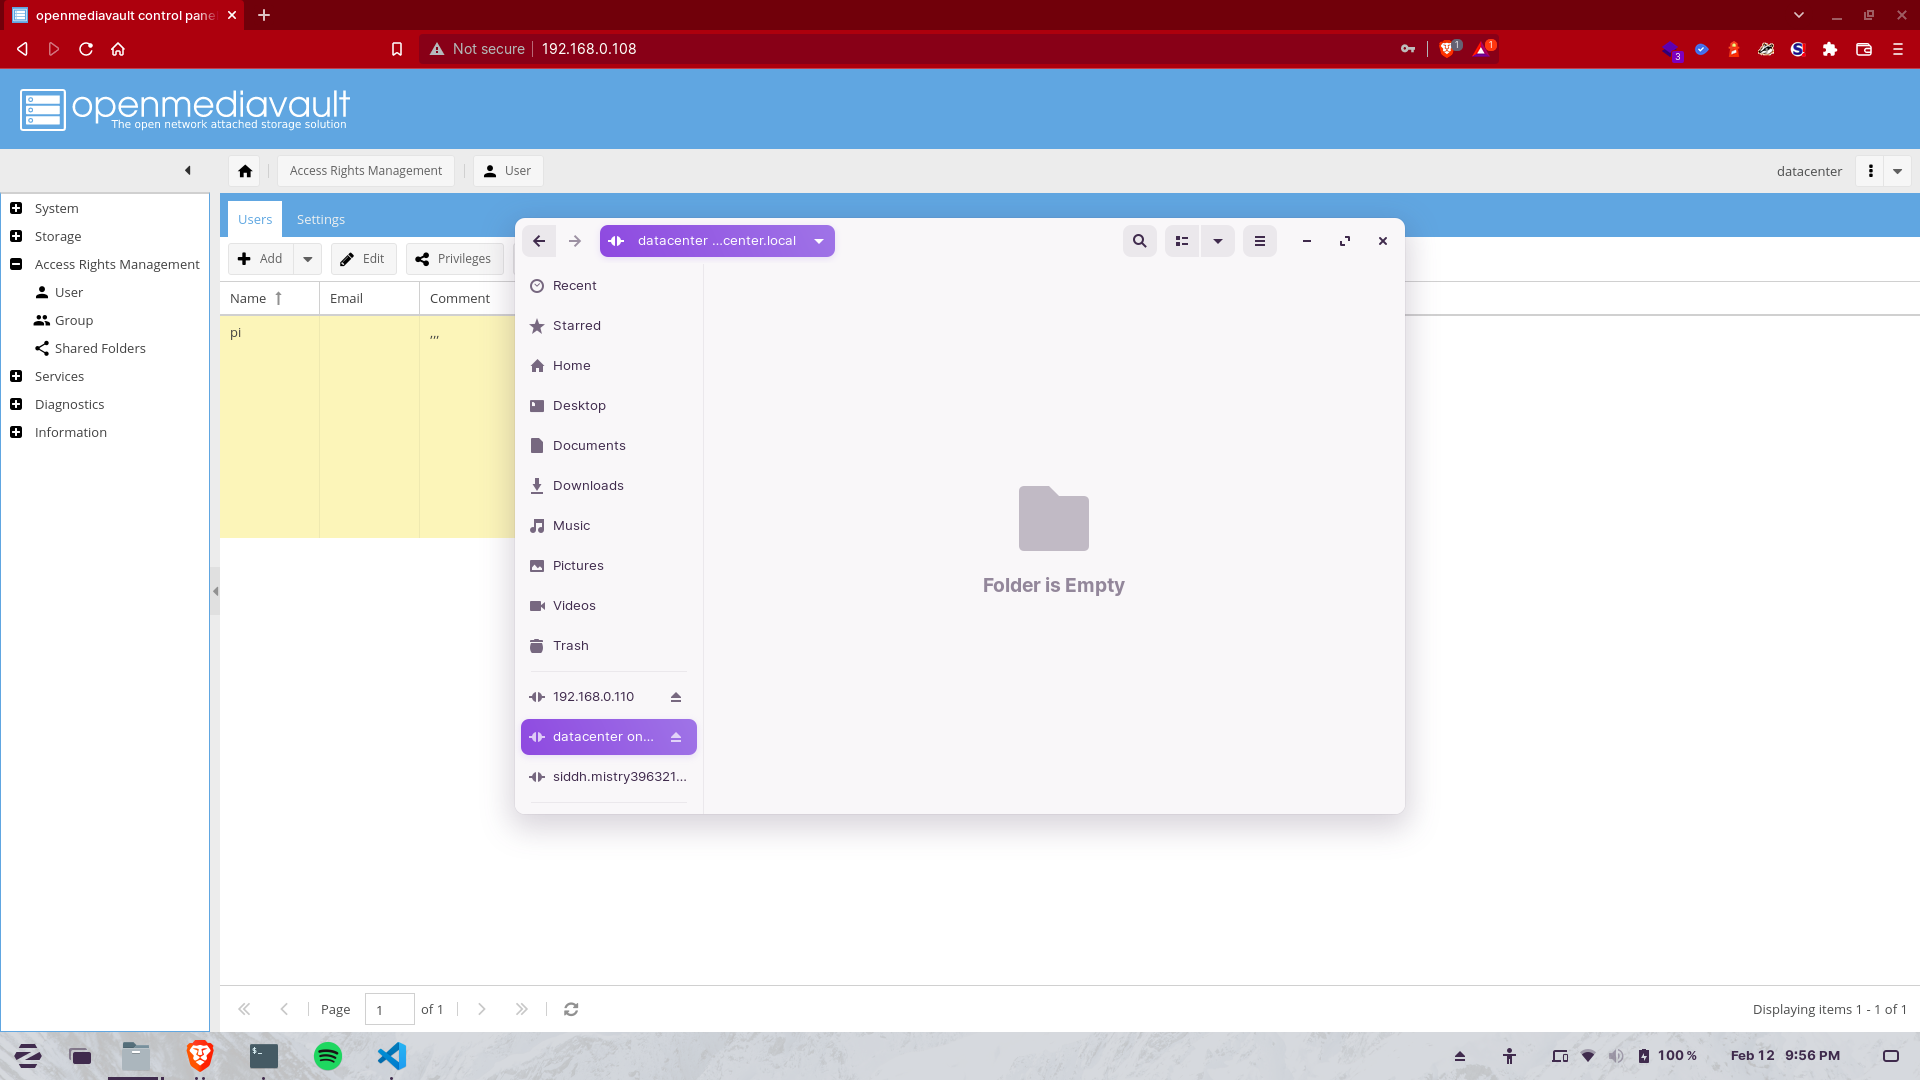
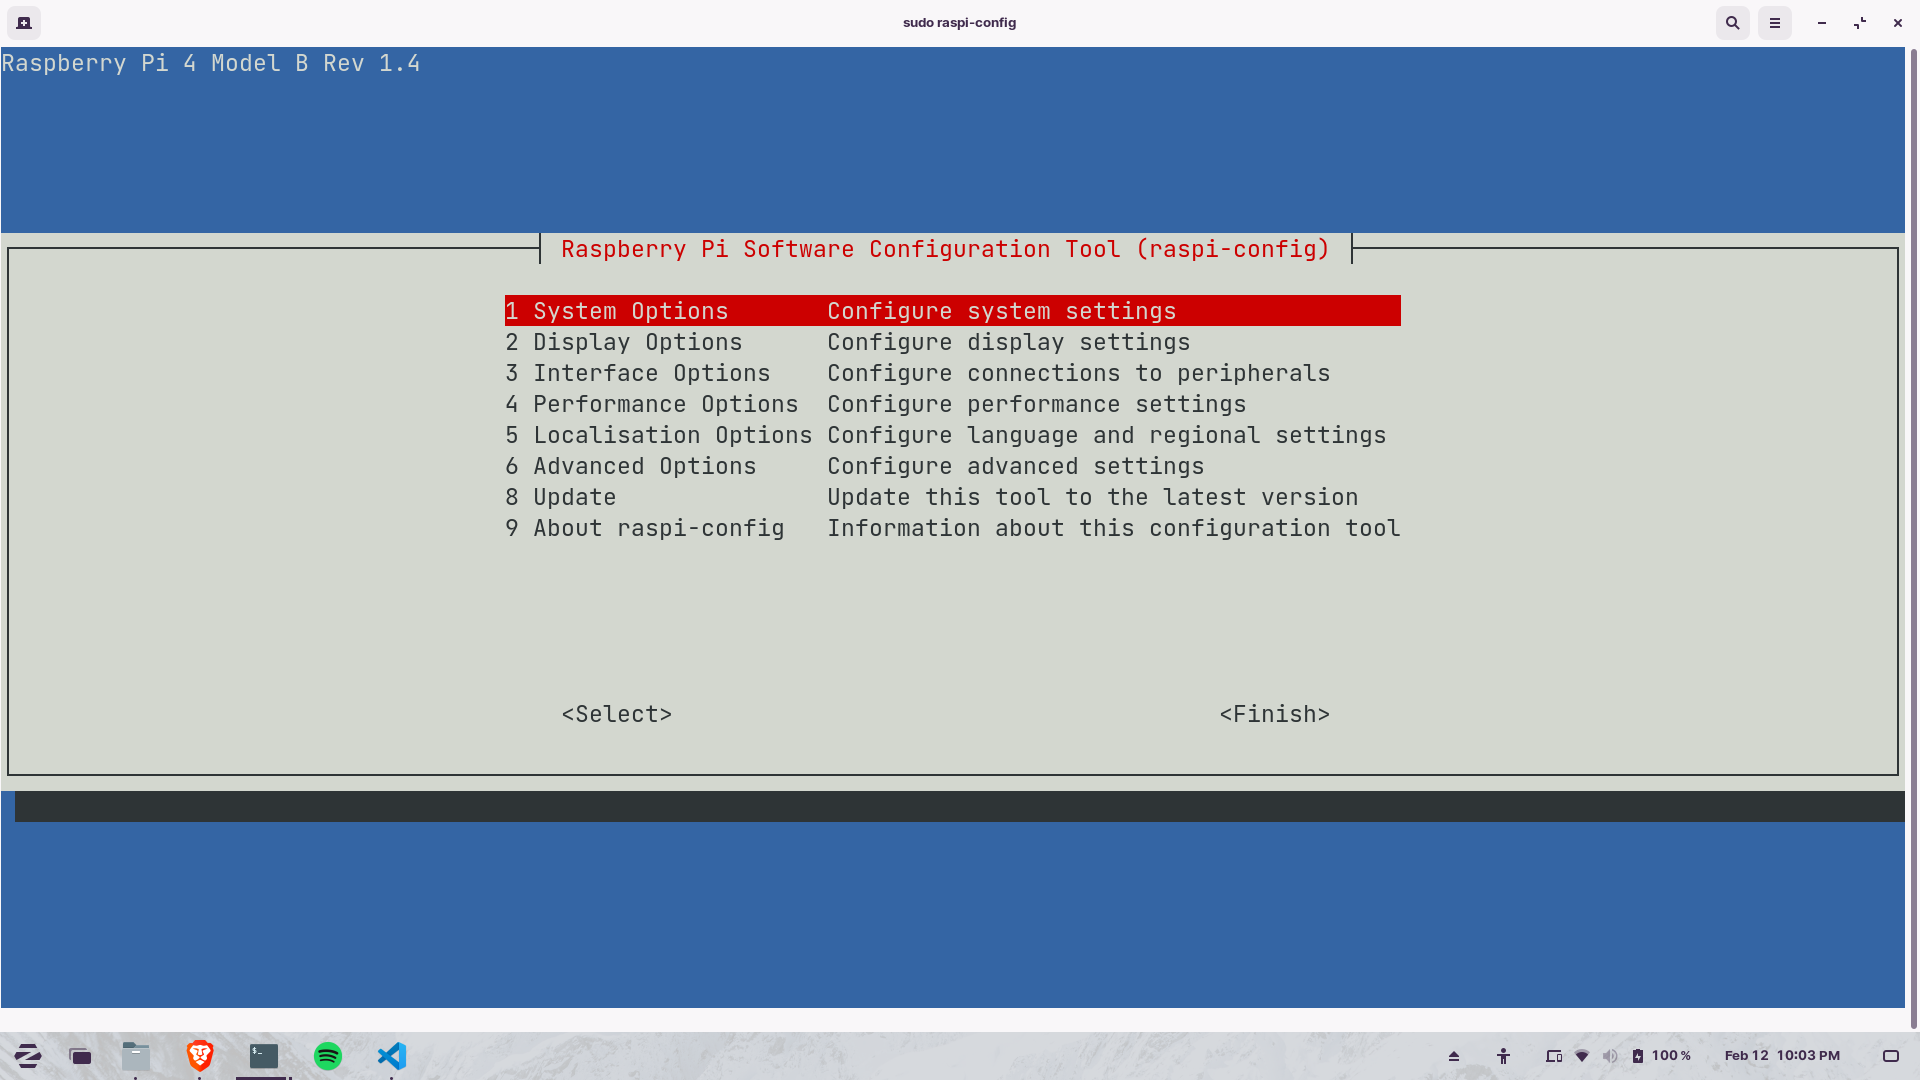
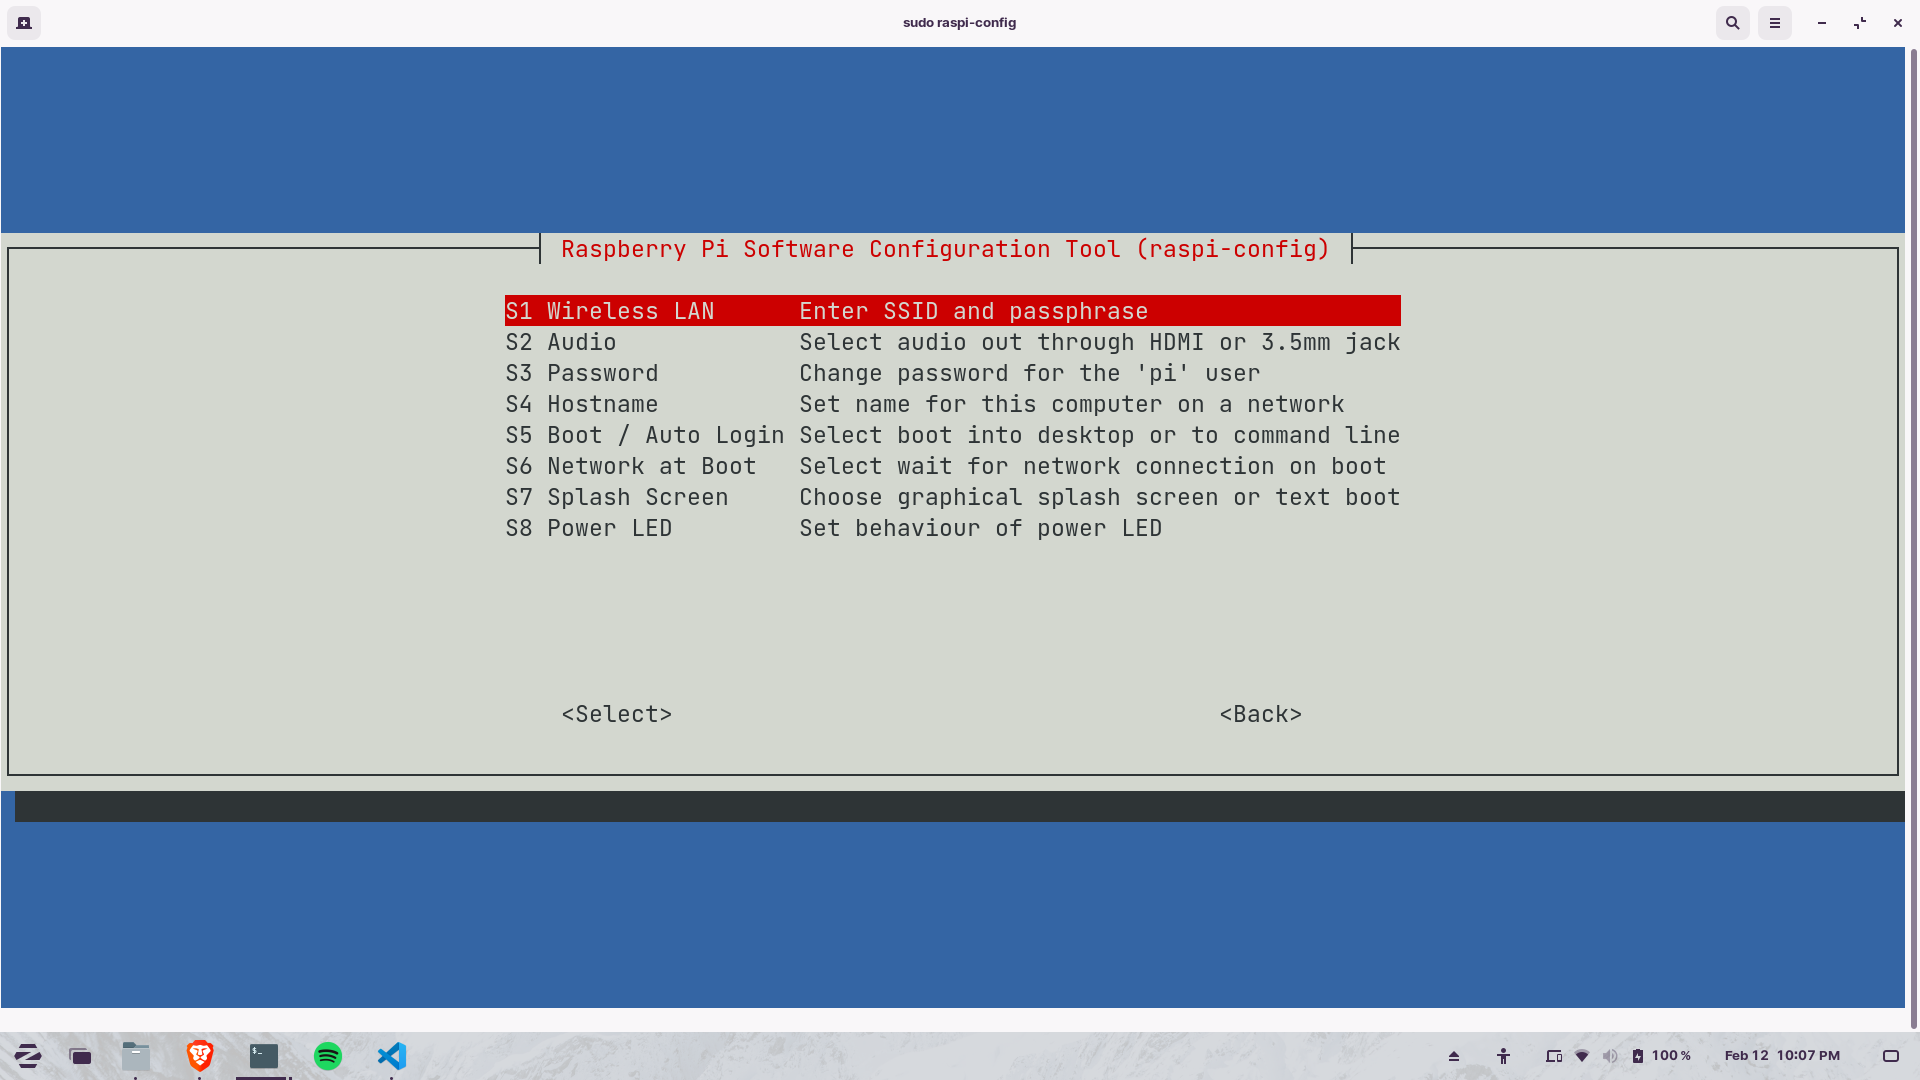
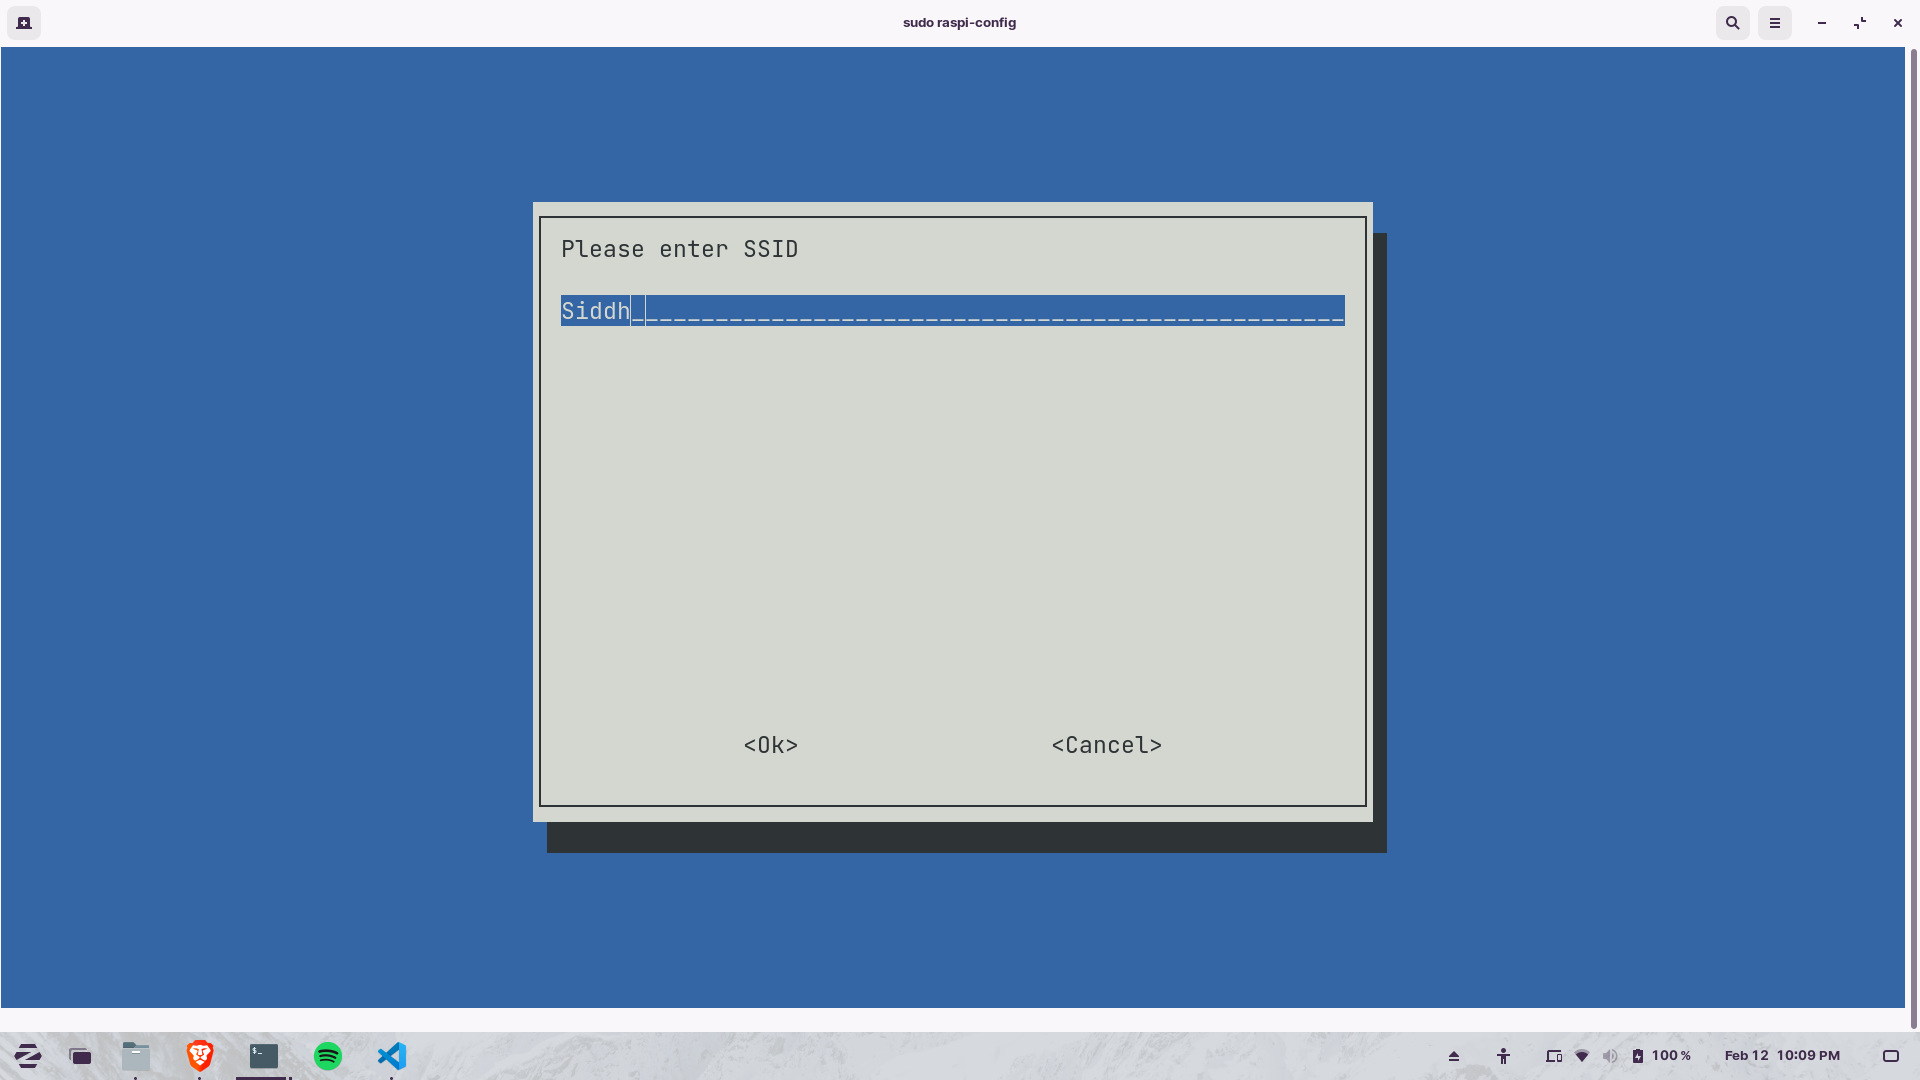
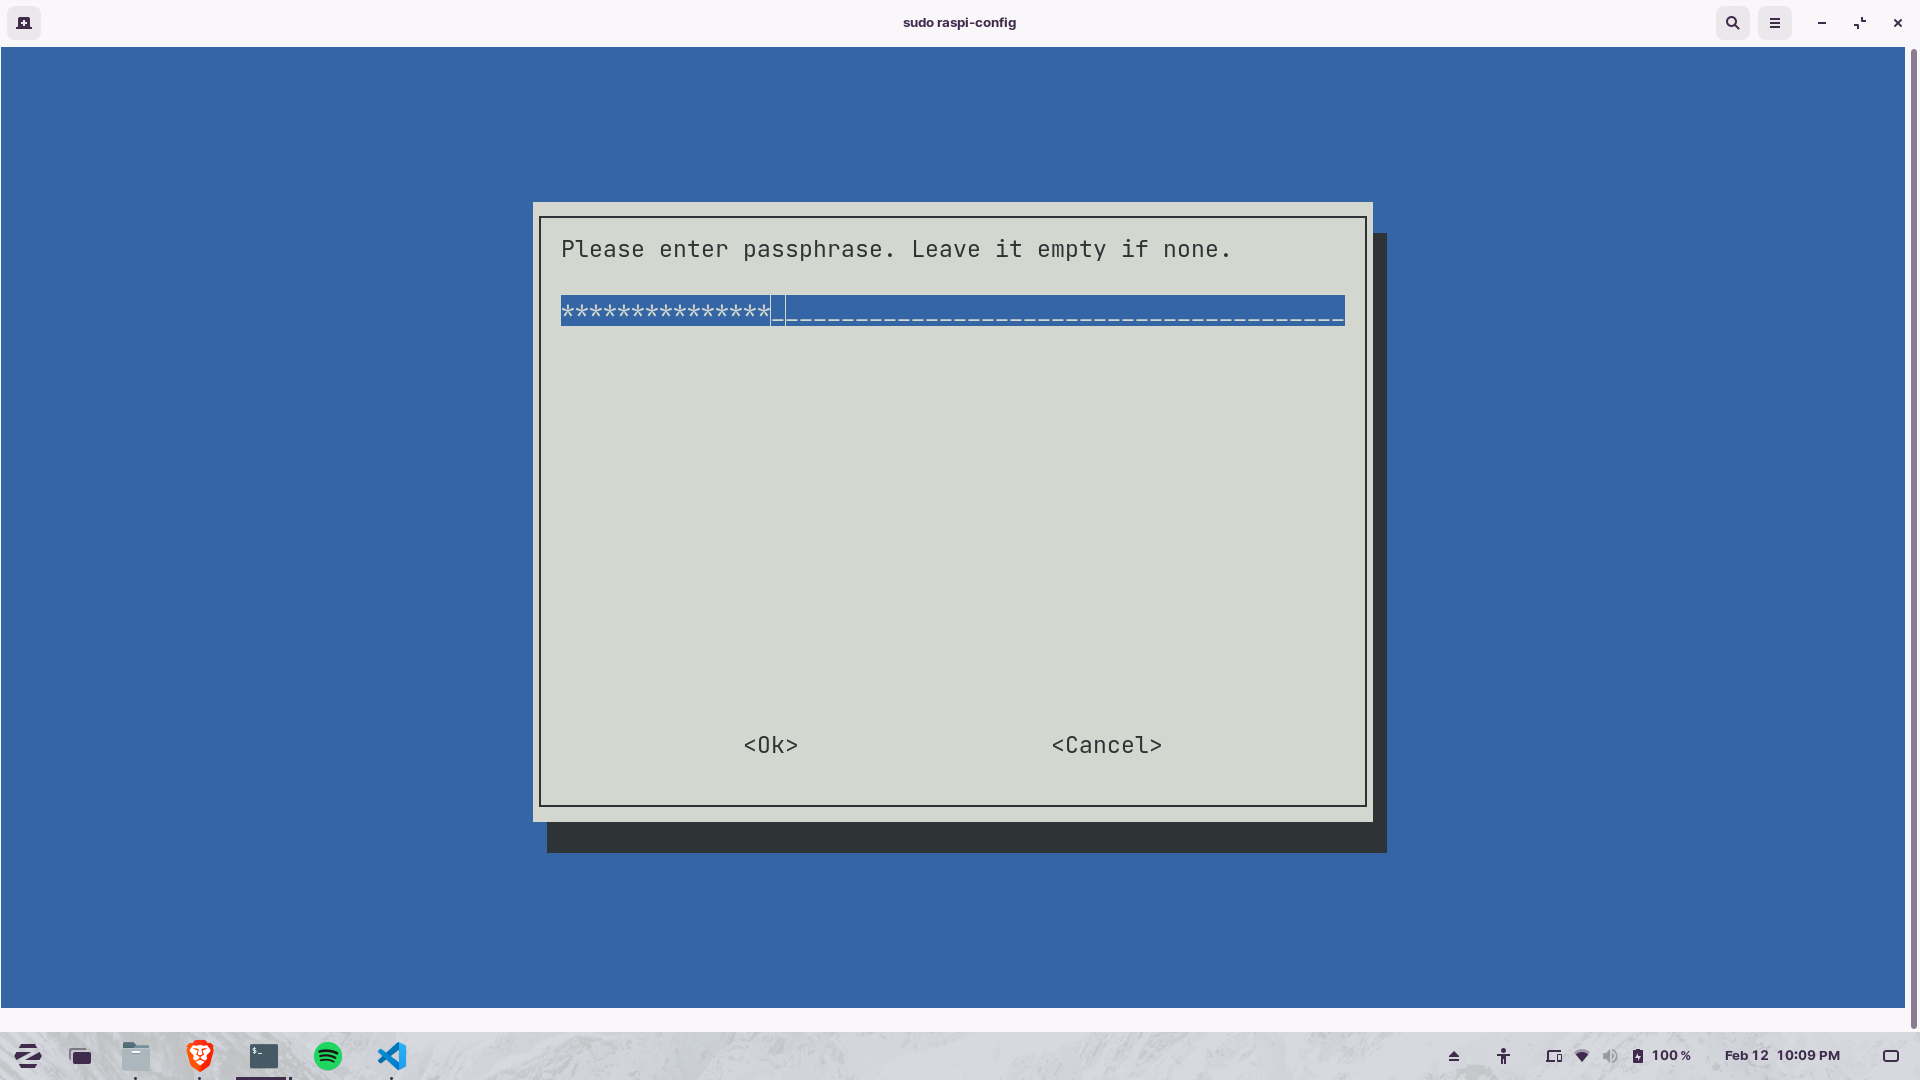
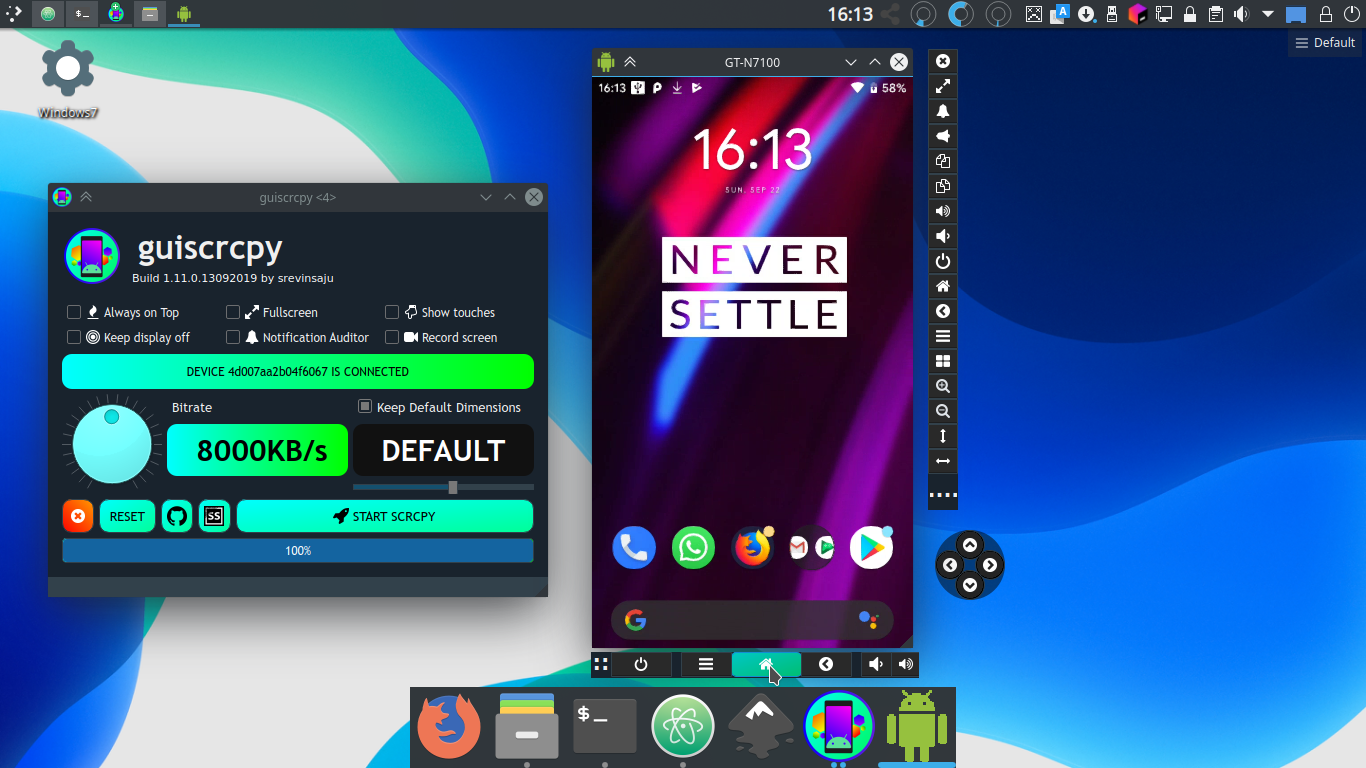
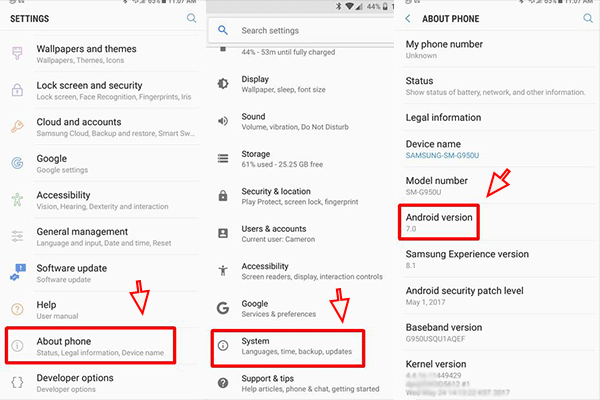
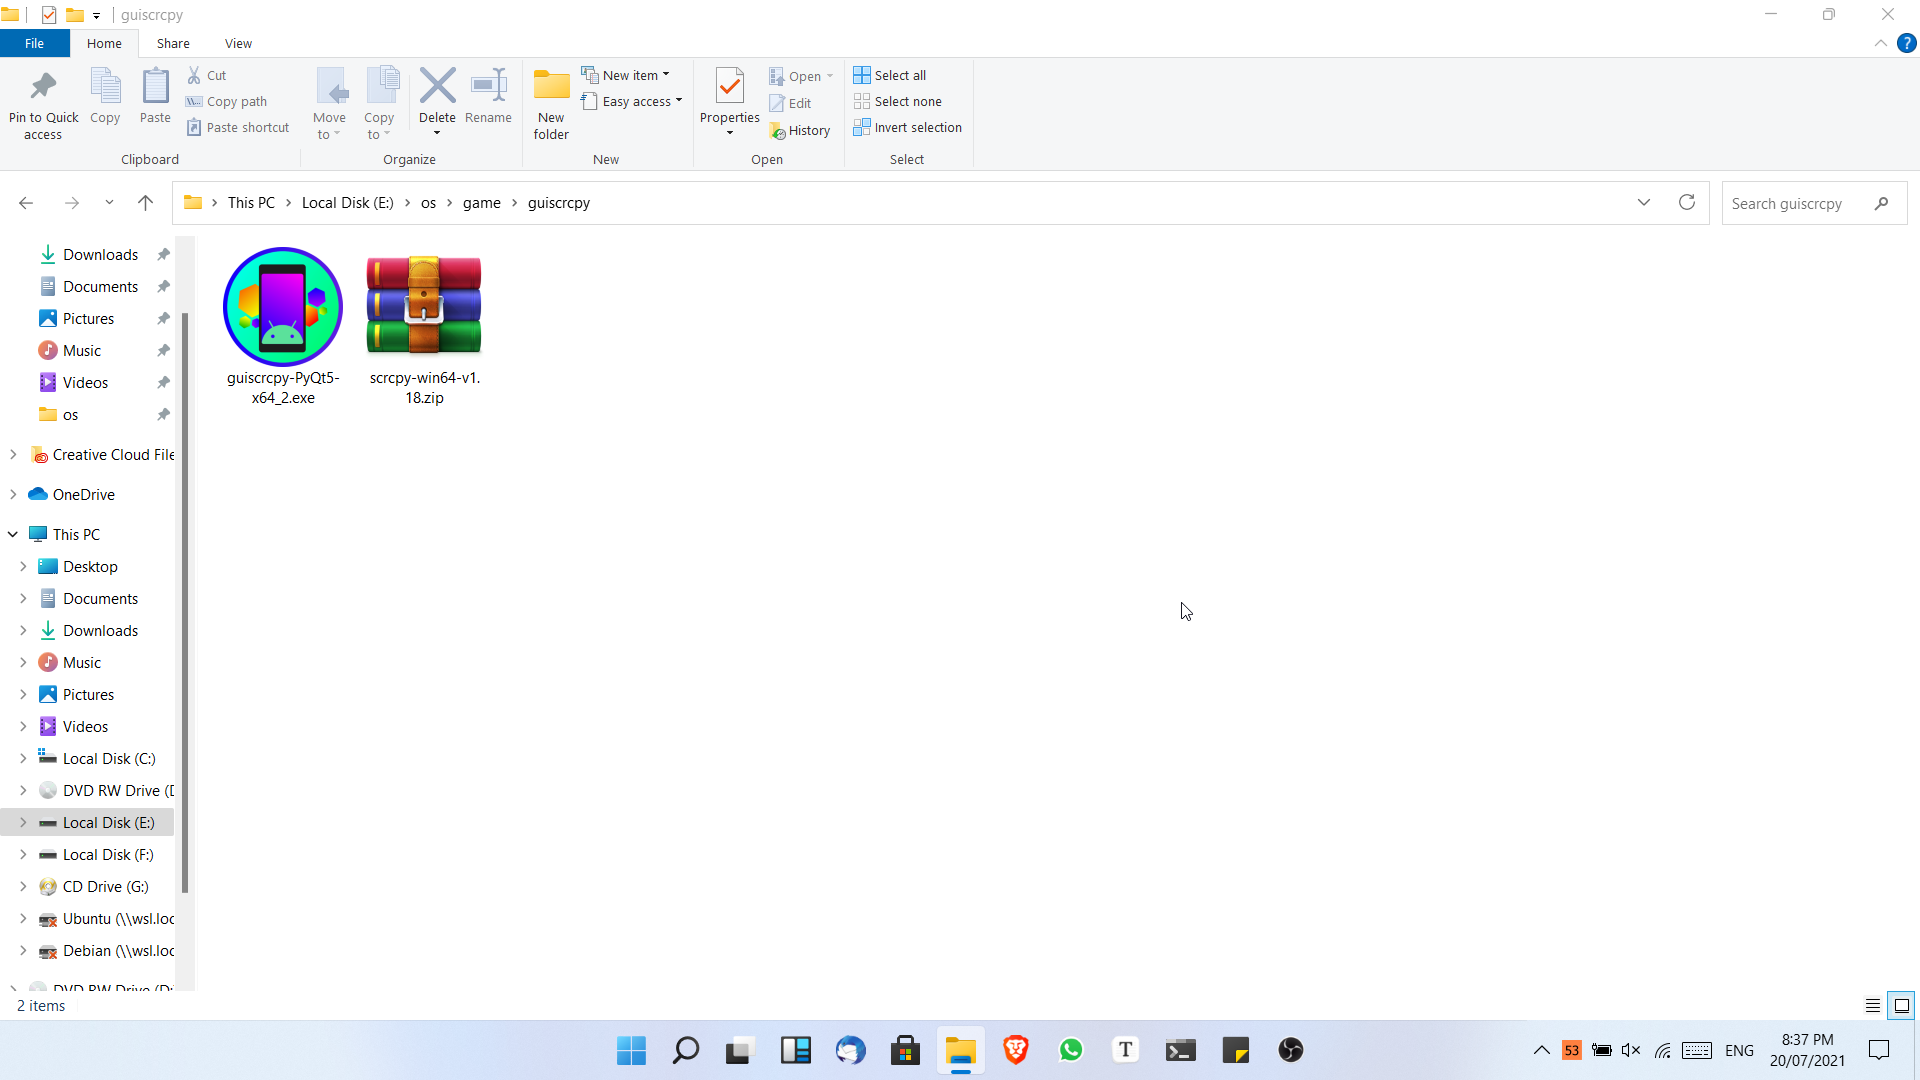
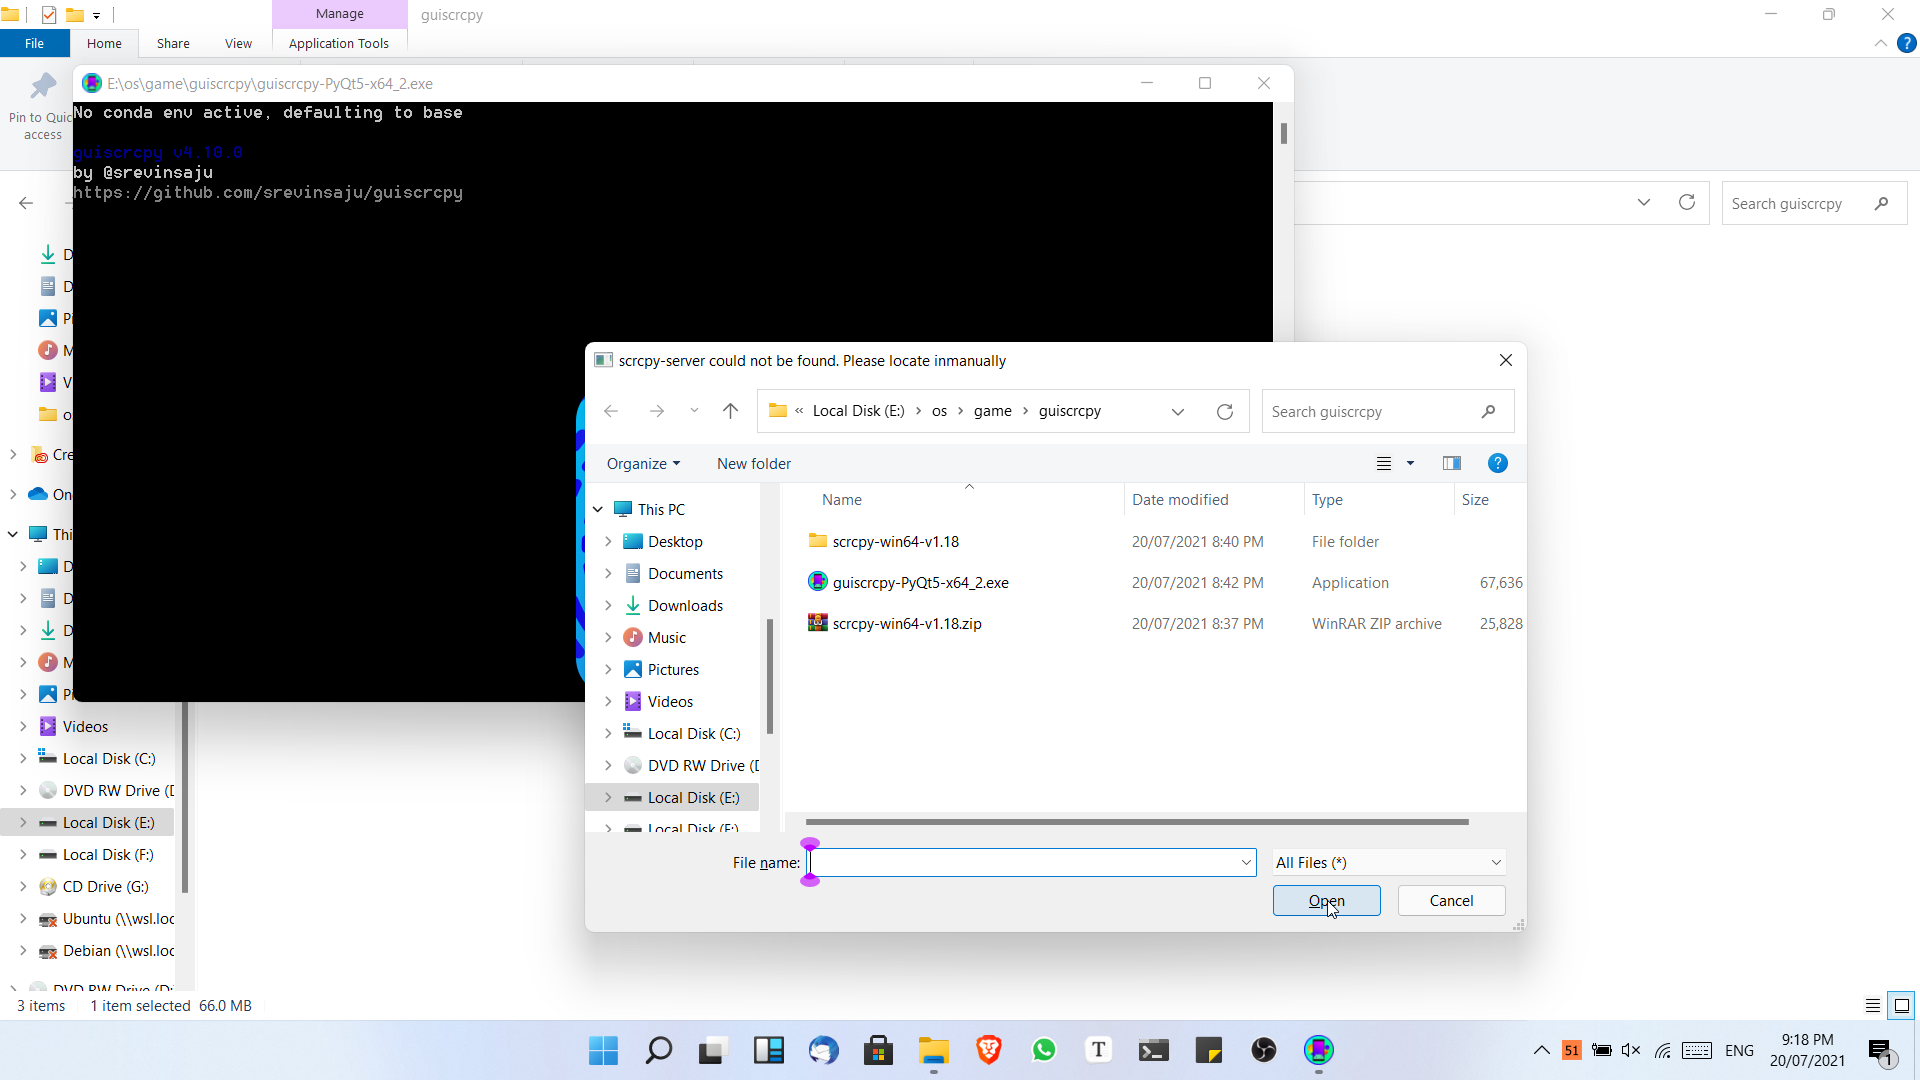
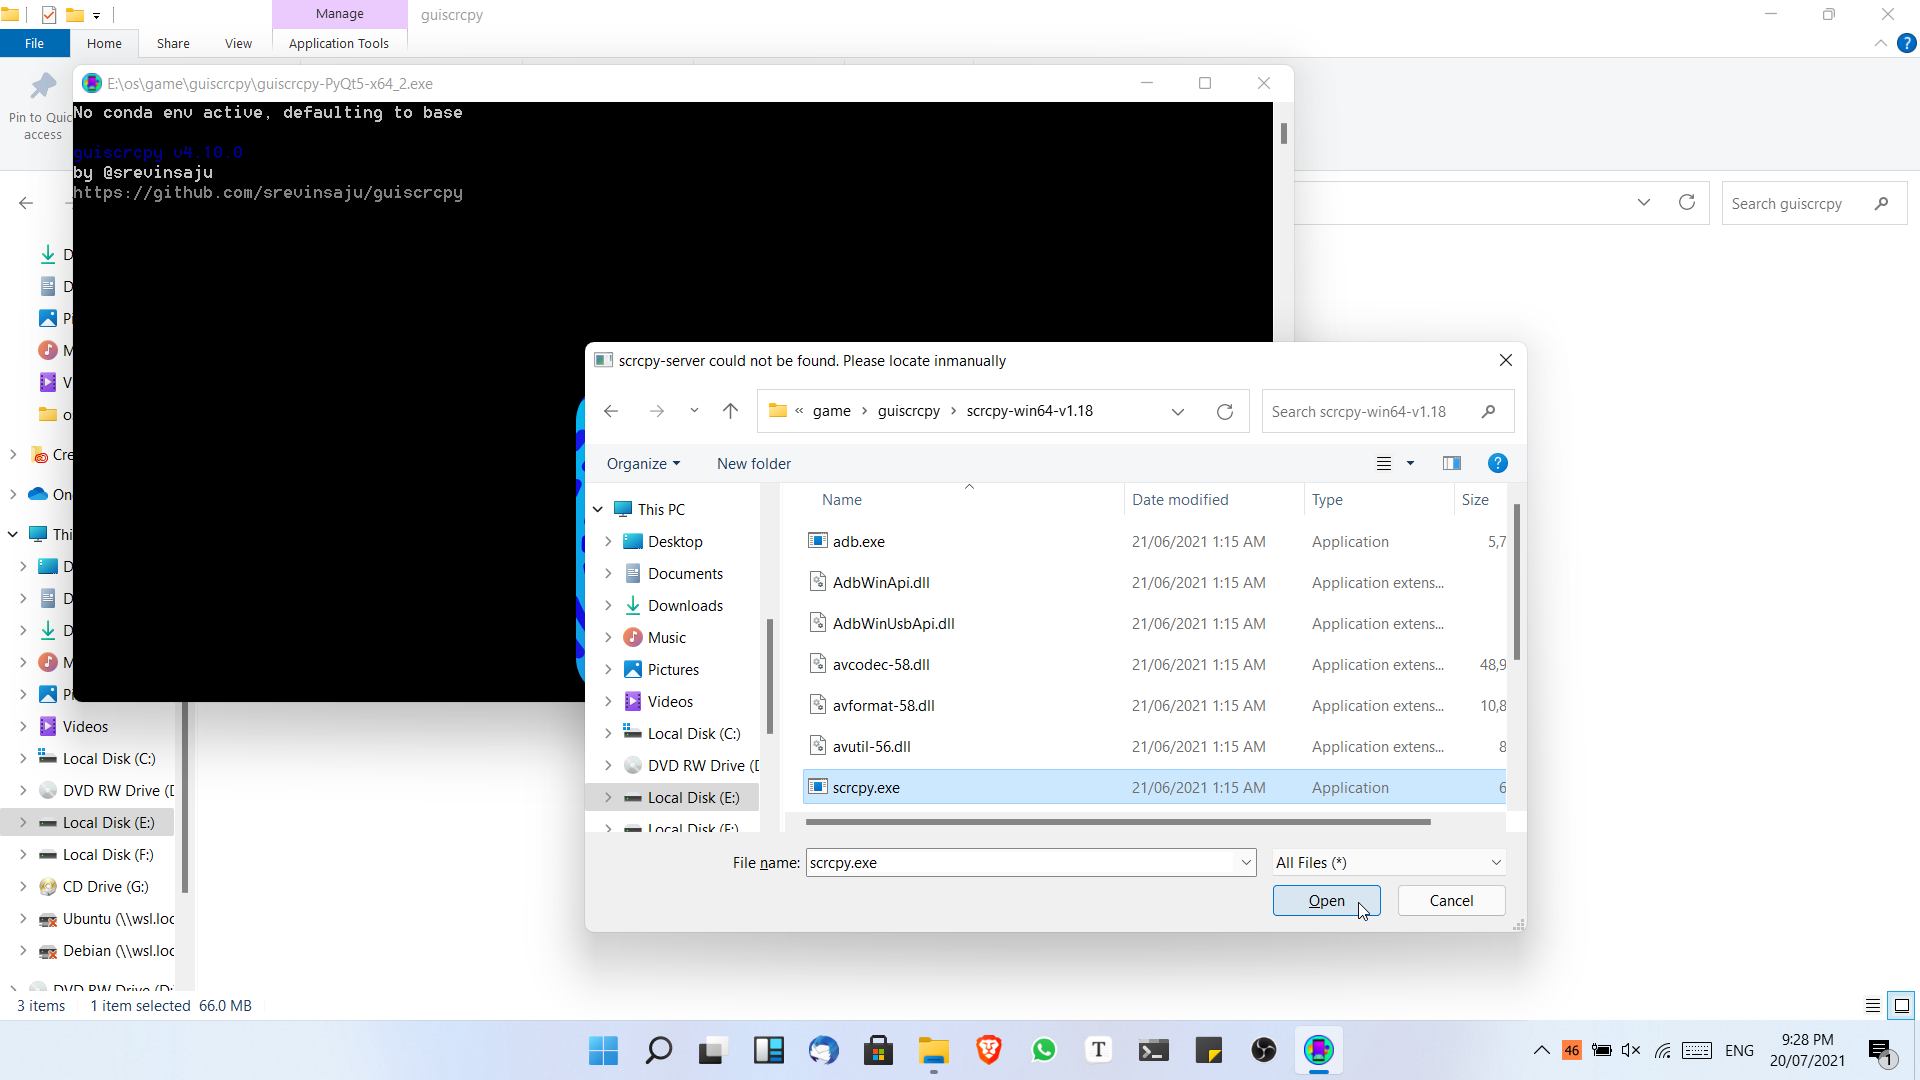
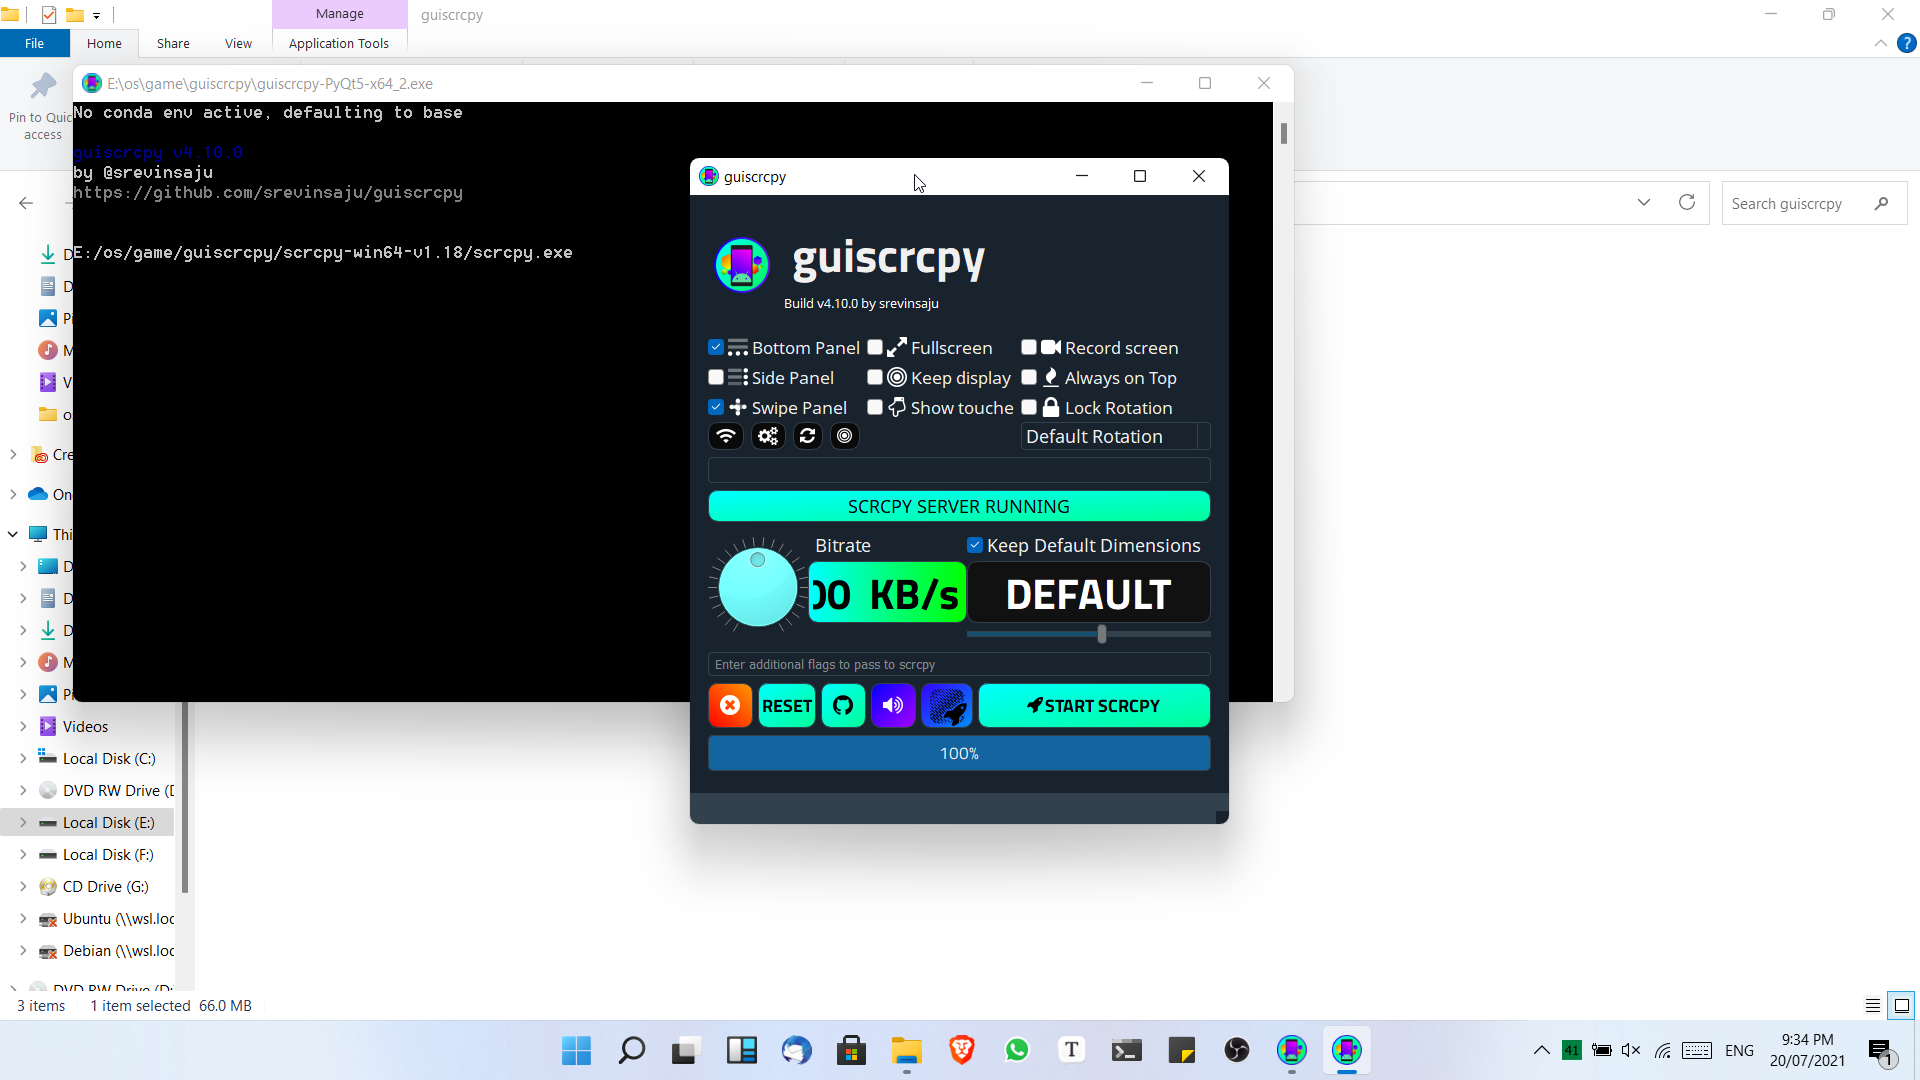
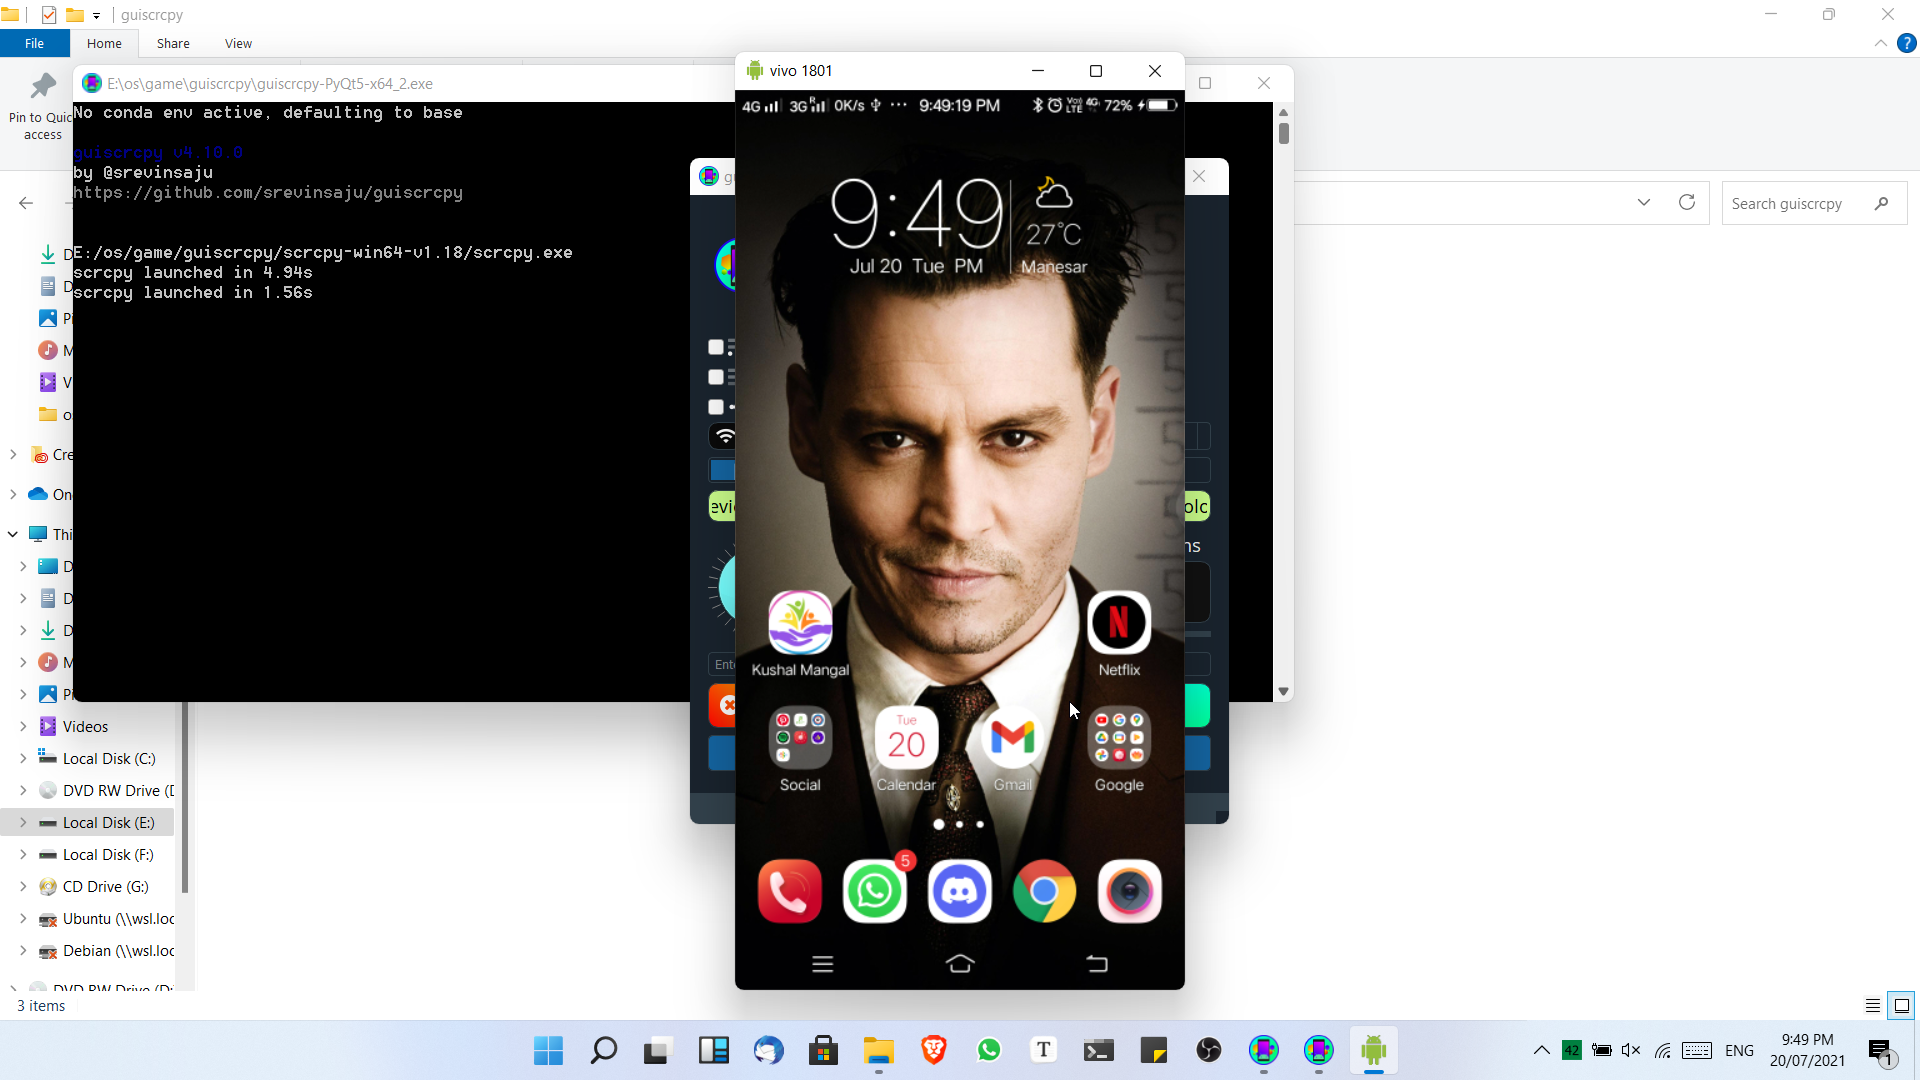

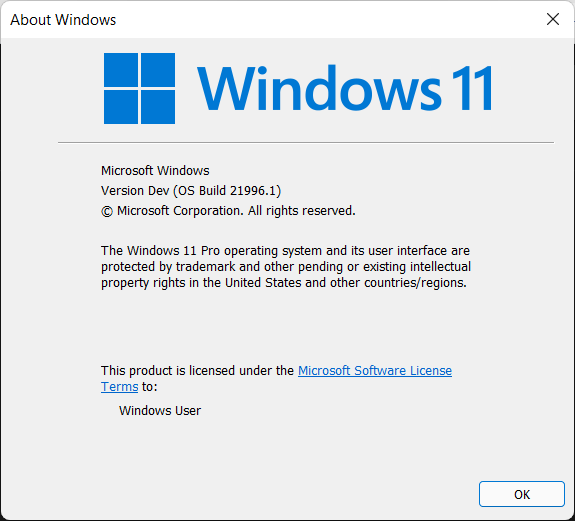
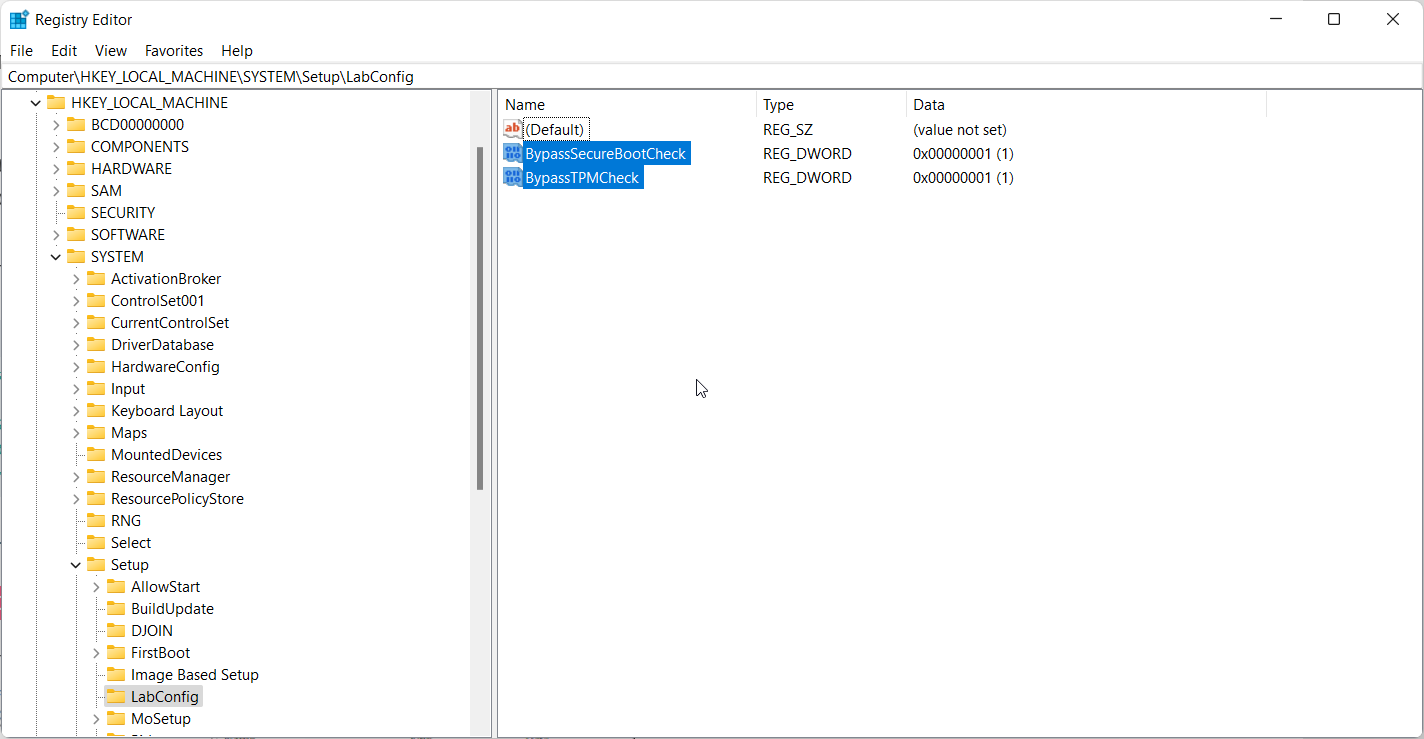

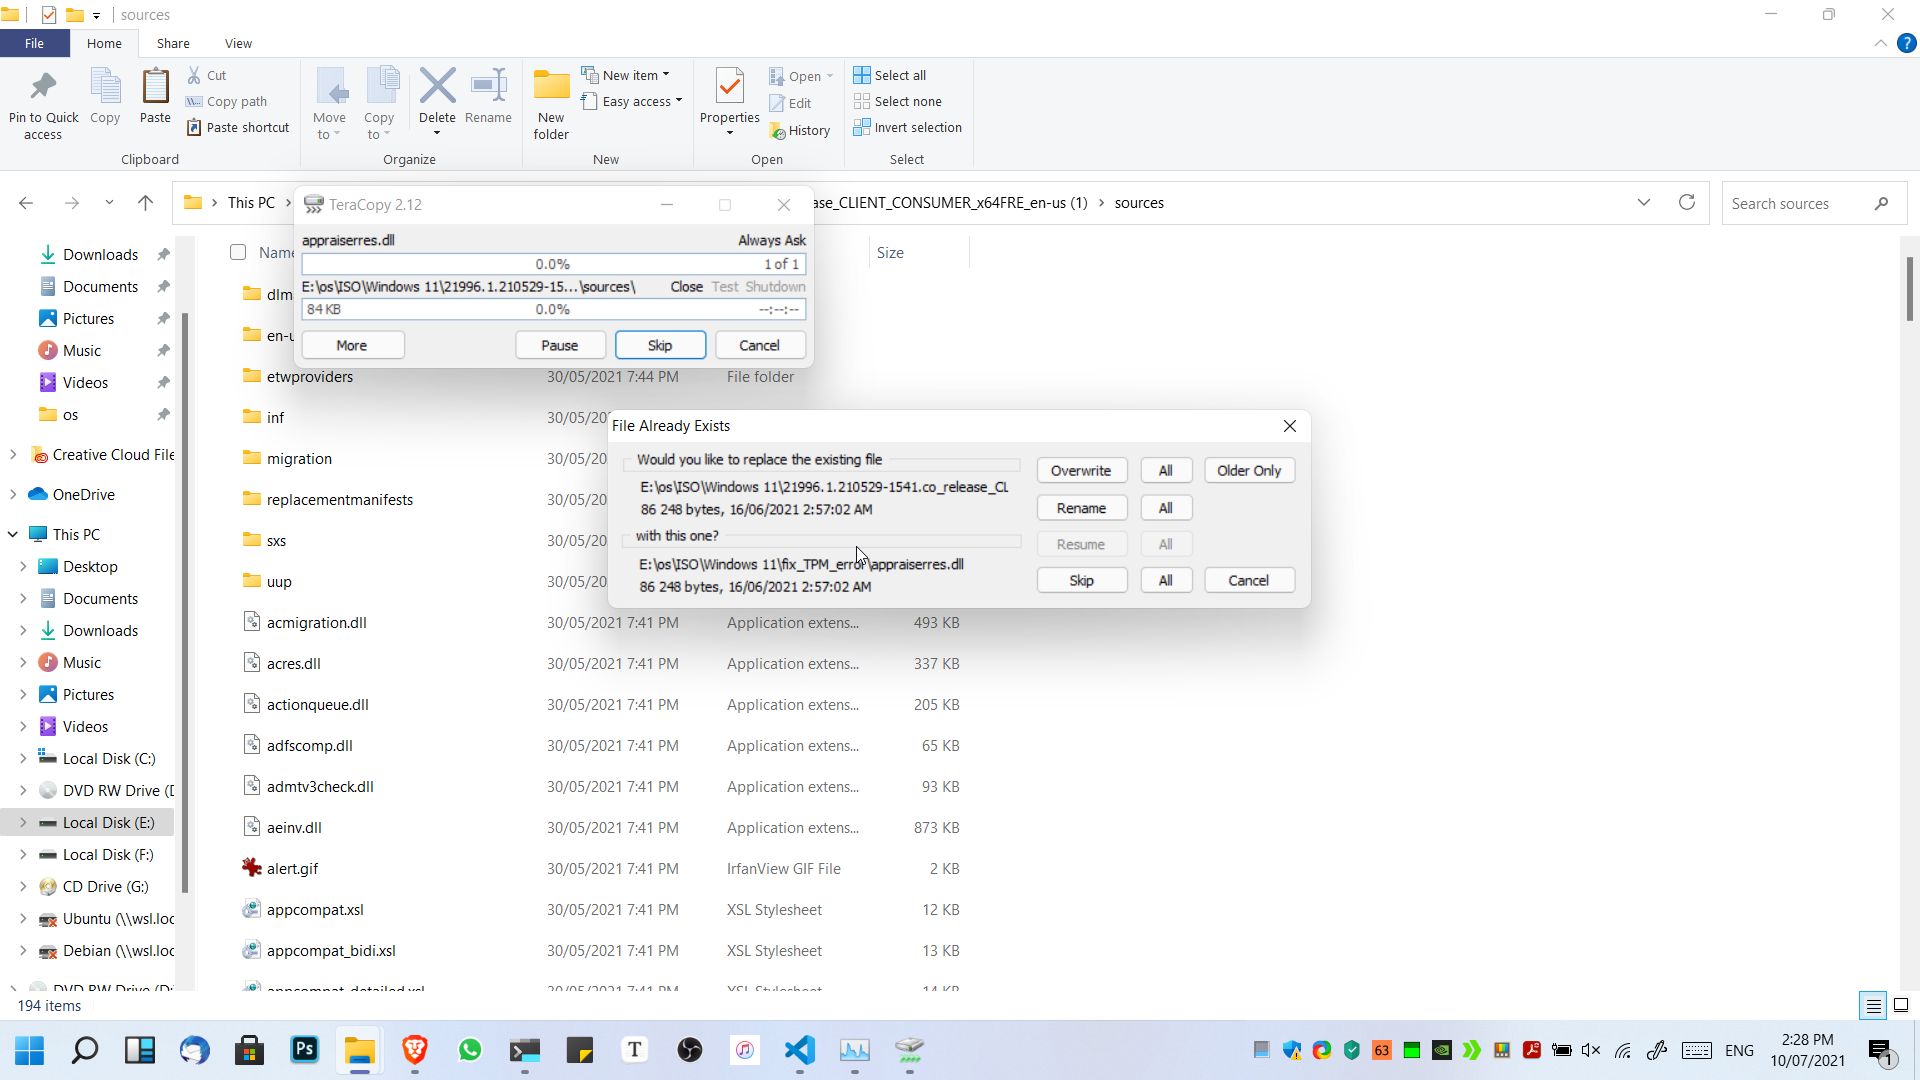
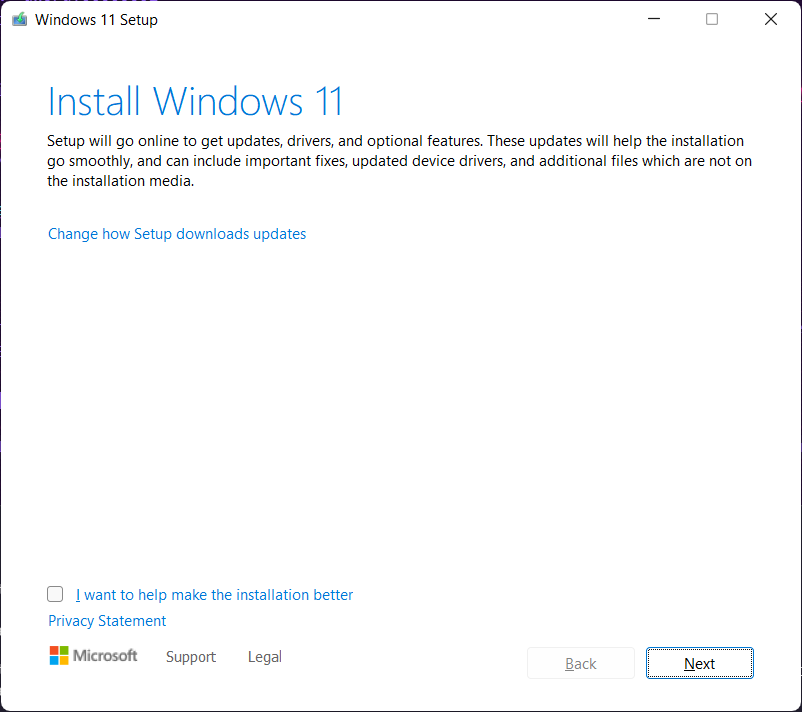

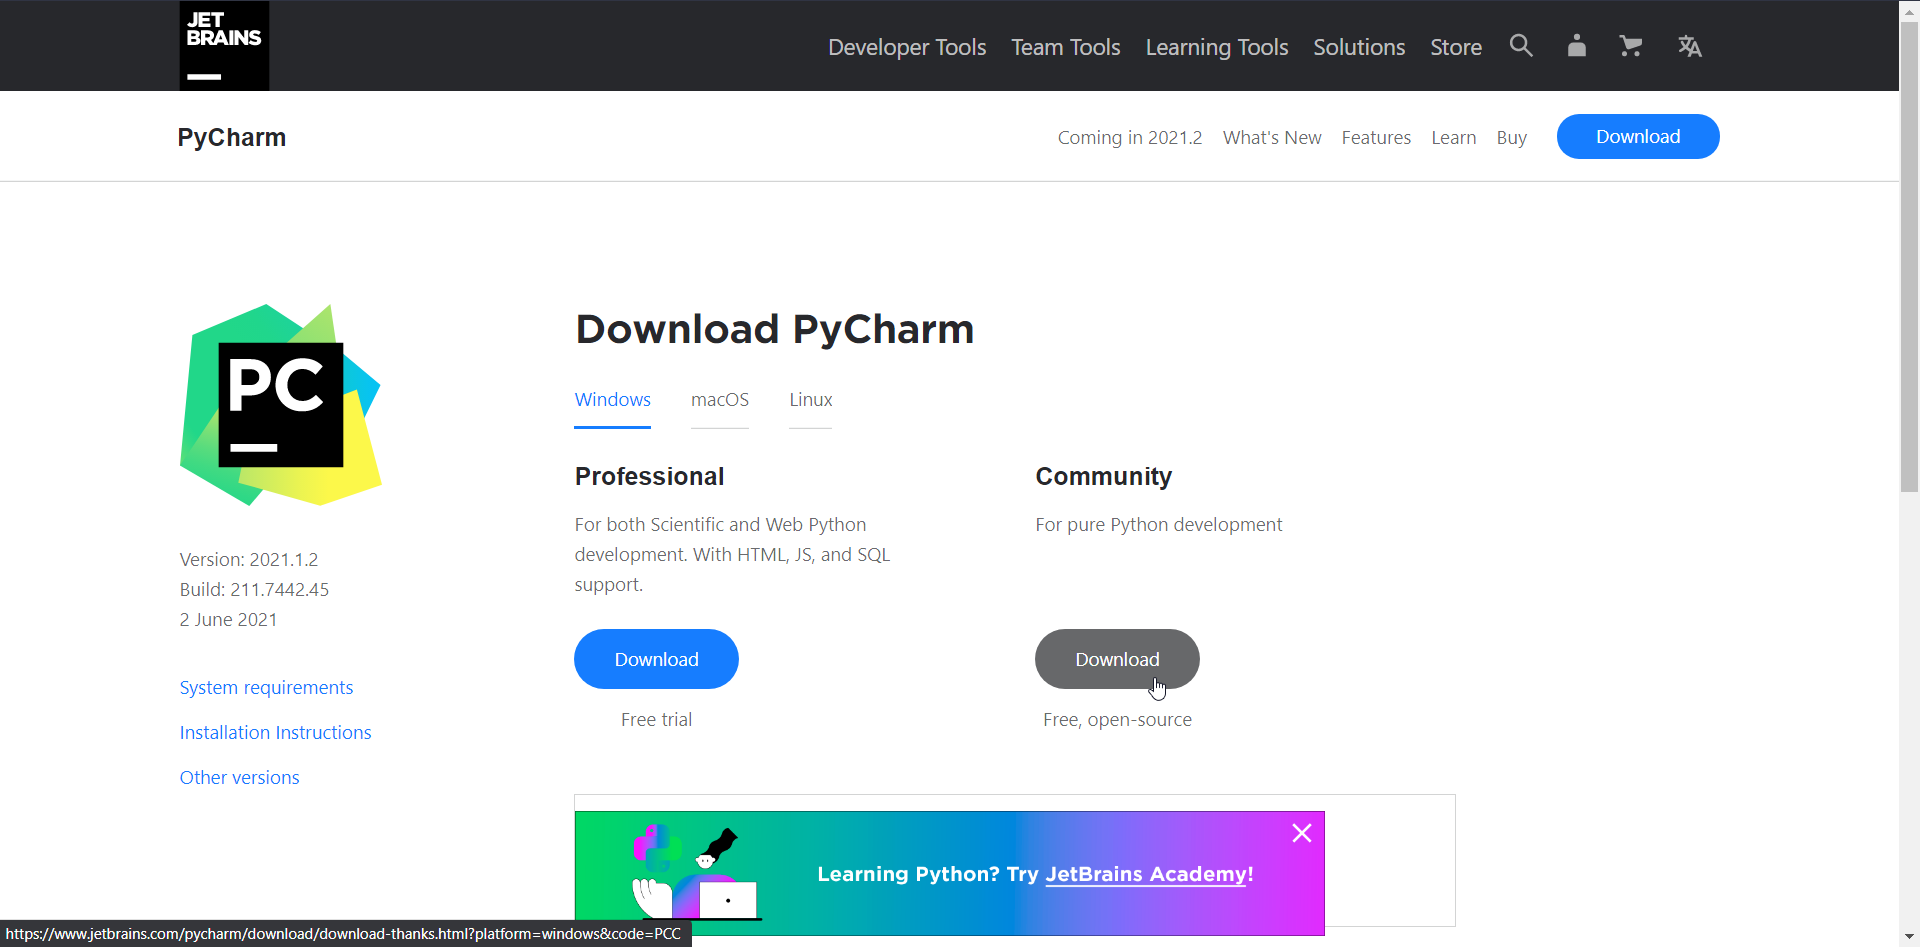
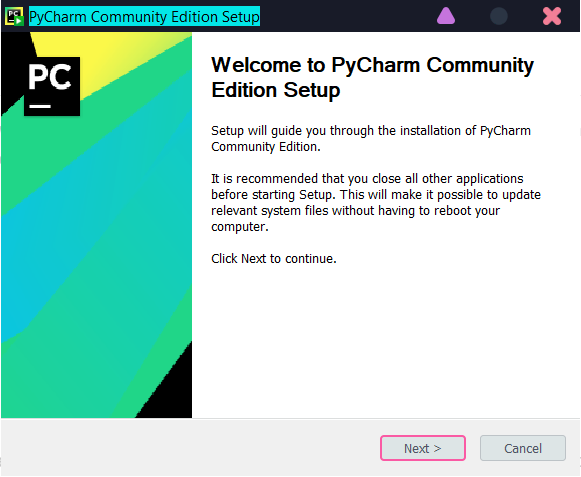
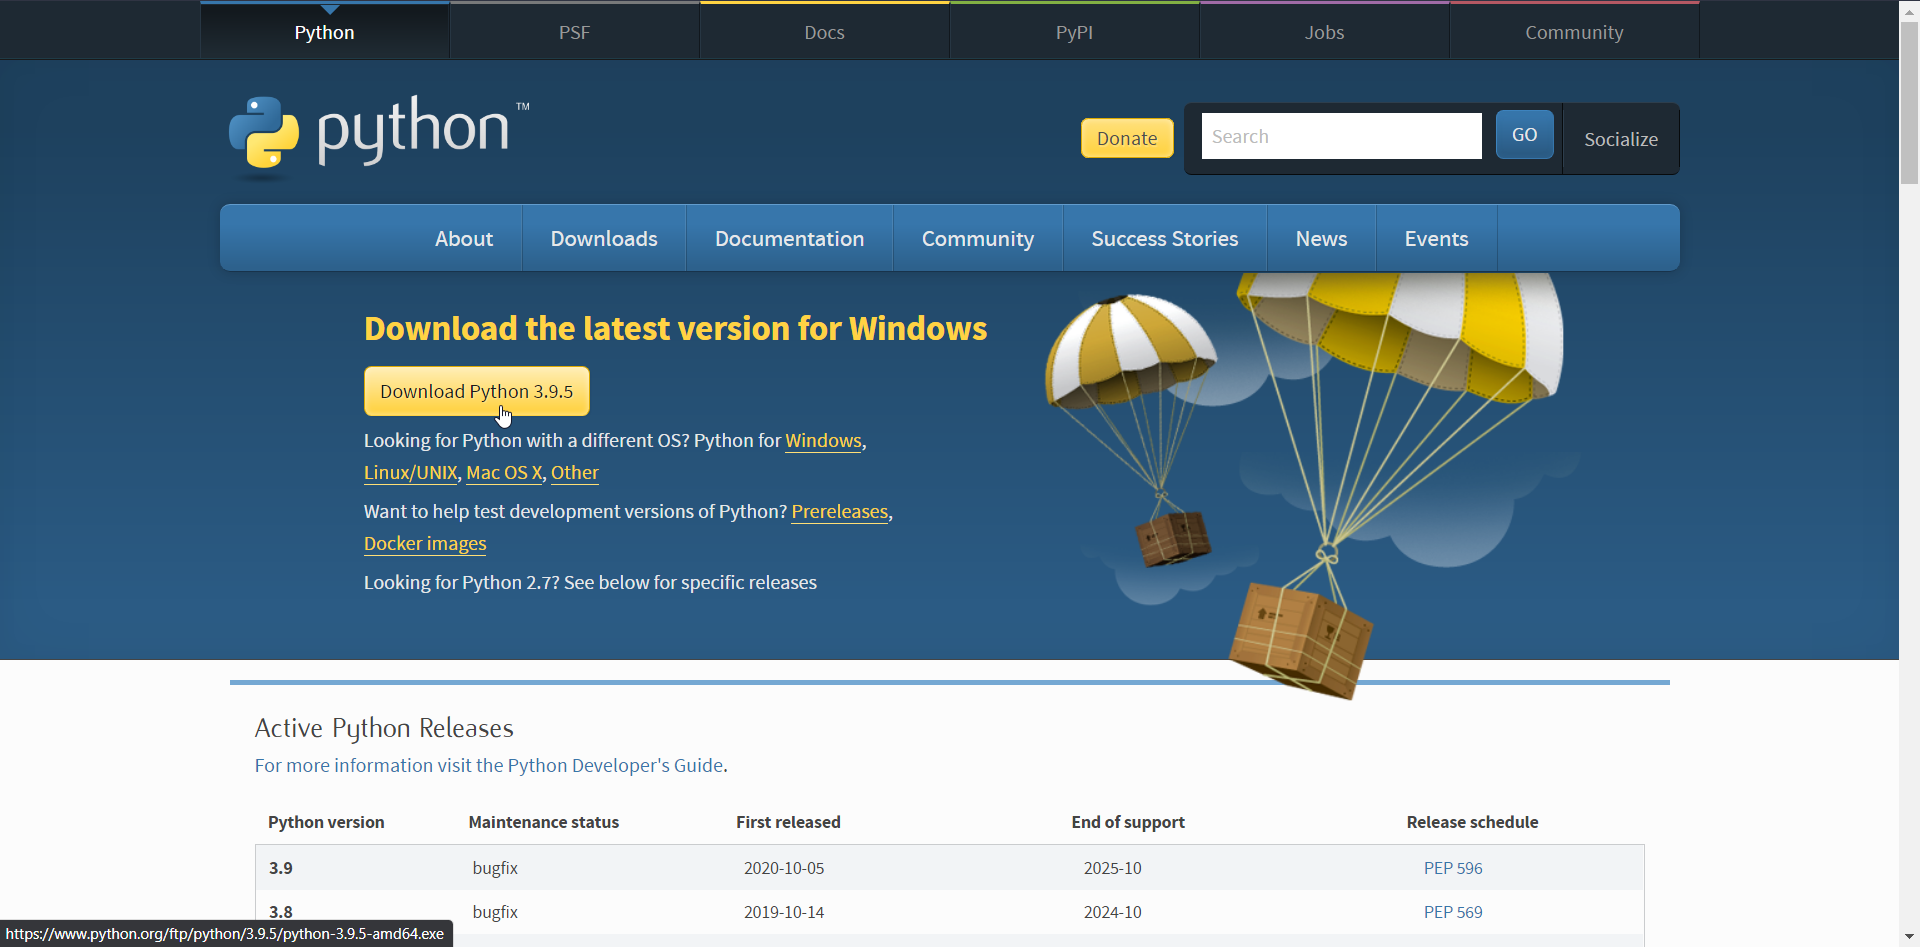
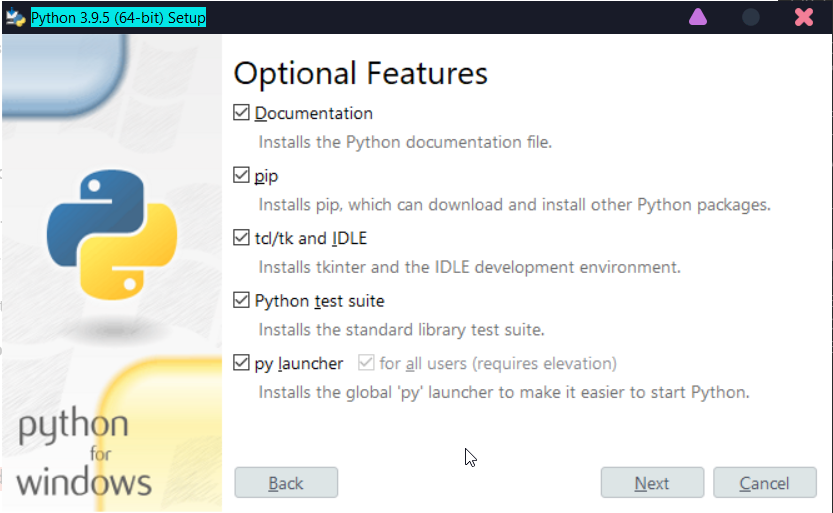
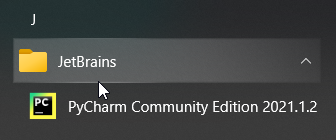
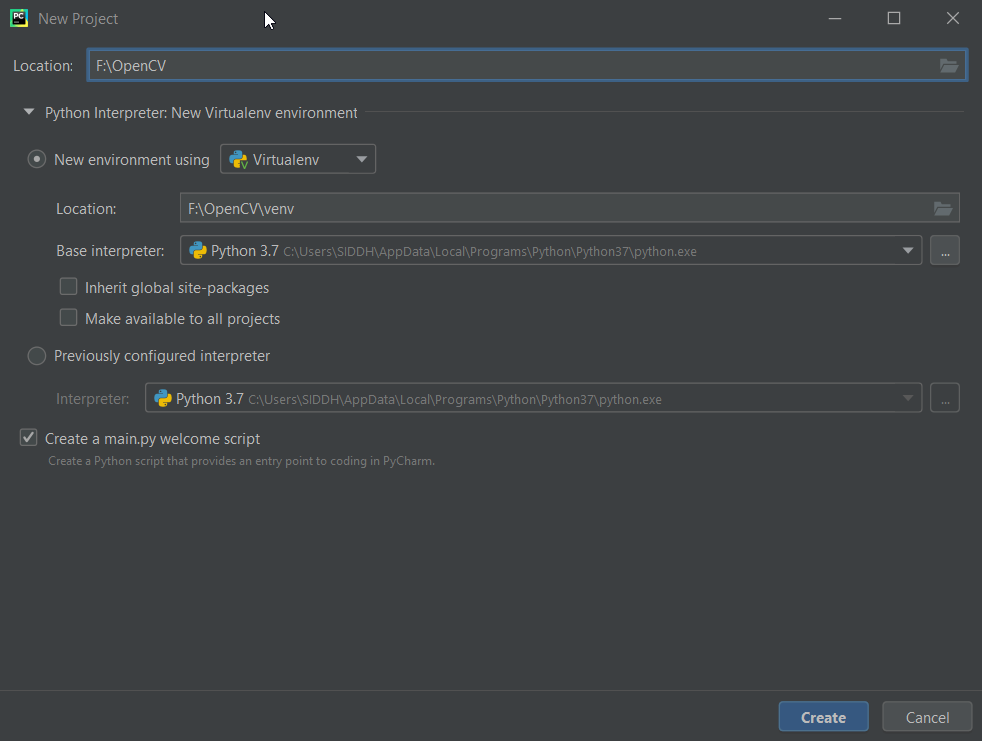
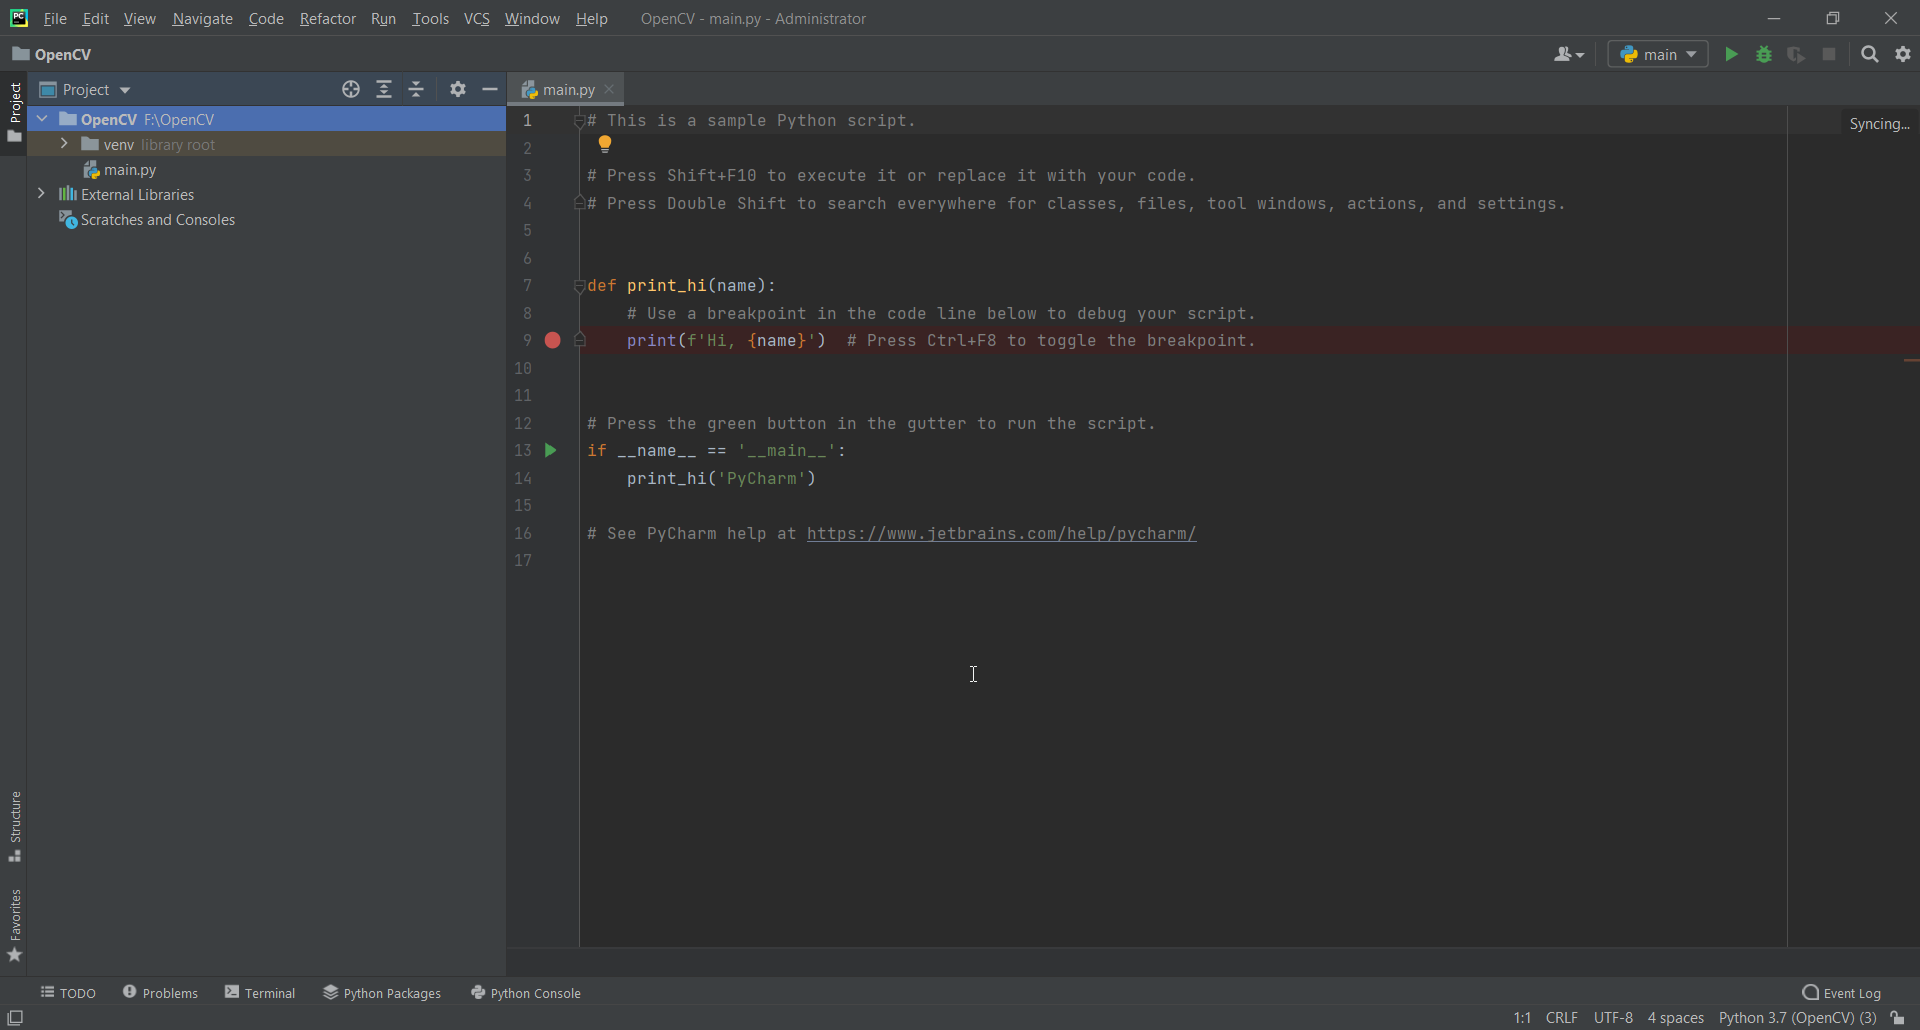
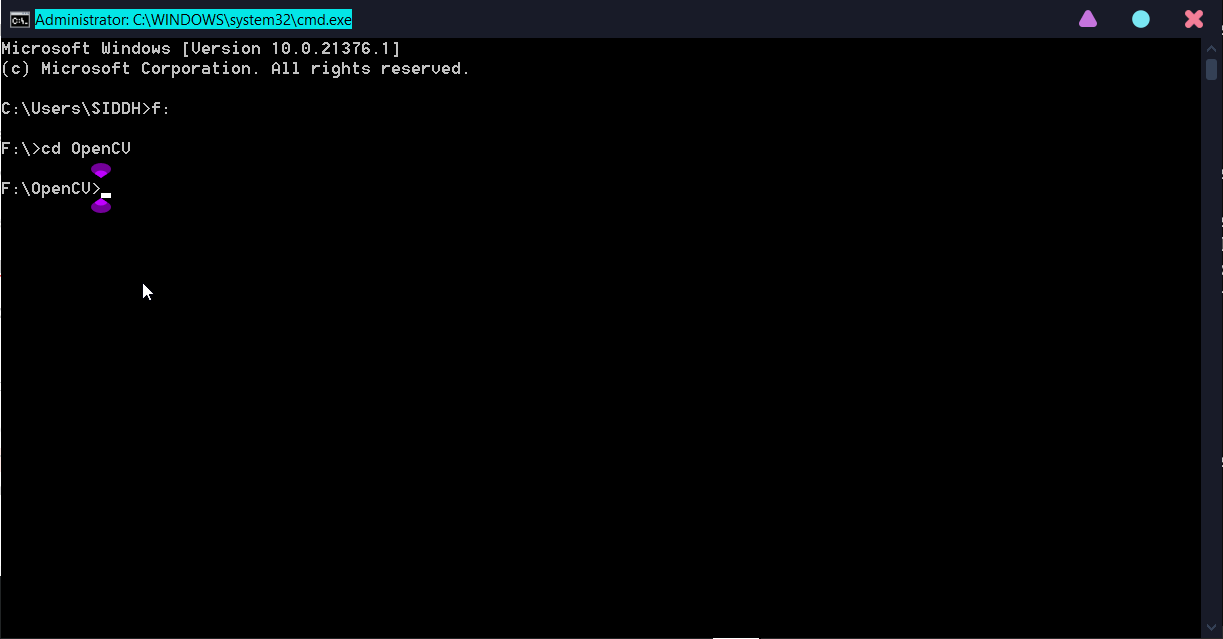
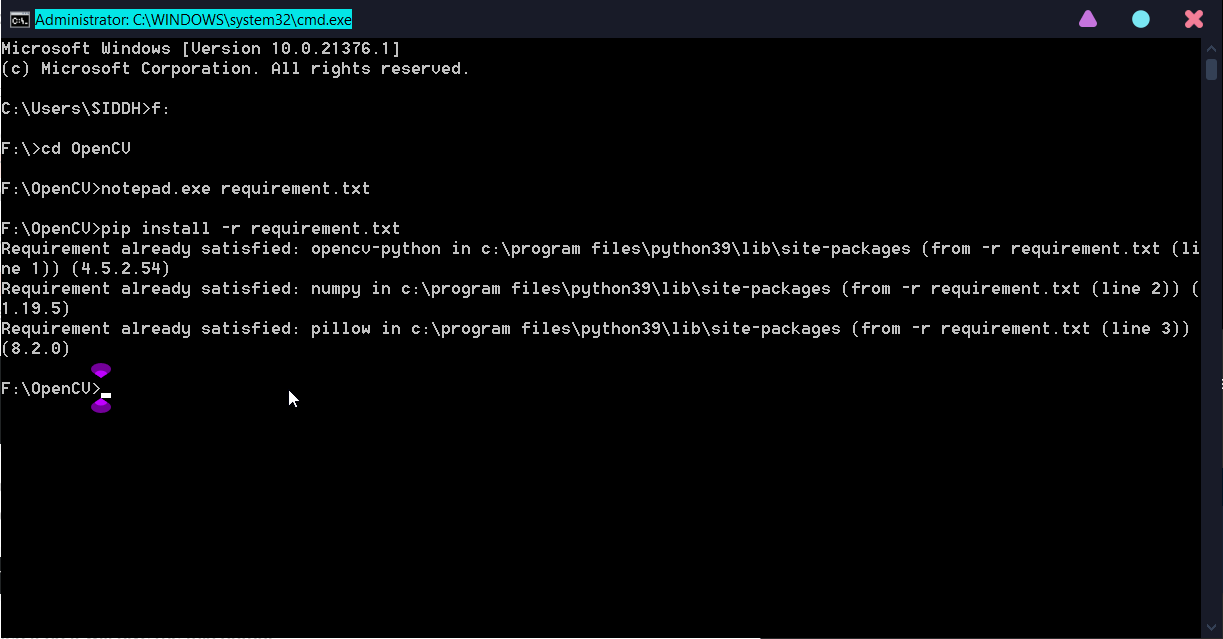
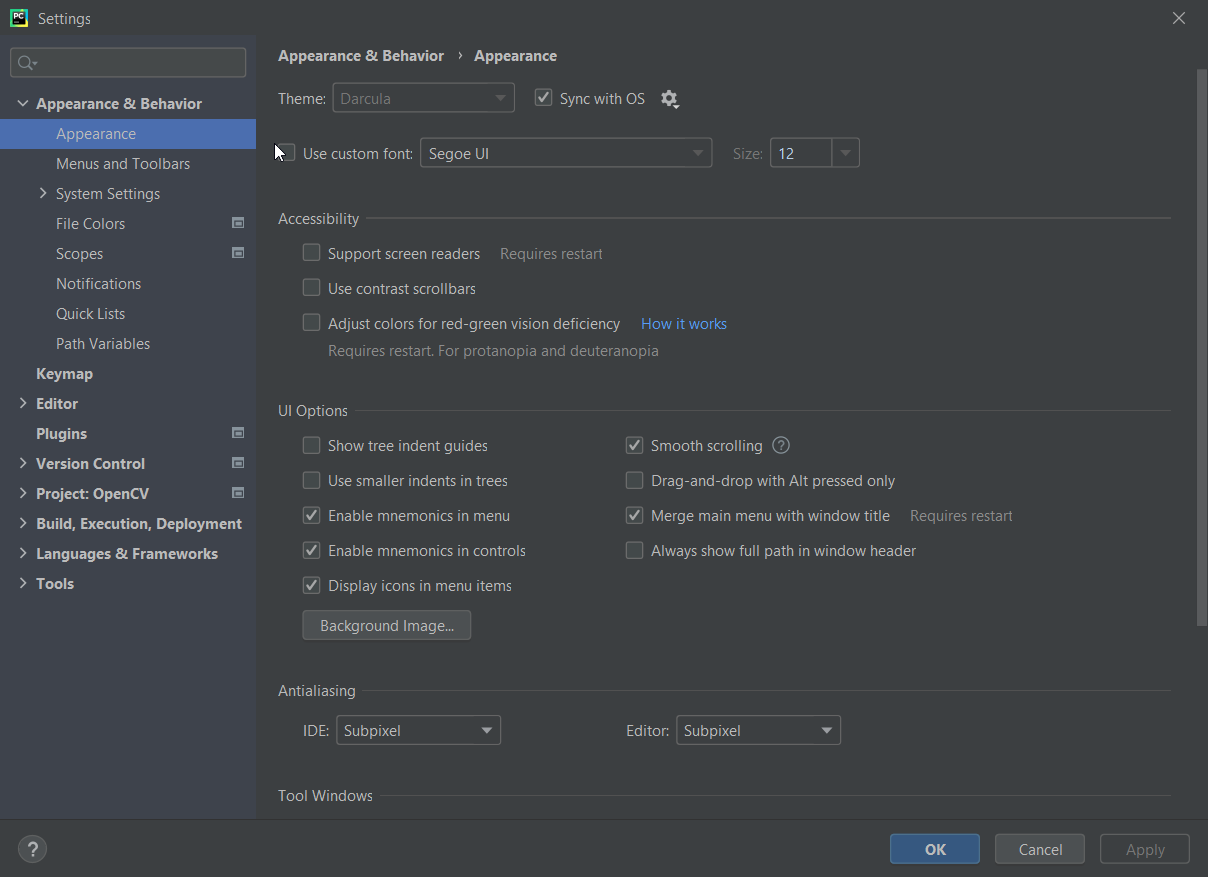
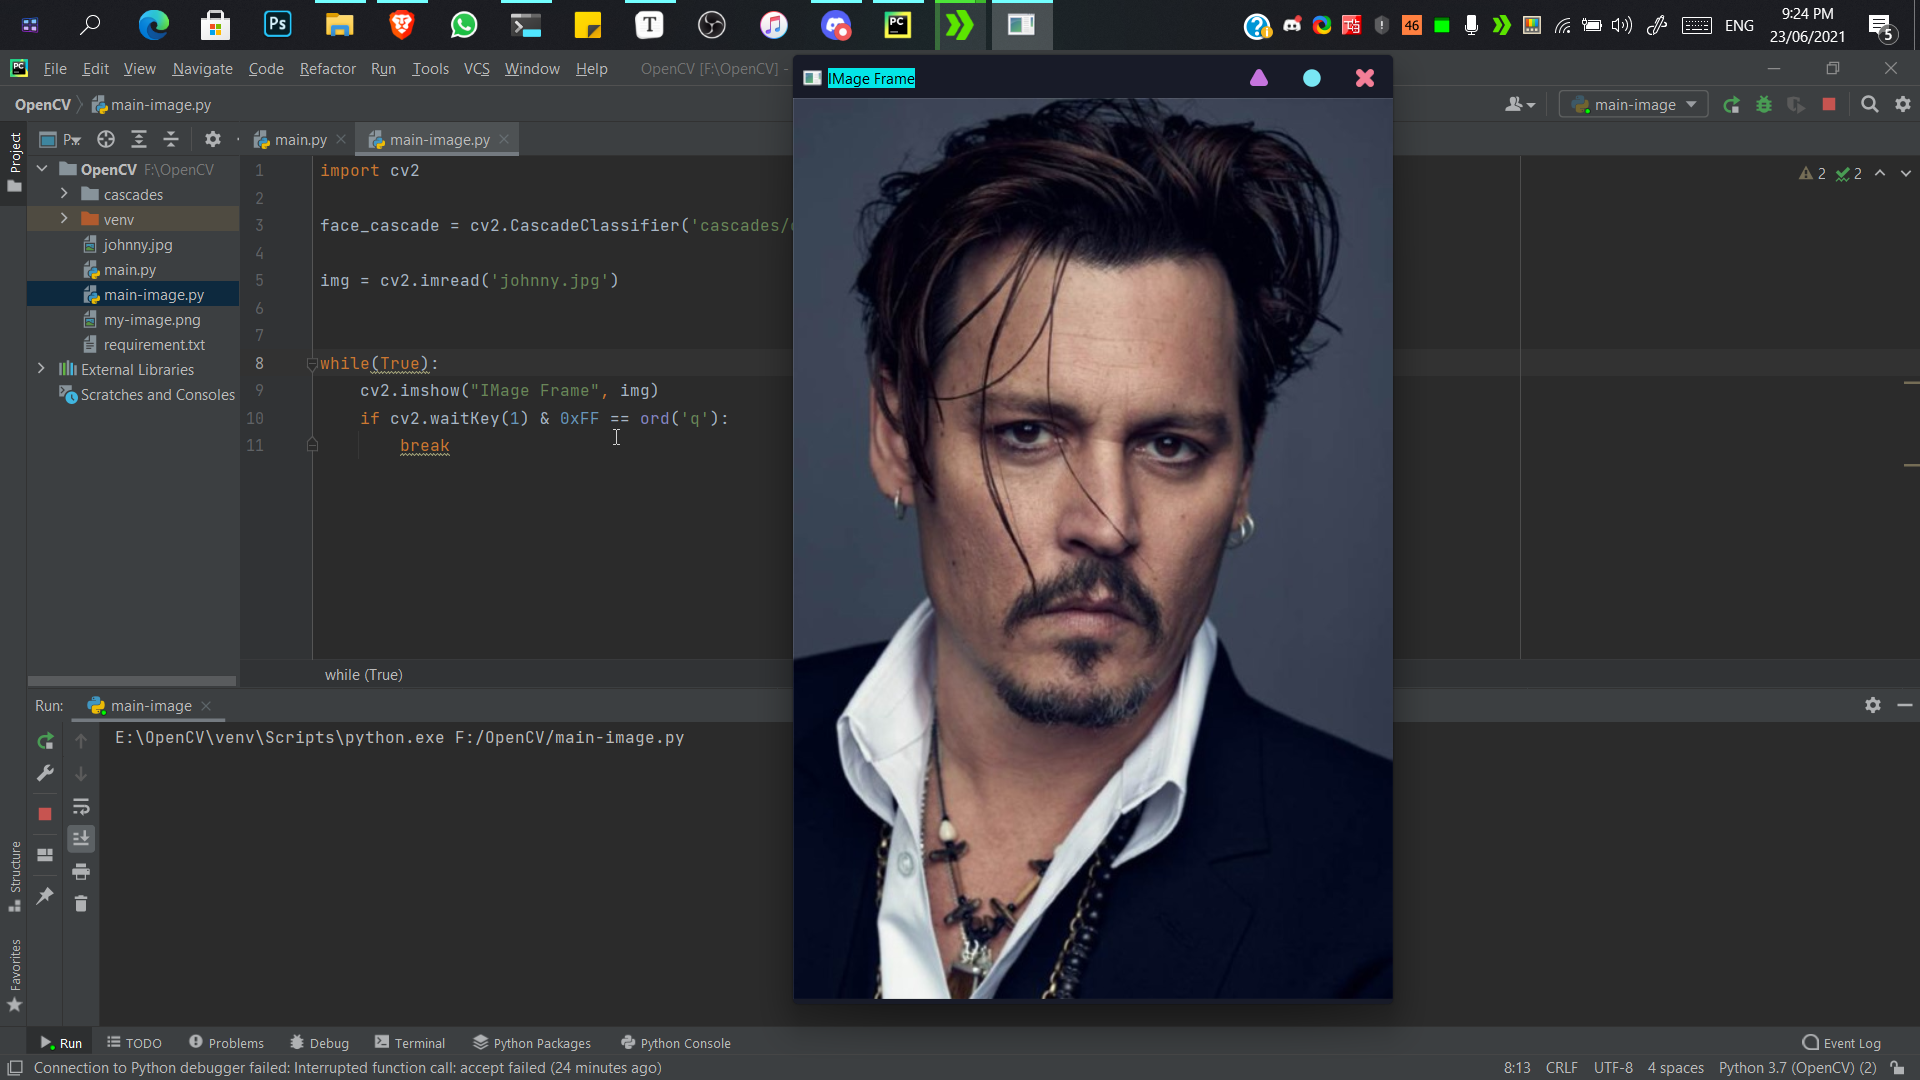 This is test image which I will be using it.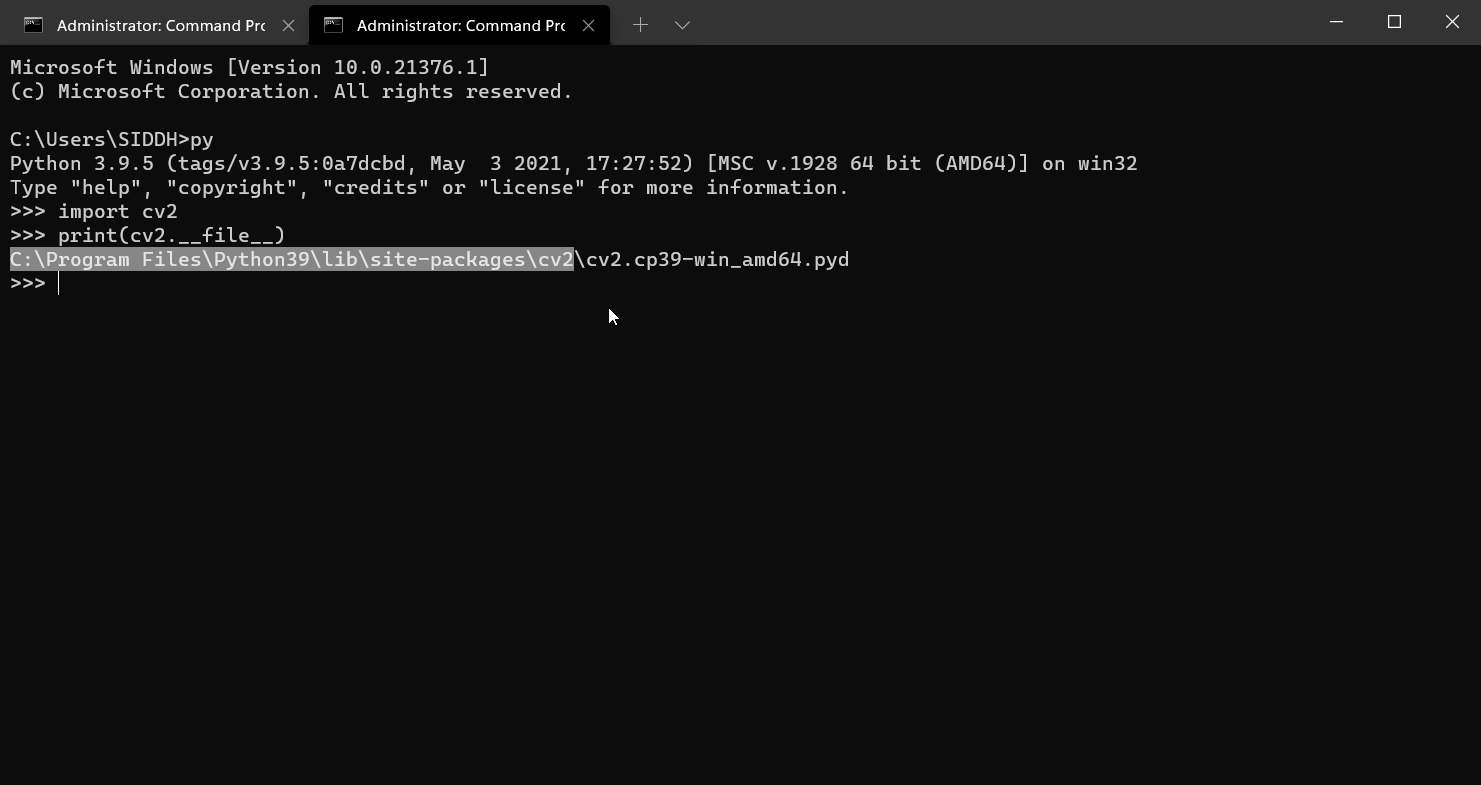
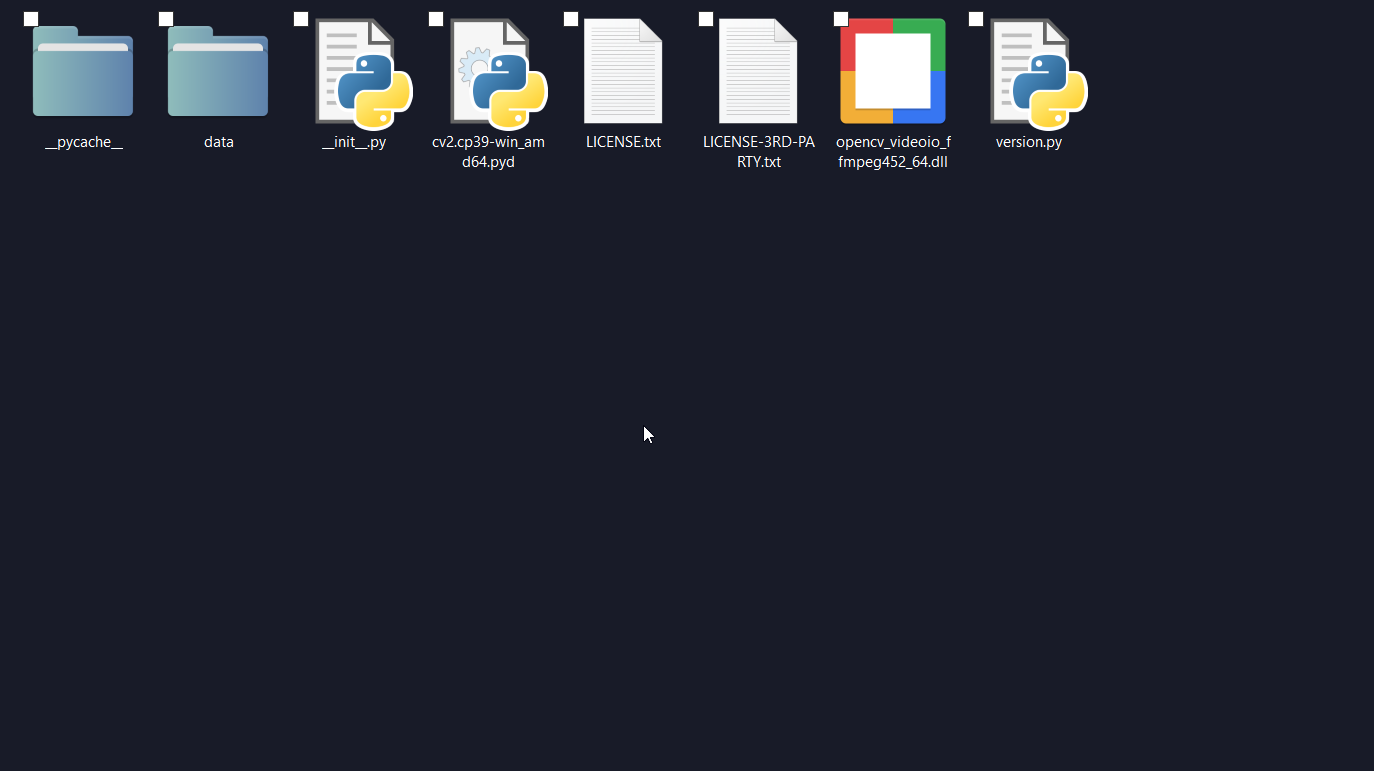
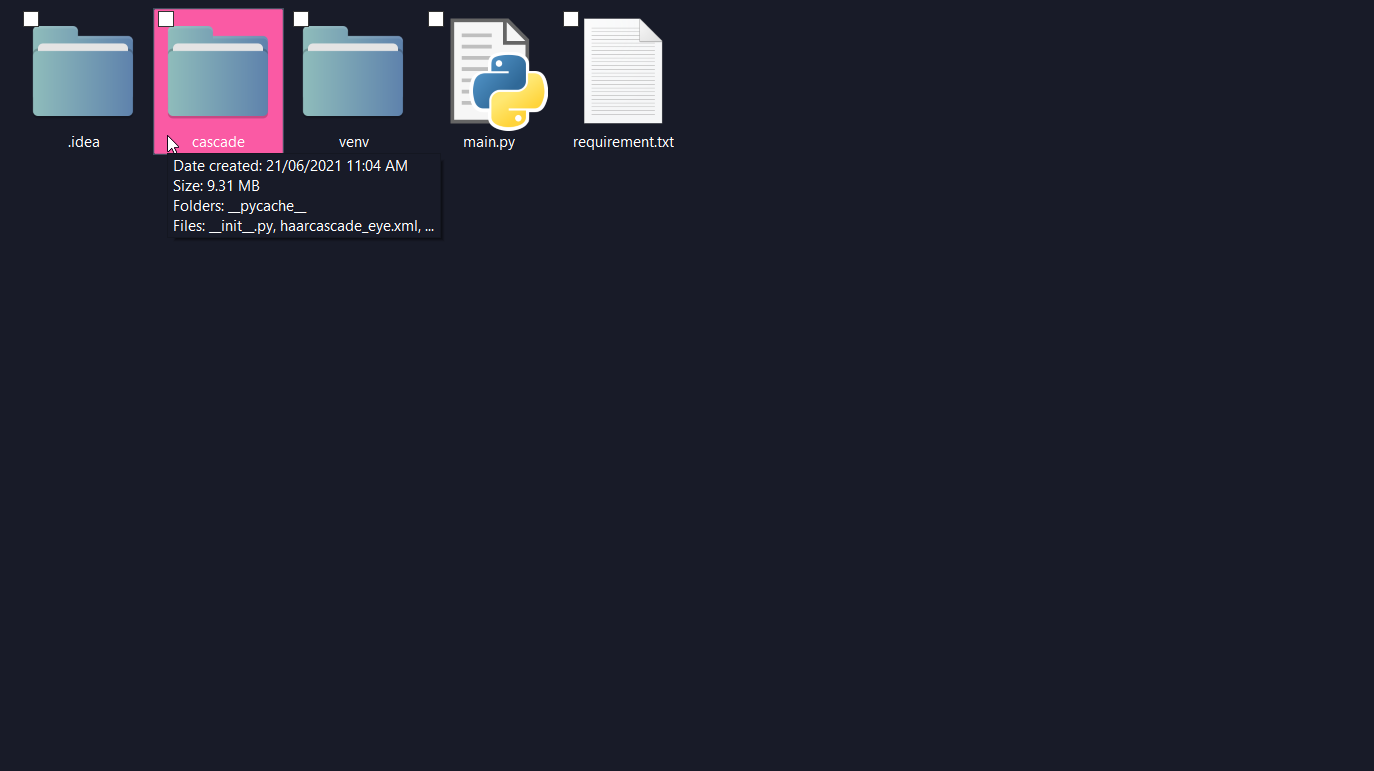
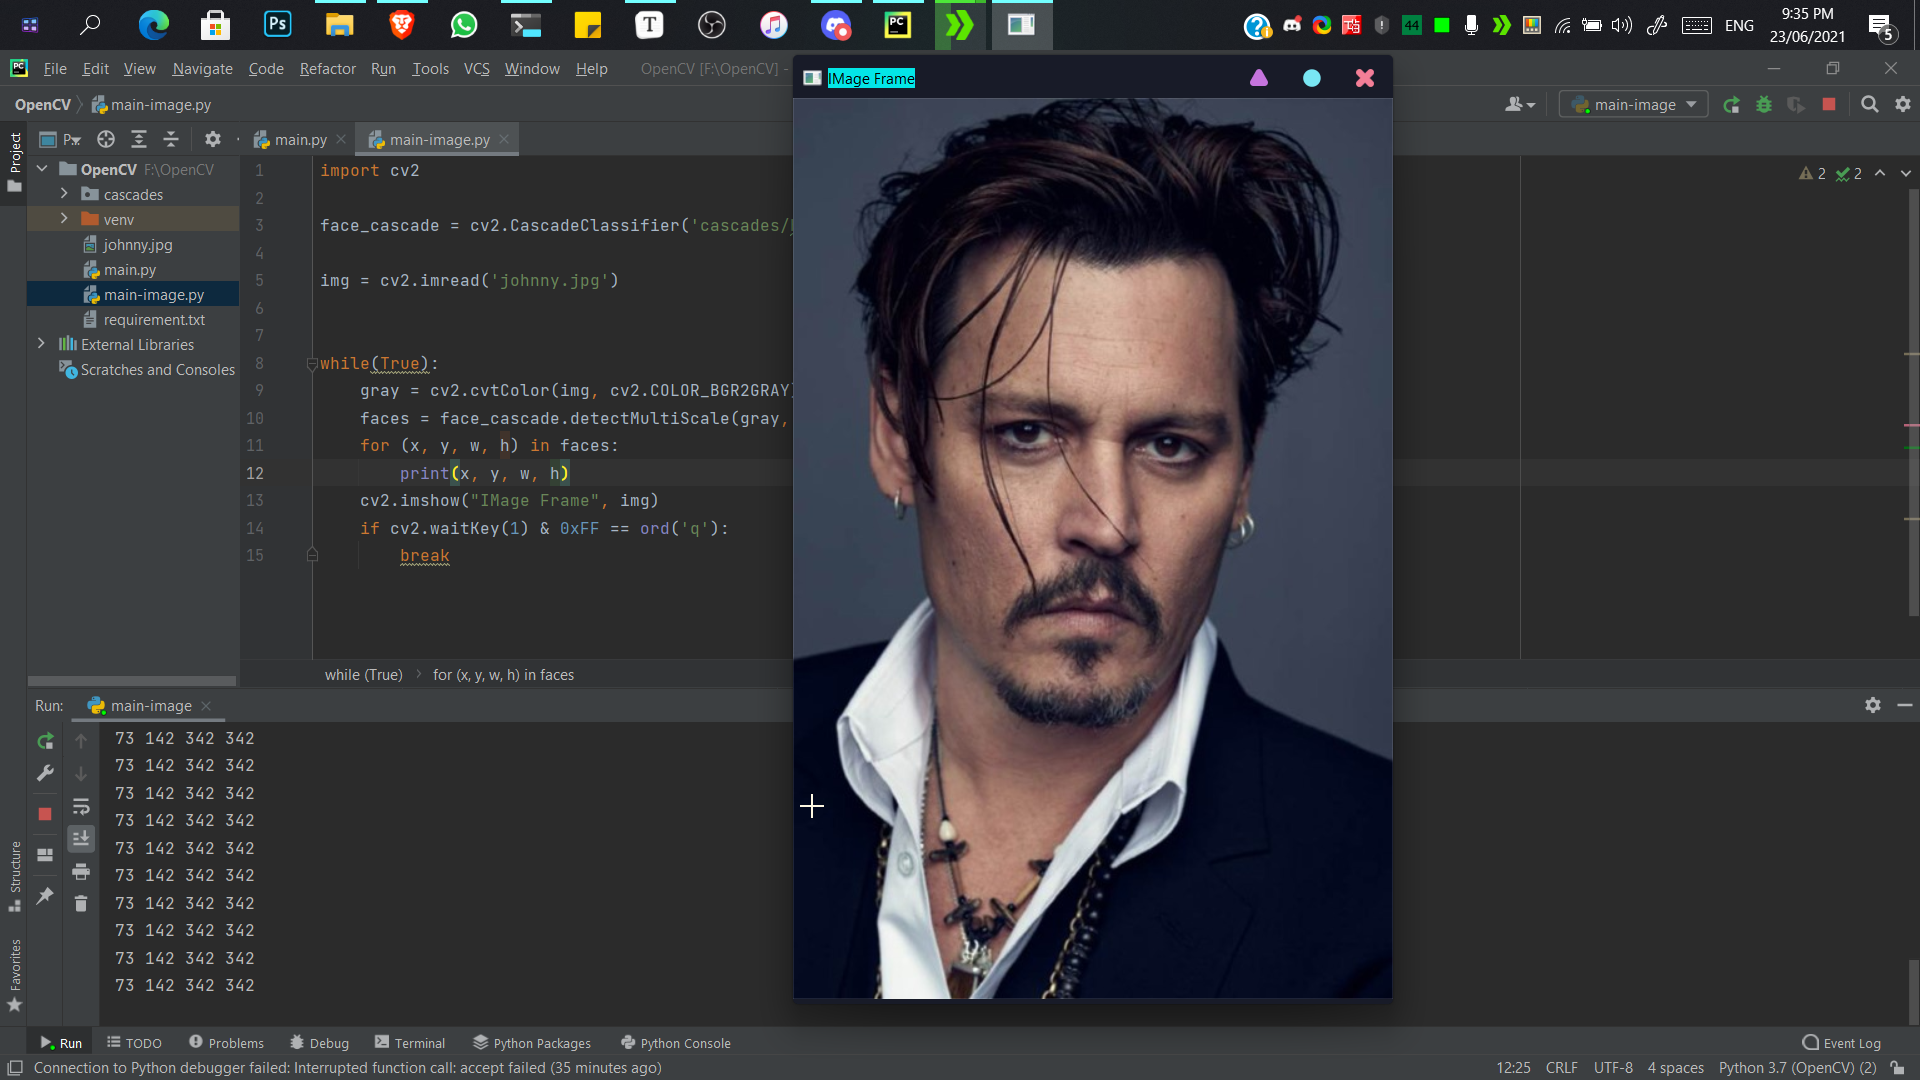
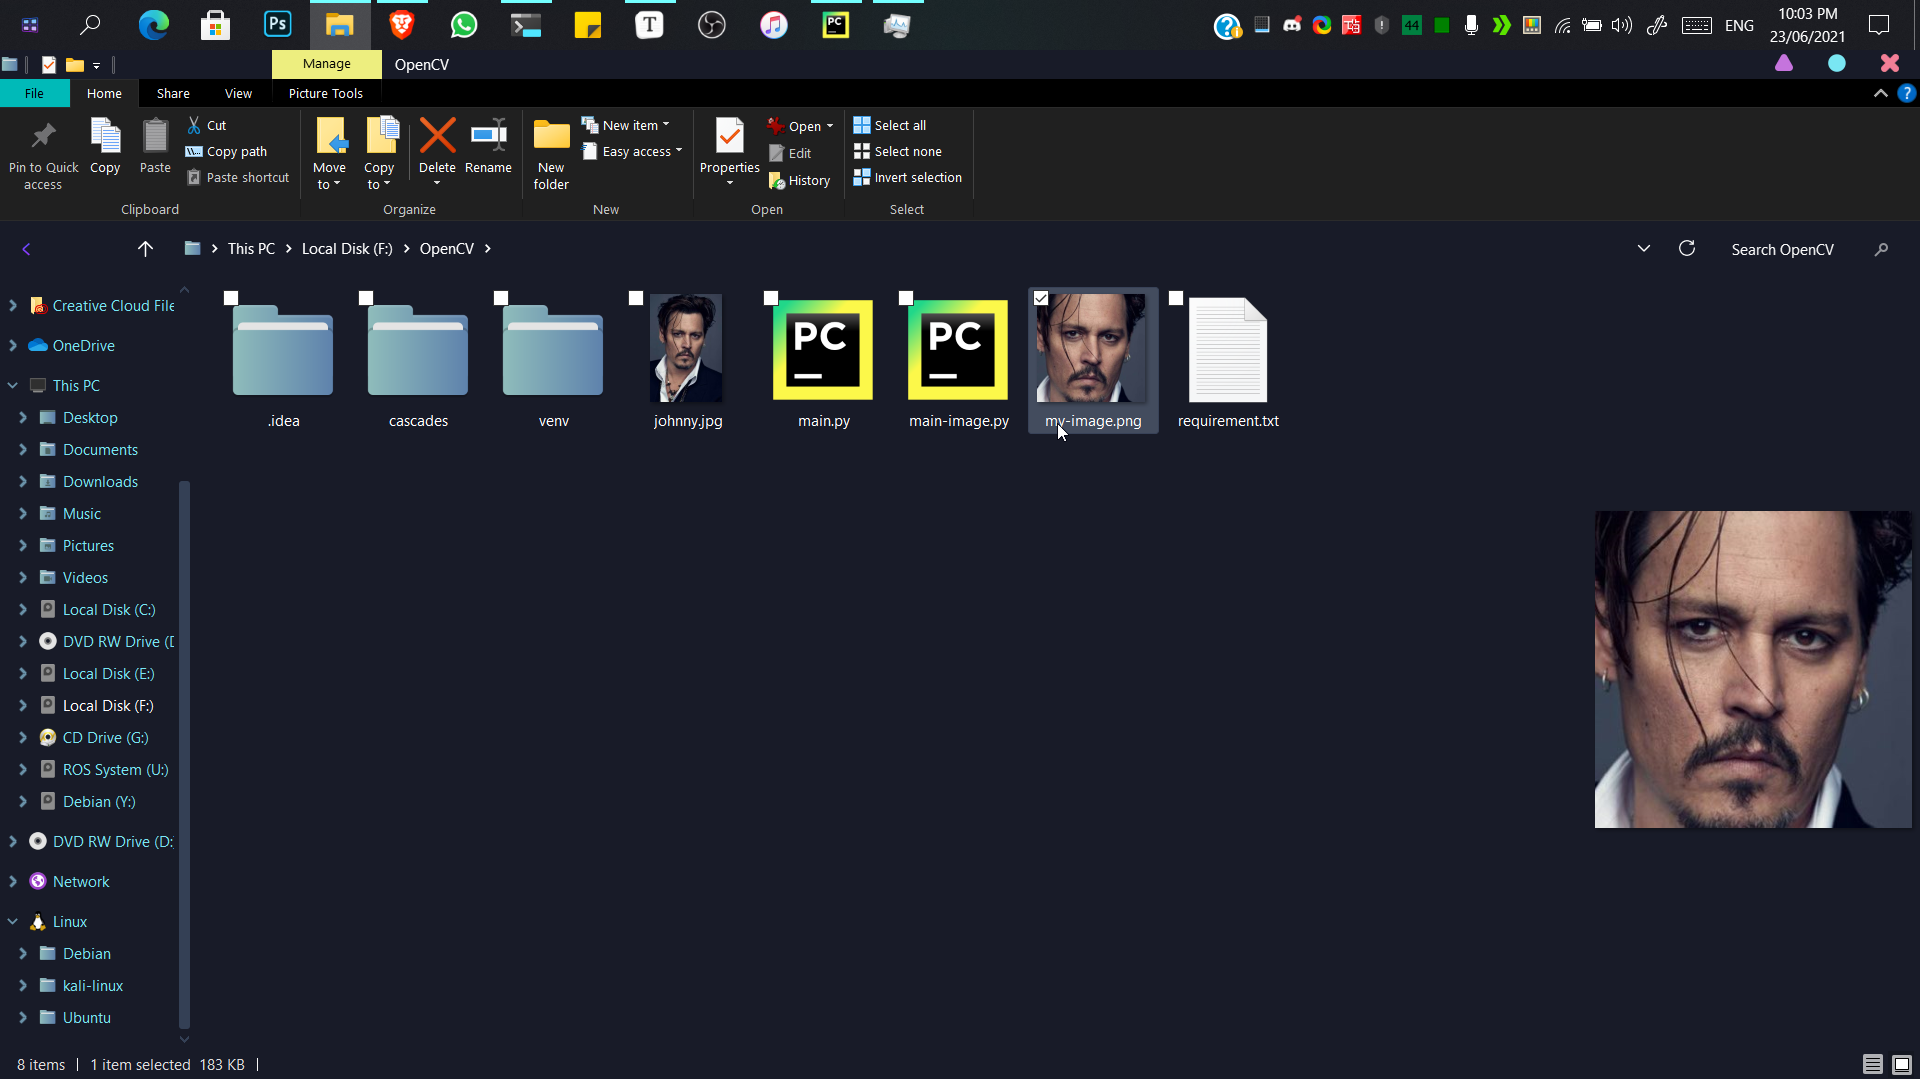
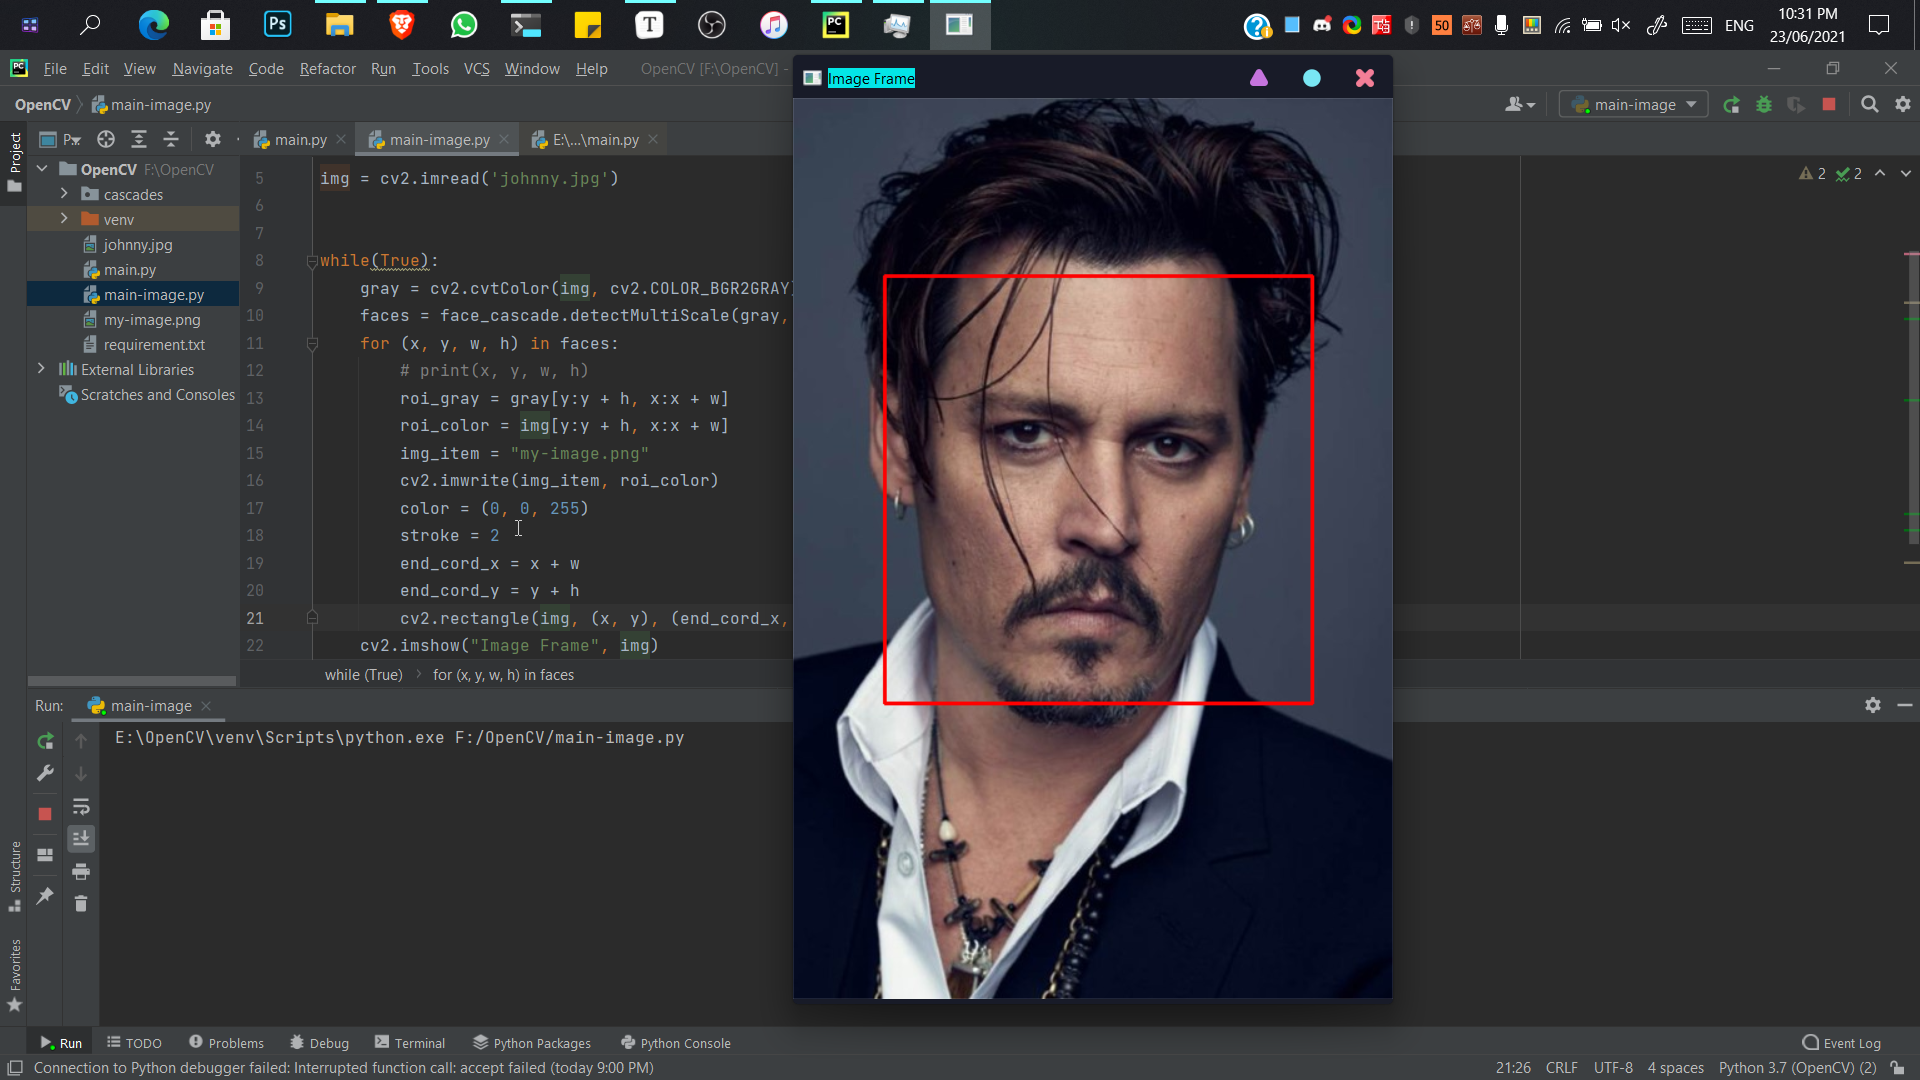
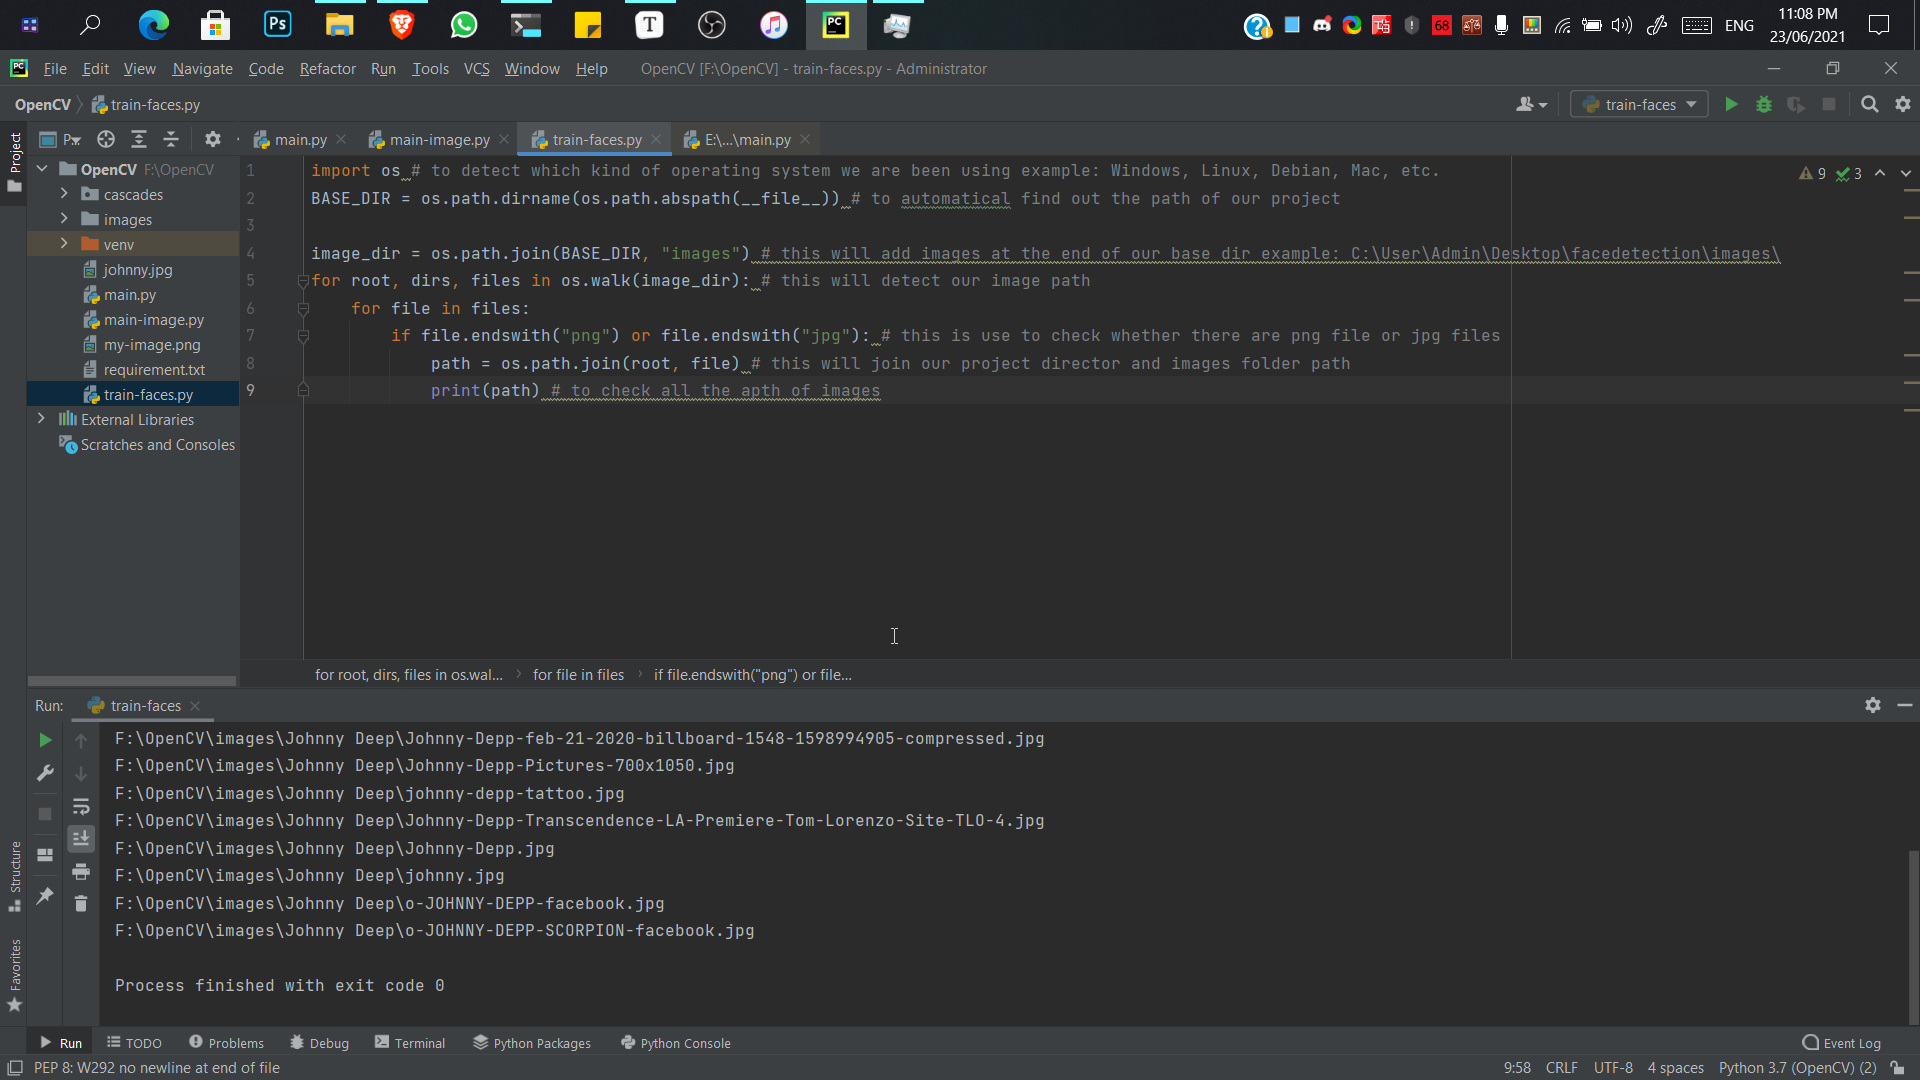
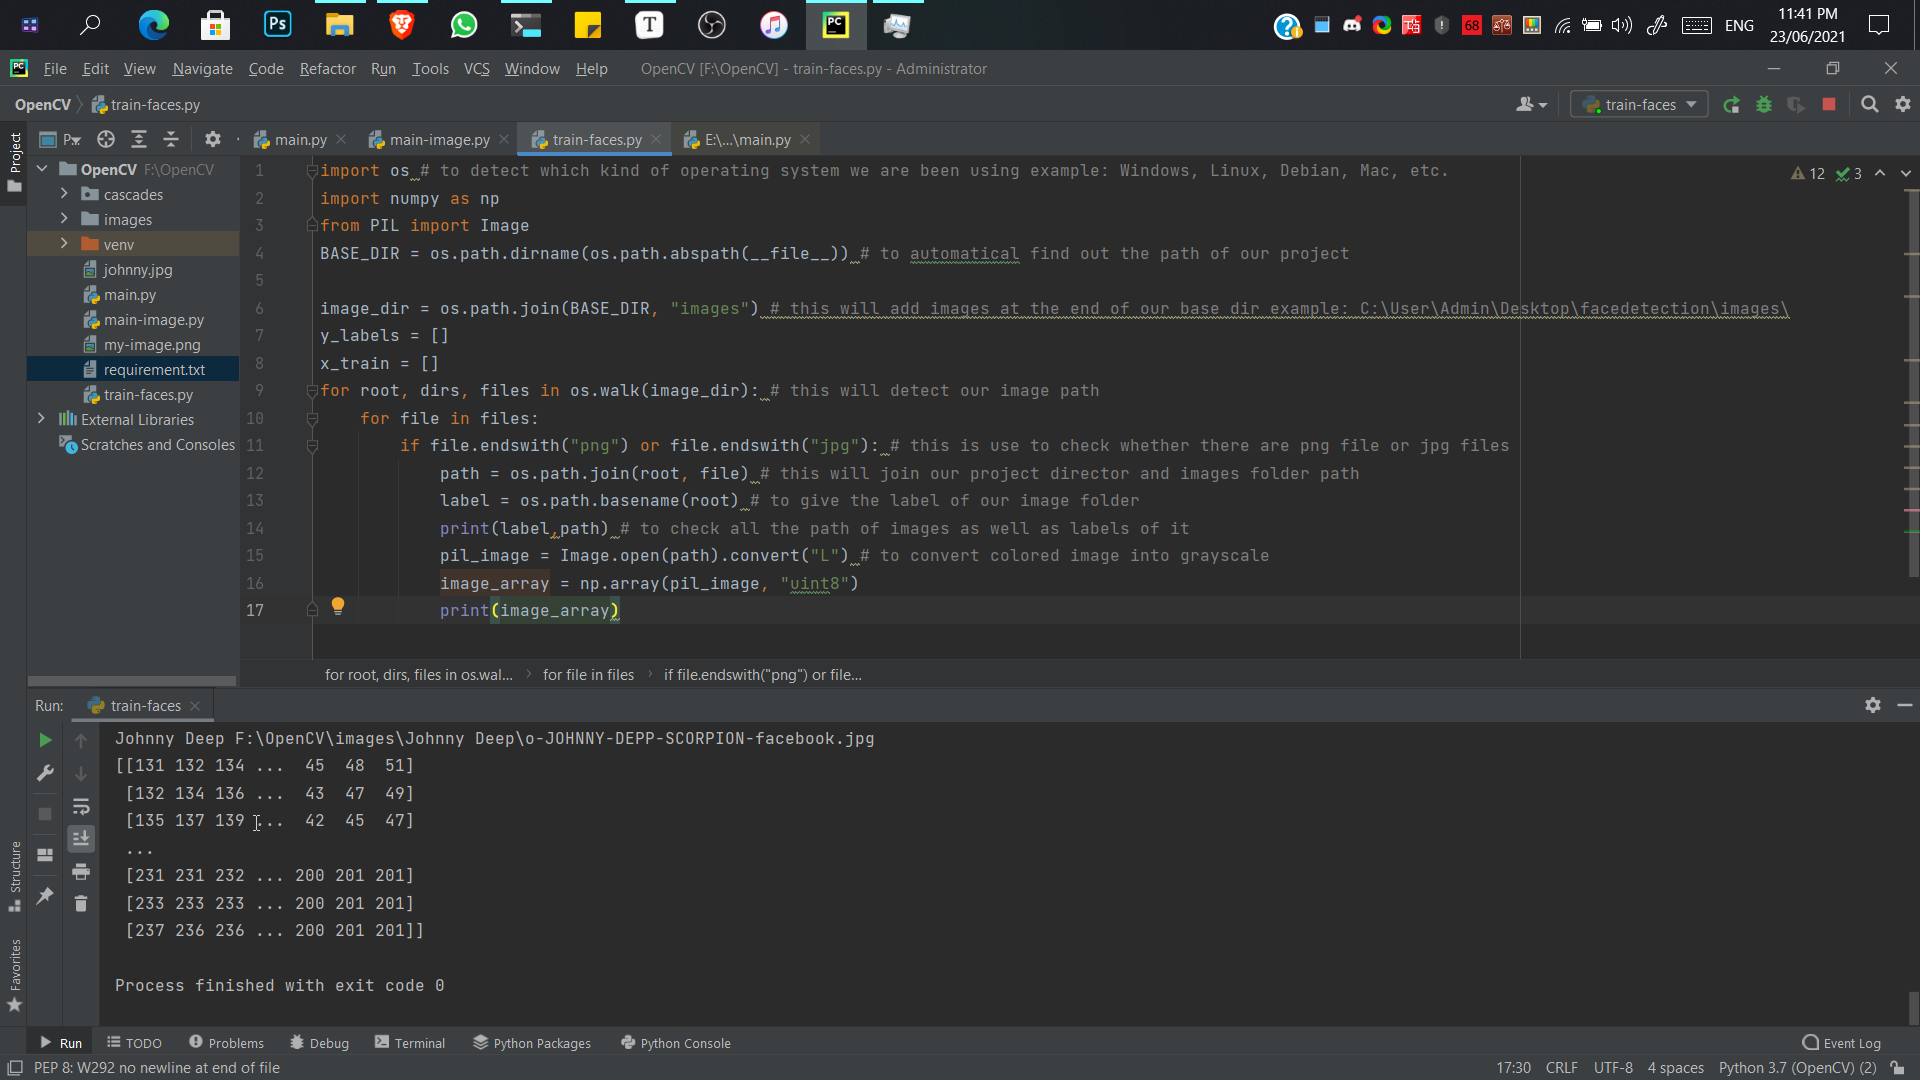
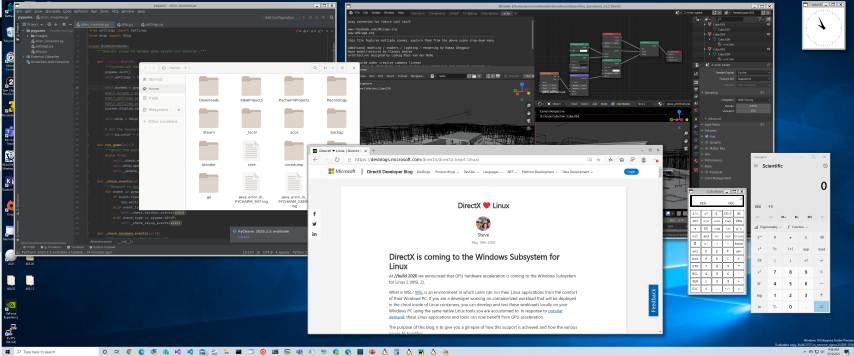
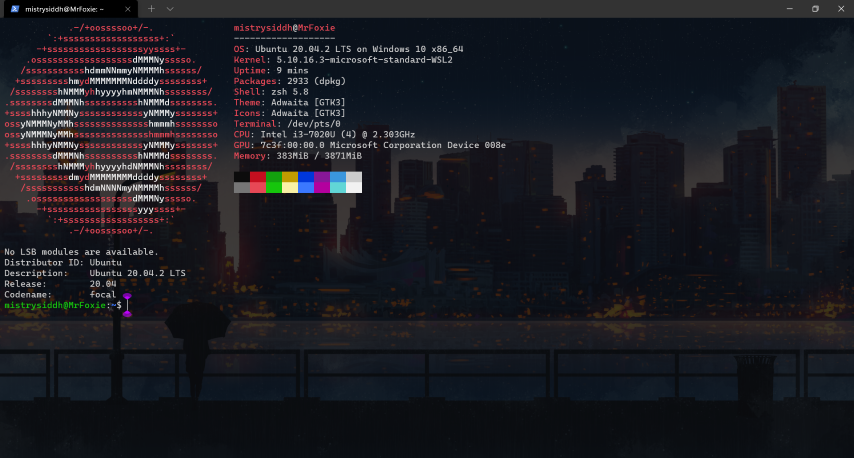


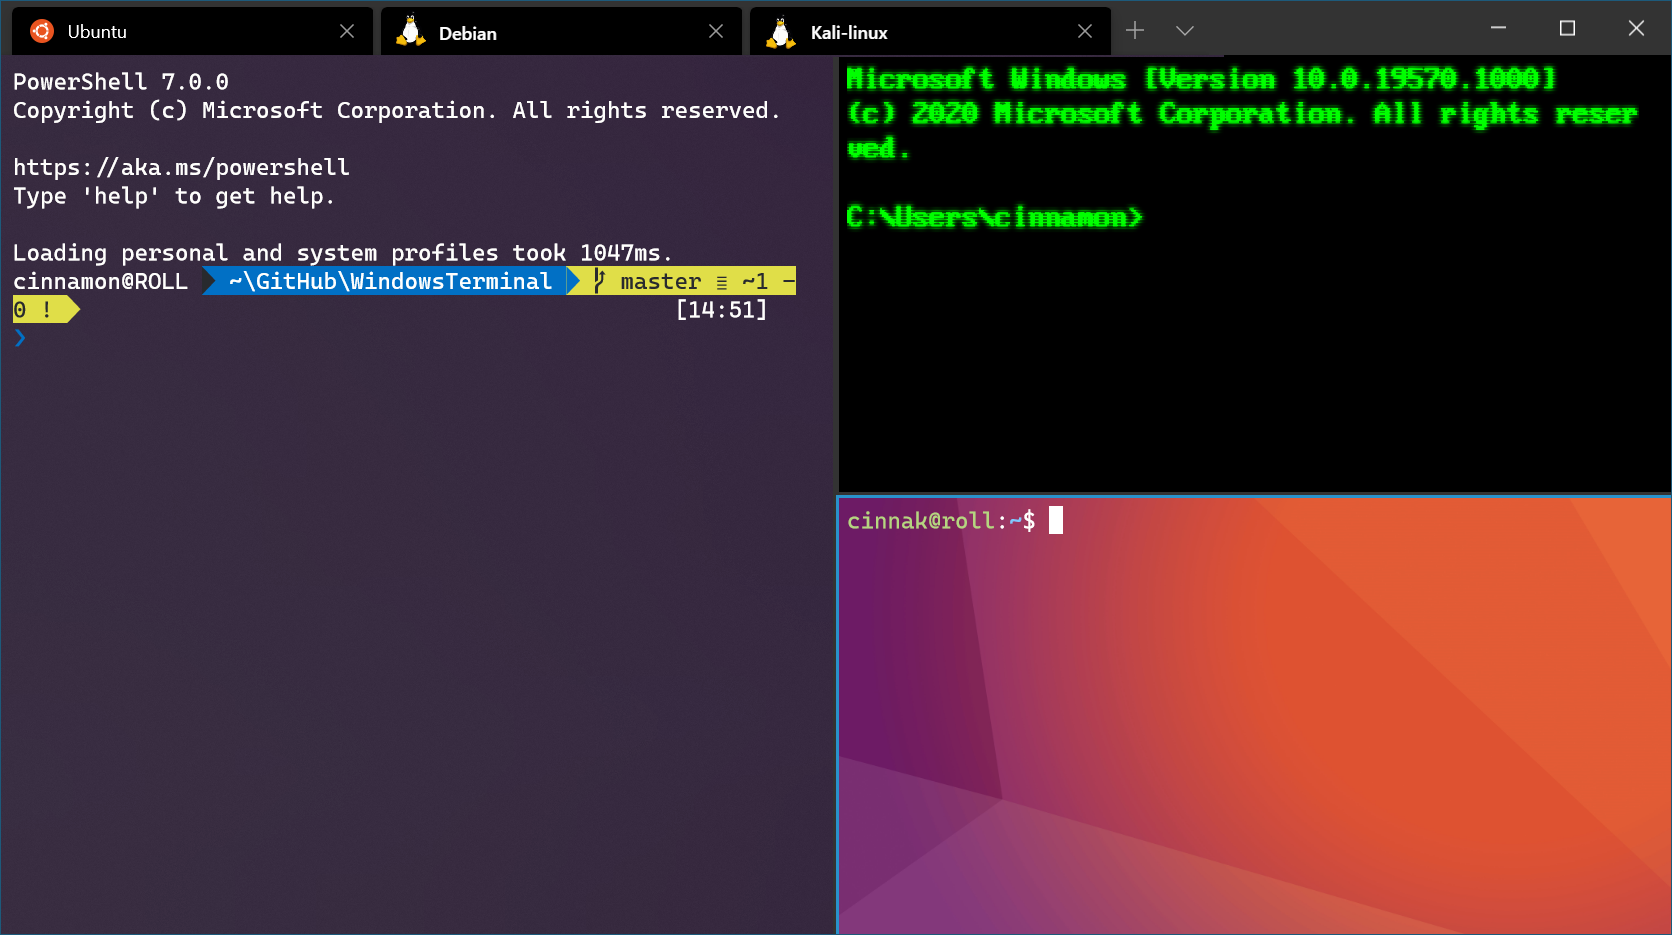








 Is this true that this person who was seen on